Loading ...
Loading ...
Loading ...
10
10
PRACTICAL INFORMATION
116
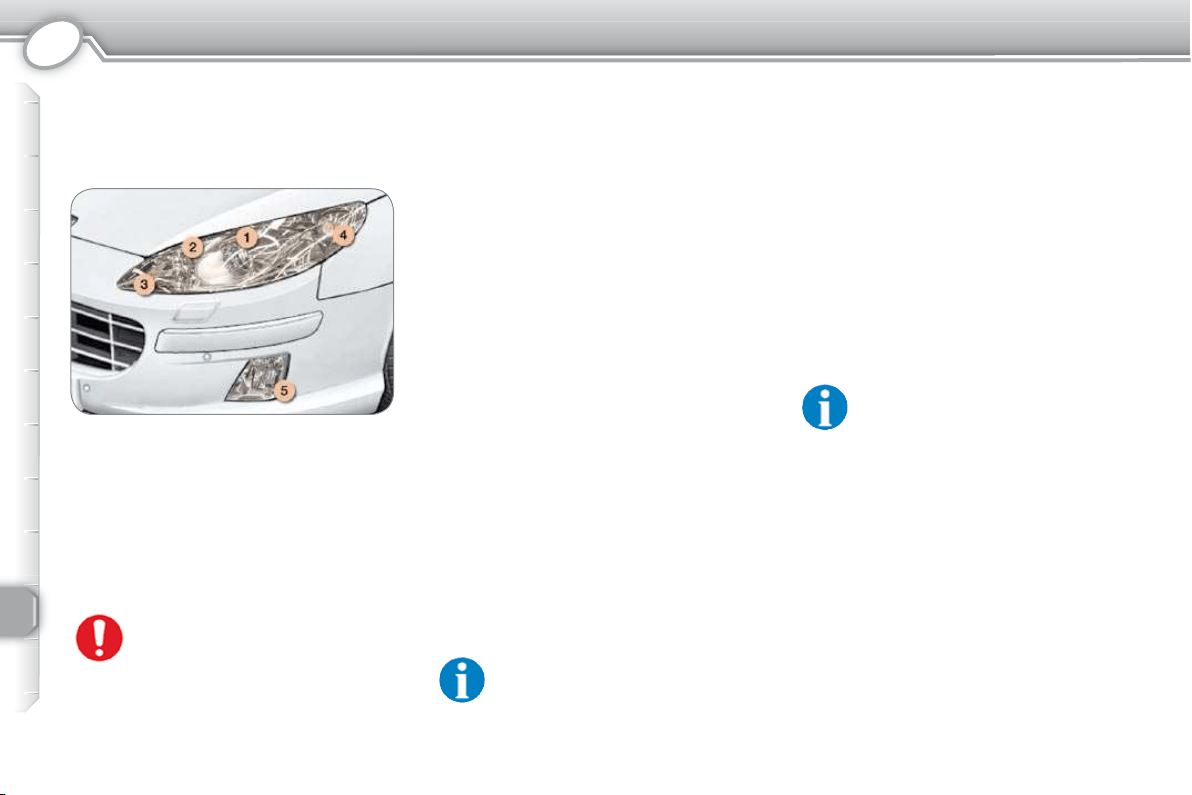
CHANGING A FRONT BULB
Handle the bulbs with a dry cloth.
2 - Main beam headlamps: H7-55W.
Remove the protective cover cor-
responding to the faulty bulb.
Disconnect the connector.
Press the end of the securing clips
to free the bulb. Change the bulb.
When fi tting the new bulb, ensure
that the direction notches are po-
sitioned correctly and the securing
clips are fi xed properly.
Reconnect the connector.
Refi t the protective cover.
4 - Direction indicators:
PY21W (amber).
Turn the bulb holder a quarter turn
and remove it.
Change the bulb.
WARNING: RISK OF ELEC-
TROCUTION
Front lamps
In the engine compartment, remove
the cover secured by one or two but-
terfl y screws, a plastic retainer clip and
two quarter turn screws.
1 - Dipped beam headlamps: H1-55W
or D2S-35W xenon bulb.
Xenon bulbs must be replaced by a
PEUGEOT dealer.
Amber coloured bulbs (direc-
tion indicators and side re-
peaters) must be replaced
with bulbs of identical specifi -
cation and colour.
5 - Front foglamps: H11 - 55W.
Turn the wheels to full lock.
Access to the bulb is via the fl ap in the
front mud fl ap.
Consult a PEUGEOT dealer.
The headlamps are fi tted with polycar-
bonate glass with a protective coating.
Do not clean them with a dry or abra-
sive cloth, nor with a detergent or sol-
vent product.
Ensure that the liquid used to fi ll the
wash-wipe and headlamp wash reser-
voir is of good quality.
High pressure washing :
when using a high pressure
washer on stubborn dirt, do
not persist on the headlamps,
the other lamps and their surrounds
to avoid damaging their coating and
seals.
In certain climatic conditions (low tem-
perature, humidity), condensation on
the inside surface of the headlamp
glass and rear lights glass is normal;
it disappears a few minutes after the
lighting is switched on.
3 - Sidelamps: W5W.
Remove the protective cover, dis-
connect the connector and then
remove the bulb and change it.
Put the connector back in place.
Reconnect the connector.
Refi t the protective cover.
Loading ...
Loading ...
Loading ...