Loading ...
Loading ...
Loading ...
Australia
INSTALLATION
Check the appliance is electrically safe and gas sound when you have finished.
Fit the plastic blanking plugs to the fixing holes.
Remove the 4mm Allen screws from the top corners of
the fascia and fix the front handrail in position.
The cooker can be installed with or without the
supplied splashback. To fit the splashback, remove the
two fixing screws (3mm hexagonal socket head) and
nuts that pass through the top of the rear flue grille.
Hold the splashback in position. From the rear, refit the
two fixing screws and nuts.
The stability bracket supplied with the cooker must be
fitted. Read the leaflet supplied with the bracket, and fit
it as follows:
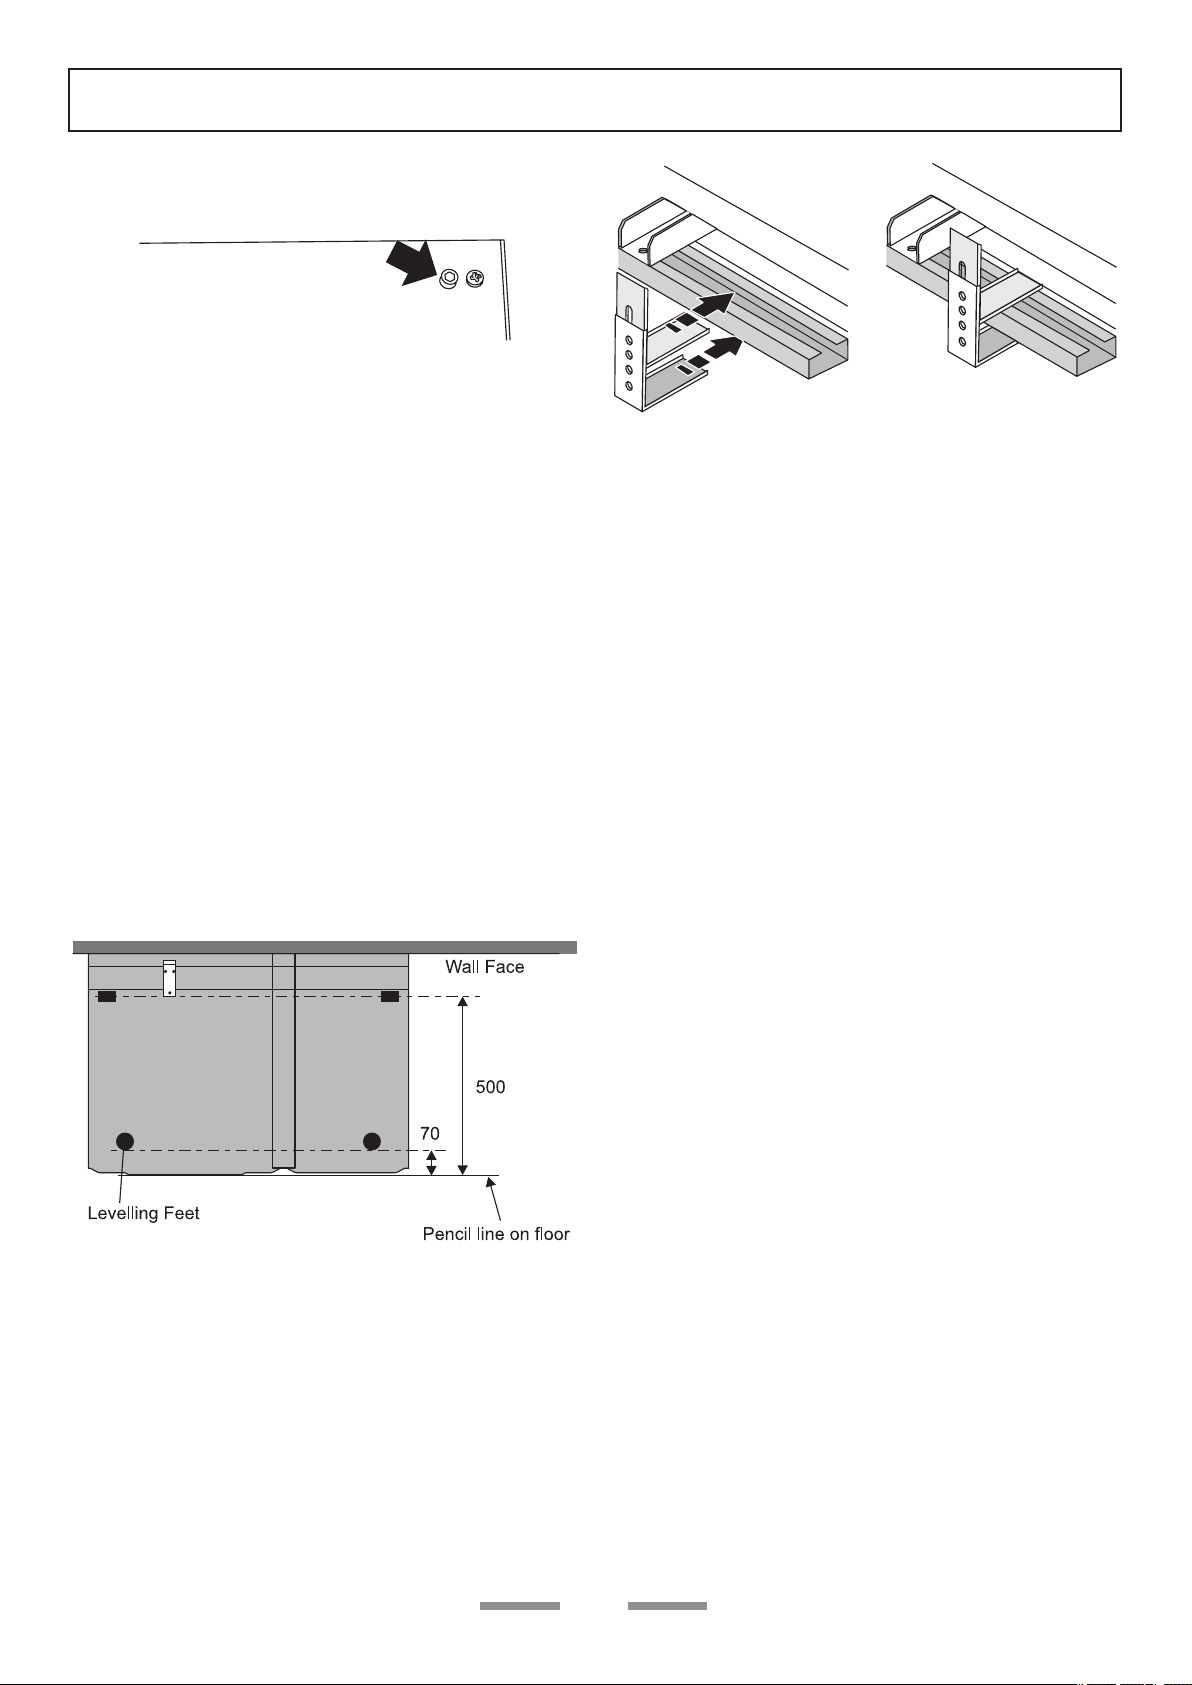
1. Place the cooker in its intended position and level the
cooker.
2. Draw a pencil line 70mm from the front edge of the
levelling feet.
3. Mark the centre line for the bracket by measuring
550mm from the left hand side of the cooker.
4. Move the cooker forward.
5. Measure back from the pencil line 500mm to locate
the front edge of the bracket. Position the bracket so
that it is away from centreline of the cooker to reduce
the possibility that it will trap the electrical connection
cable or gas hose. Fix the bracket to the floor.
6. Measure the height from floor level to the engagement
edge at the rear of the cooker. Add 3mm to this
dimension and assemble the stability bracket to this
height (i.e. from floor level to the underside of the top
member), and ensure the bracket does not foul the
oven burner assembly:
Loading ...
Loading ...
Loading ...