Loading ...
Loading ...
EN
3
THANK YOU FOR PURCHASING A WHIRLPOOL PRODUCT.
To receive more comprehensive help and support, please register your product at:
www.whirlpool.eu/register
1 2 3 4 5 6 7 8 9 10
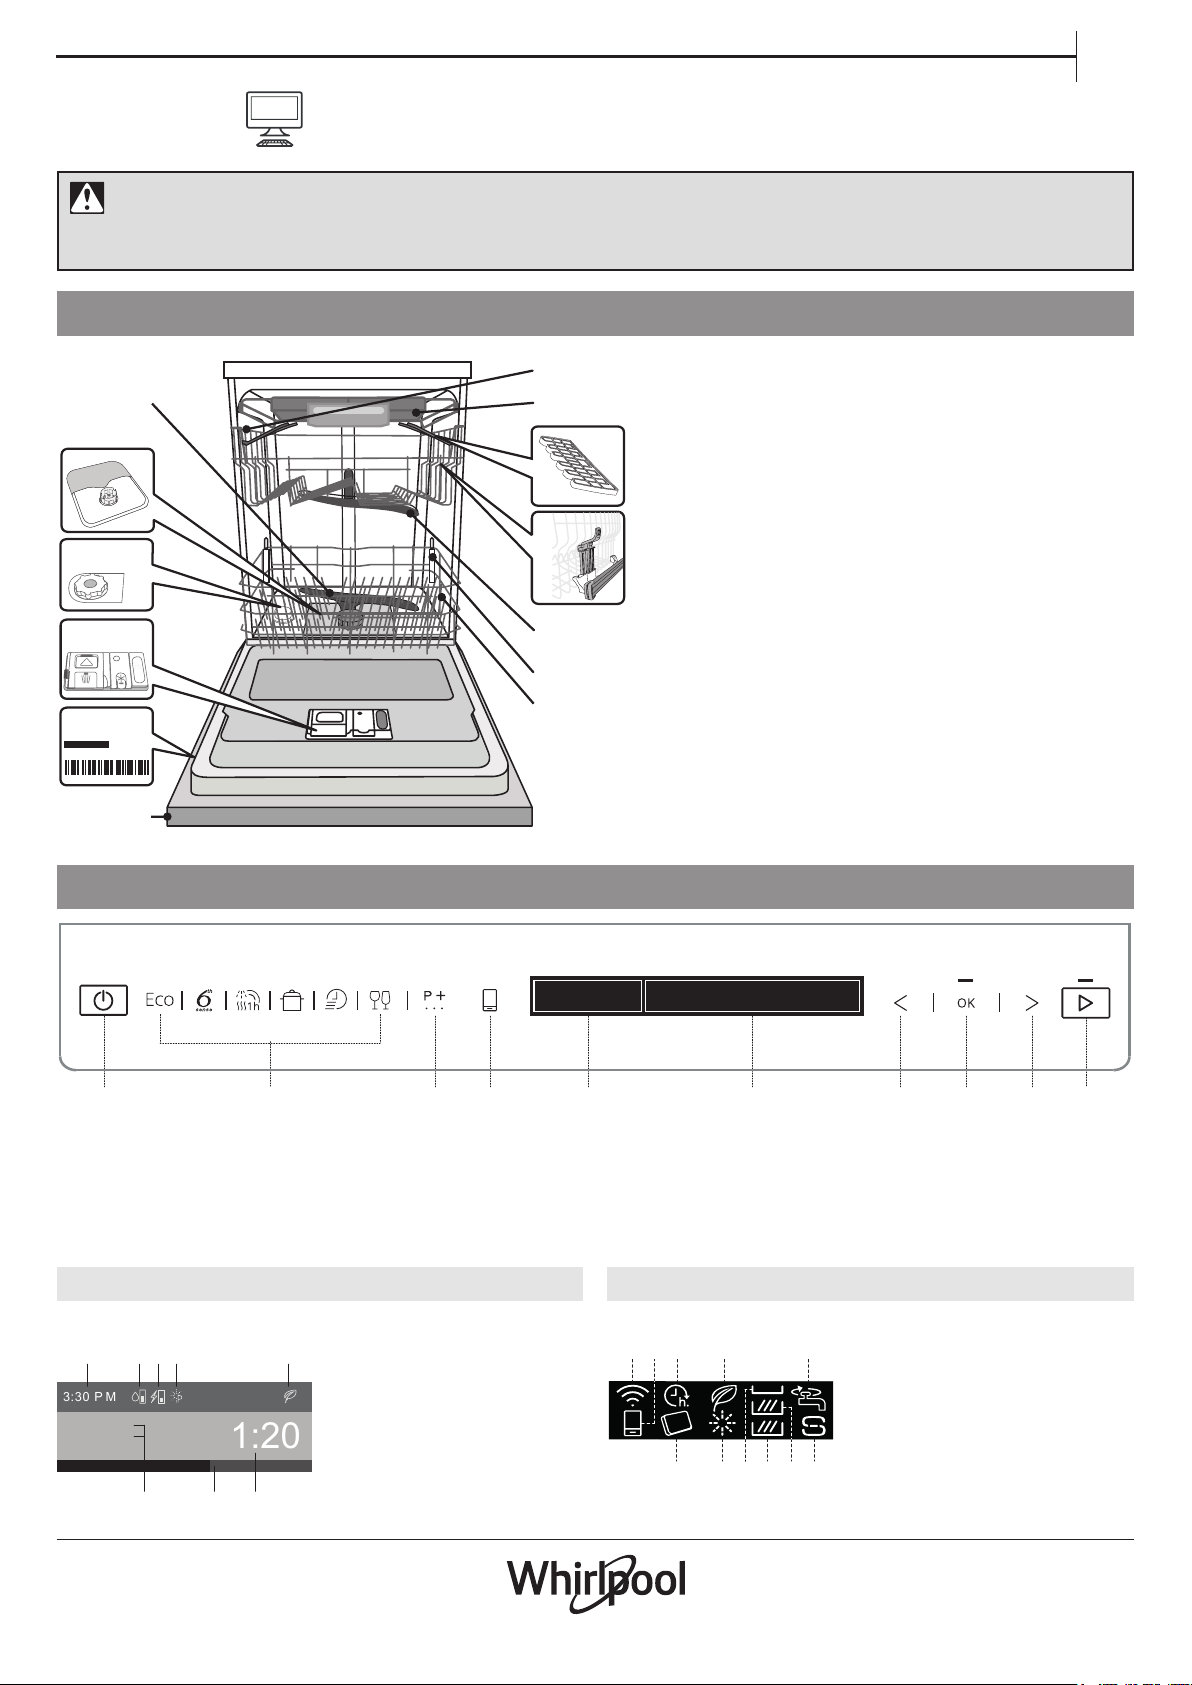
1. Upper rack
2. Cutlery rack
3. Foldable aps
4. Upper rack height adjuster
5. Upper sprayer arm
6. Power Clean support
7. Lower rack
8. Lower sprayer arm
9. Filter Assembly
10. Salt reservoir
11. Detergent and Rinse Aid dispensers
12. Rating plate
13. Control panel
1. ON-OFF button
2. CYCLES 6 buttons for direct acces popular cycles
3. EXTRA CYCLES button. Access to other cycles
4. CONNECTIVITY (Remote Control) button.
5. DISPLAY - Indicators area
6. DISPLAY - Information area
7. PREVIOUS button for options/settings
8. OK button. Select/change options and settings
9. NEXT button for options/settings
10. START button
PRODUCT DESCRIPTION
Before using the appliance carefully read Health and Safety guide.
The control panel of this dishwasher activates pushing by ON/OFF button.
For energy saving the control panel deactivates automatically after 10 minutes if no cycle has started.
CONTROL PANEL
DISPLAY - Indicators
0000 000 00000
Service:
5
6
11
13
12
8
2
10
9
1
3
4
7
A. WiFi - connection status
B. CONNECTIVITY
C. START DELAY
D. ECO CYCLE / STANDBY
E. CLOSED WATER TAP
F. ADD SALT
G. MULTIZONE - Upper Rack
H. MULTIZONE - Lower Rack
I. MULTIZONE - Cutlery rack
J. ADD RINSE AID
K. TABLET
A B C
I H G F
D ED
JK
DISPLAY (on the front of the control panel)
3:30 P
M
1:20
A B C D E
H G F
A. Current Time
B. Energy consumption
C. Water consumption
D. Available option
E. Cycle
F. Time to end of the cycle
G. Phase of the cycle as bar
H. Cycle name
Phase of the cycle
Eco Cycle
WASHING
Cykle ends in:
Loading ...
Loading ...
Loading ...