Loading ...
Loading ...
Loading ...
7
ENG
English
ASSEMBLING AND PREPARING
Oncethepinisremoved,itisnotnecessary
tore-insertittoadjusttheheight.
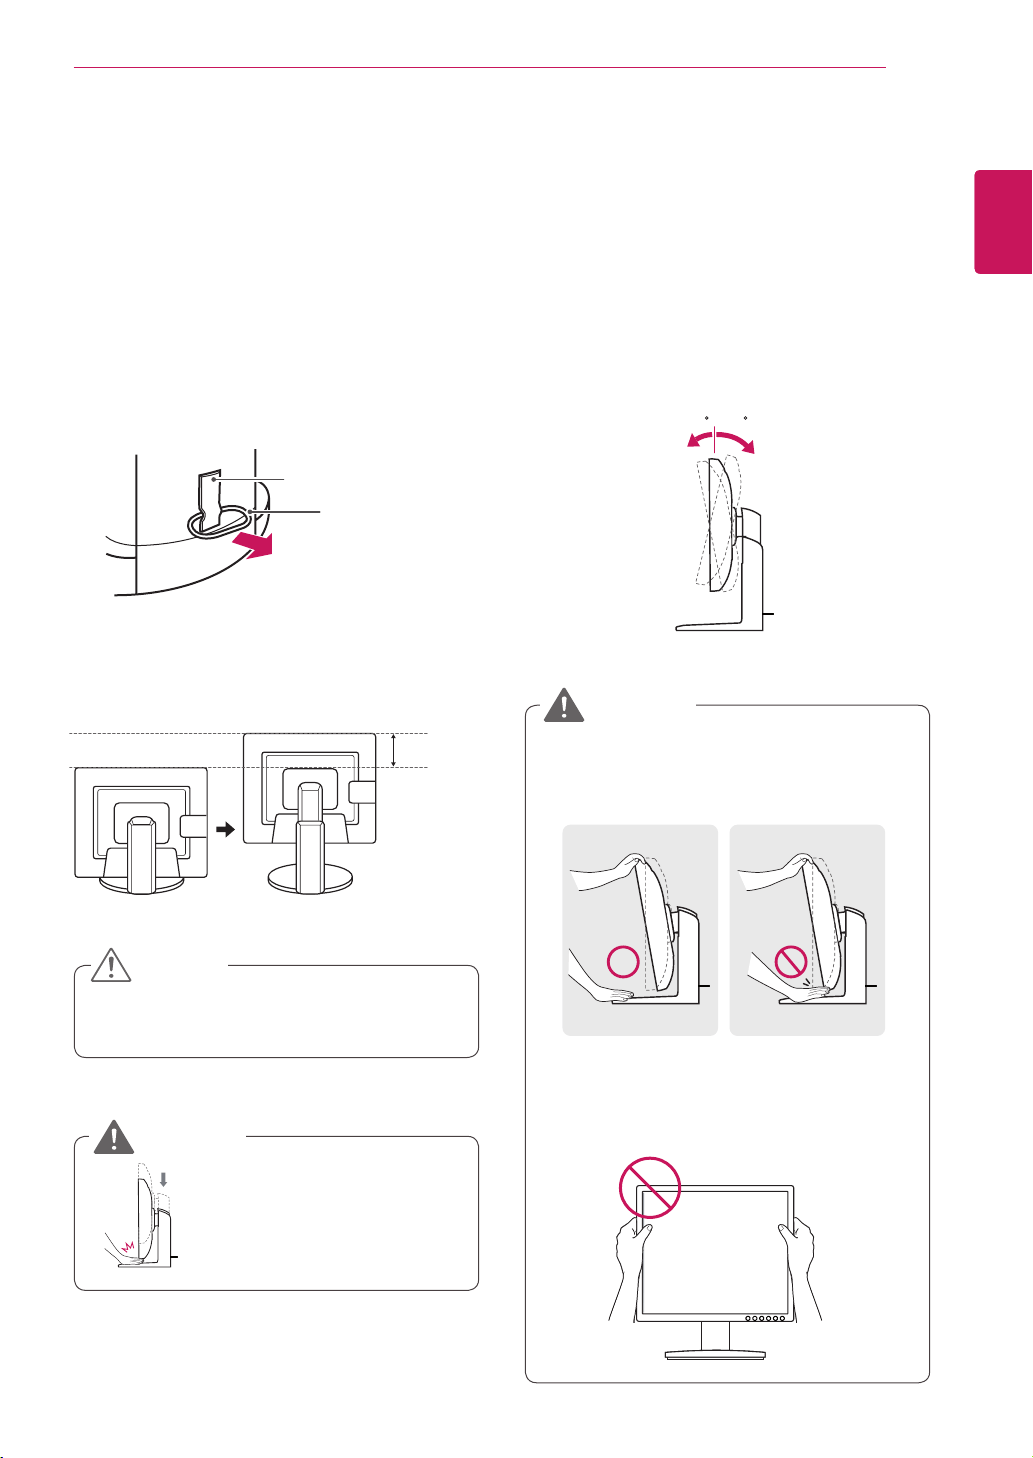
Adjusting the stand height
1
Placethemonitormountedonthestandbase
inanuprightposition.
Adjusting the angle
1
Placethemonitormountedonthestandbase
inanuprightposition.
2
Removethetapeattachedatthebottomrear
ofthe stand body, thenpulloutthelocking
pin.
3
Theheightcanbeadjustedupto110 mm.
2
Adjusttheangleofthescreen.Theangleofthe
screencanbeadjustedupto15°forwardsand
5°backwardsforacomfortableviewingexperi-
ence.
Toavoidinjurytothefingerswhenadjusting
thescreen,donotholdthelowerpartofthe
monitor'sframeasillustratedbelow.
Donotputyourfingerbe-
tweenthescreenandthe
base(chassis)whenadjust-
ingthescreen'sheight.
Becarefulnottotouchorpressthescreen
areawhenadjustingtheangleofthemonitor.
15- 5
Front Side Rear Side
15- 5
Tape
Locking Pin
Stand Body
110.0 mm
CAUTION
WARNING
WARNING
Loading ...
Loading ...
Loading ...