Loading ...
Loading ...
Loading ...

28 WMS420
Setting up
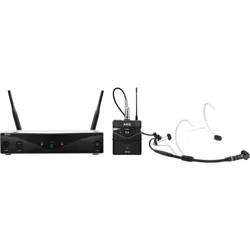
Connecting the microphone
1) Remove the battery compartment cover.
2) Connect the mini XLR plug on the cable of
your microphone to the audio input jack of the
pocket transmitter.
3) Turn the pocket transmitter on by setting the
ON/OFF switch to ”ON”.
4) Set the SQUELCH control on the receiver to
minimum and switch on the receiver.
5) Set the frequency on the transmitter and on the receiver to the same frequency.
6) Speak or sing into the microphone.
7) Adjust the GAIN control with the screwdriver integrated in the battery compartment cover
so that the CLIP-LED on the receiver lights up briefly at intervals.
8) Replace the battery compartment cover on the transmitter.
Connecting an instrument
1) Remove the battery compartment cover.
2) Plug the jack plug on the MKG L guitar cable into the output jack of your instrument and
the mini XLR connector on the guitar cable into the audio input socket of the pocket
transmitter.
3) Turn the pocket transmitter on by setting the on/off switch to "ON".
4) Set the SQUELCH control on the receiver to minimum and switch the receiver on.
5) Play your instrument.
6) Use the screwdriver integrated in the battery compartment cover to set the GAIN control
to a position where the CLIP LED on the receiver will flash occasionally.
7) Replace the battery compartment cover on the transmitter.
1) Move the transmitter around the area where you will use the system to check the area for
"dead spots", i.e. places where the field strength seems to drop and reception
deteriorates.
If you find any dead spots, try to eliminate them by repositioning the receiver. If this does
not help, avoid the dead spots.
2) If the RF OK LED on the receiver goes out, this means no signal is being received or the
squelch is active.
Switch the transmitter on, move closer to the receiver or adjust the squelch level to the
point where the green RF OK LED lights up.
3) If interference noise occurs, adjust the squelch level until the interference noise goes
away.
NOTE
Do not set the squelch level higher than necessary. The higher the squelch level, the lower the
sensitivity of the receiver and hence the smaller the range between transmitter and receiver.
Figure 5: Adjusting the GAIN control
Before the soundcheck
+
-
Loading ...
Loading ...
Loading ...