
Loading ...
Loading ...
Loading ...
27
1
2
OPERATION
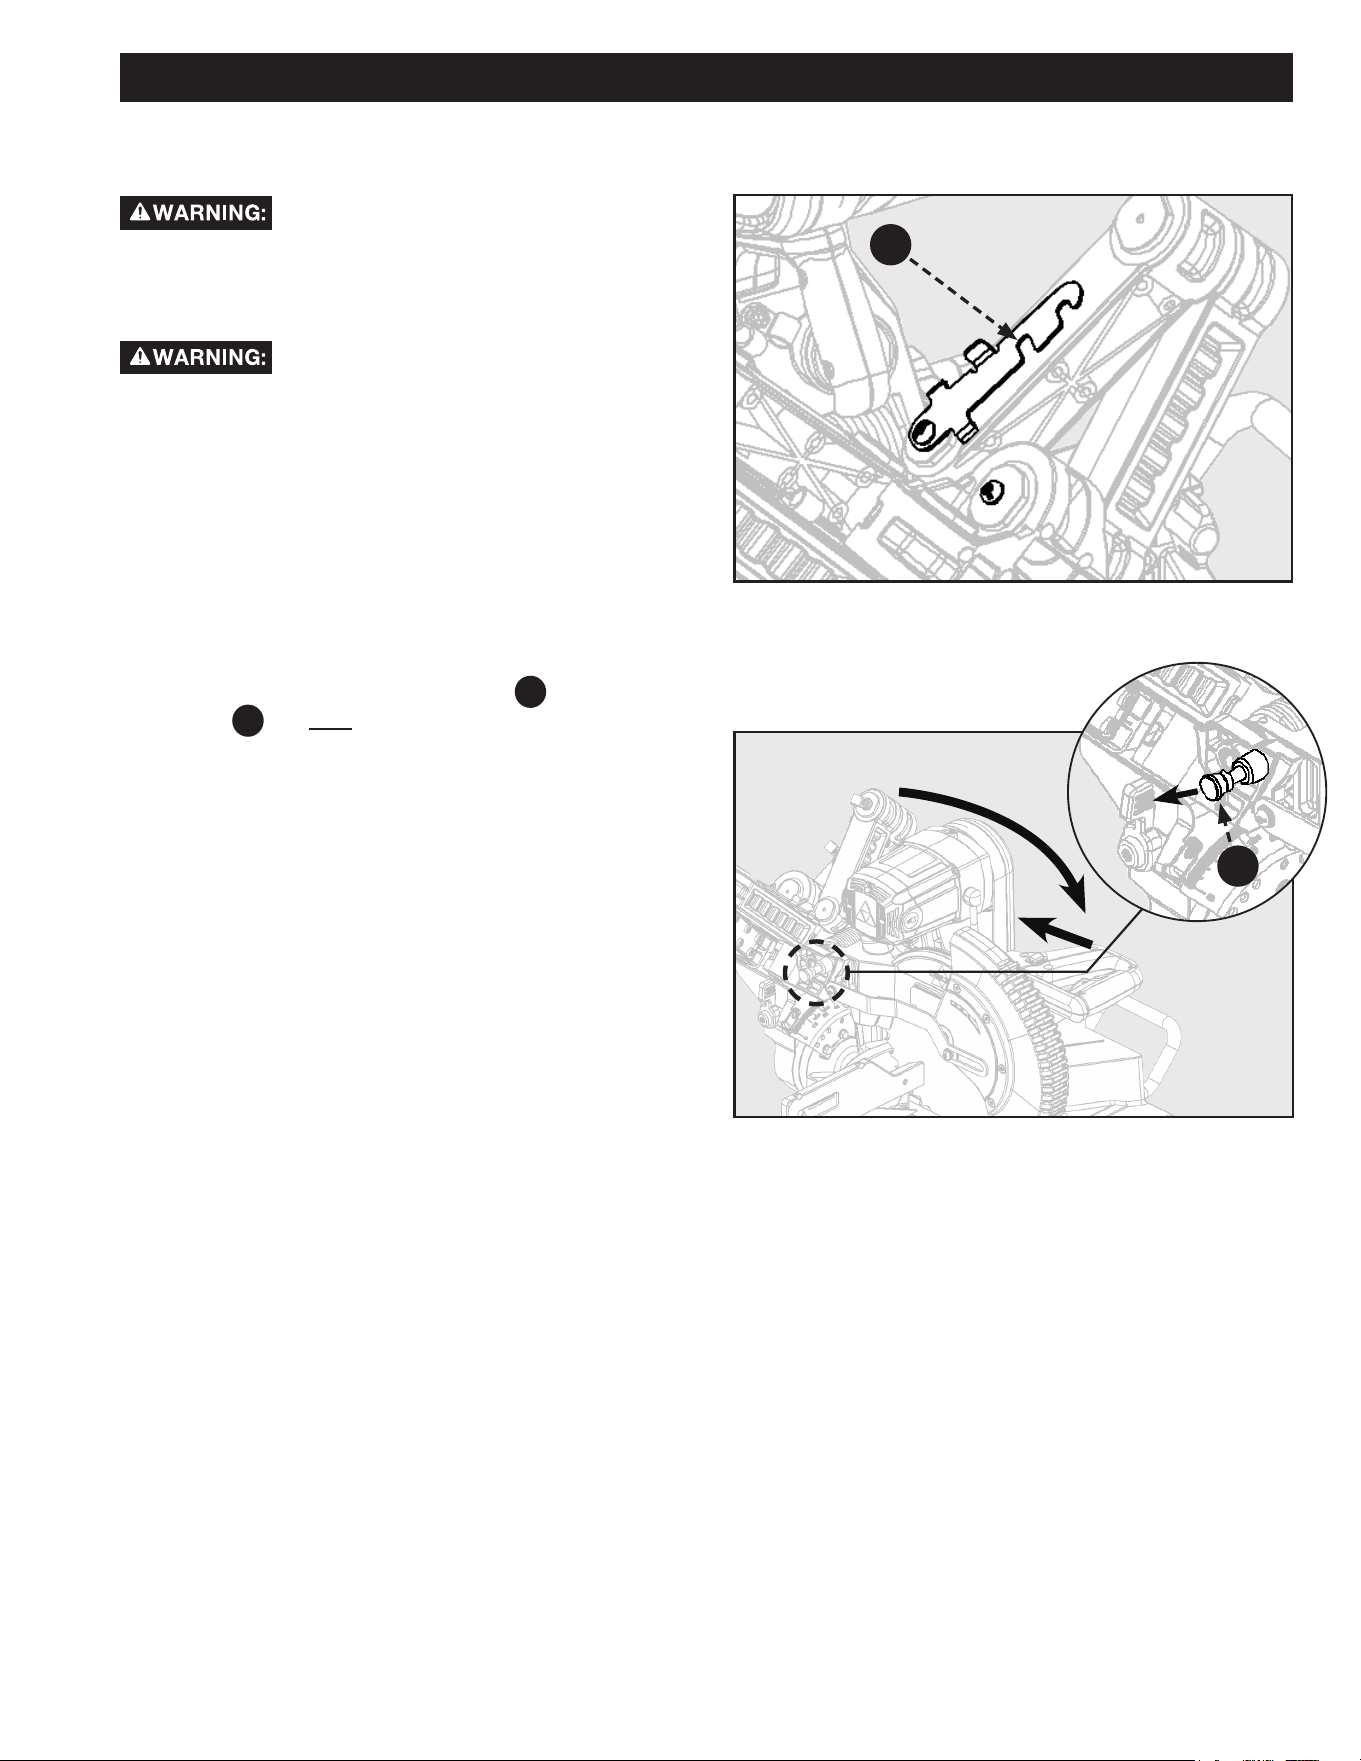
Figure 34
SLIDE CUTS
See Figures 34 and 35.
A slide cut should NEVER be performed by
pulling the saw toward you. Due to the blade rotation
direction, this can cause the saw blade to climb over the
workpiece and towards the operator. Failure to follow this
warning could result in serious personal injury.
Before turning the saw power ON, check to
make sure saw head and blade will not make contact with the
provided work clamp or fence during the cutting operation.
Position the work clamp and fence to avoid contact with the
miter saw head. Failure to follow this warning could result in
serious personal injury.
1. Check to make sure the slide lock lever
F31
and saw head
lock pin
F20
are NOT engaged. Raise the saw head to its
UP position.
2. Position the workpiece so that it is securely supported by
the saw table and fence. If the board is warped, read and
follow the instructions under “Cutting Warped Material” in
the “Operation” section of this manual.
3. Secure the workpiece to the table and against the fence,
using the provided clamp.
4. Before turning the power switch ON, perform a simulated
cut to check your cut alignment. Also check to make sure
the blade will not come into contact with the provided work
clamp fence or anything other than the workpiece.
5. Before turning the power switch ON, pull the saw arm
towards you until the blade is beyond the front edge
of your workpiece or until the saw arm is in the fully
EXTENDED position. The saw head should be in the full UP
position.
6. Engage the power ON switch. Allow the blade to reach
maximum speed.
7. Lower the saw blade through the workpiece and push the
saw head towards the fully RETRACTED position.
8. Disengage the power switch and allow blade to come to a
complete stop before raising the saw head.
To use this saw to make slide cuts follow the instructions
below. Slide cuts must ONLY be performed by pushing the
saw blade away from you and toward the back of the saw,
stopping at the fully RETRACTED position after each cut. See
warning above.
Figure 35
F31
F20
Loading ...
Loading ...
Loading ...