Loading ...
Loading ...
Loading ...
16
ADJUSTMENTS
MITER ALIGNMENT
Your saw is calibrated at the factory to cut true. Over time the
saw’s calibration may drift and will need to be re-calibrated.
See Figure 13.
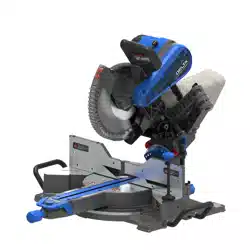
1. Unplug the Saw.
2. Lower the saw head all the way down to the transport
position and engage the saw head lock pin
F20
to hold
it in place. Push the saw head into the fully retracted
position and engage the slide lock lever F31 to hold it in
place.
3. Set the miter position to 0° and allow the miter detent
to lock
F28
into position.
4. Set the bevel position to 0°. Engage the bevel detent
latch
F21
to lock bevel angle.
5. Place a framing square
A
against the fence and the
face of the saw blade.
NOTE: Make sure the square contacts the flat part of the
blade and not the teeth.
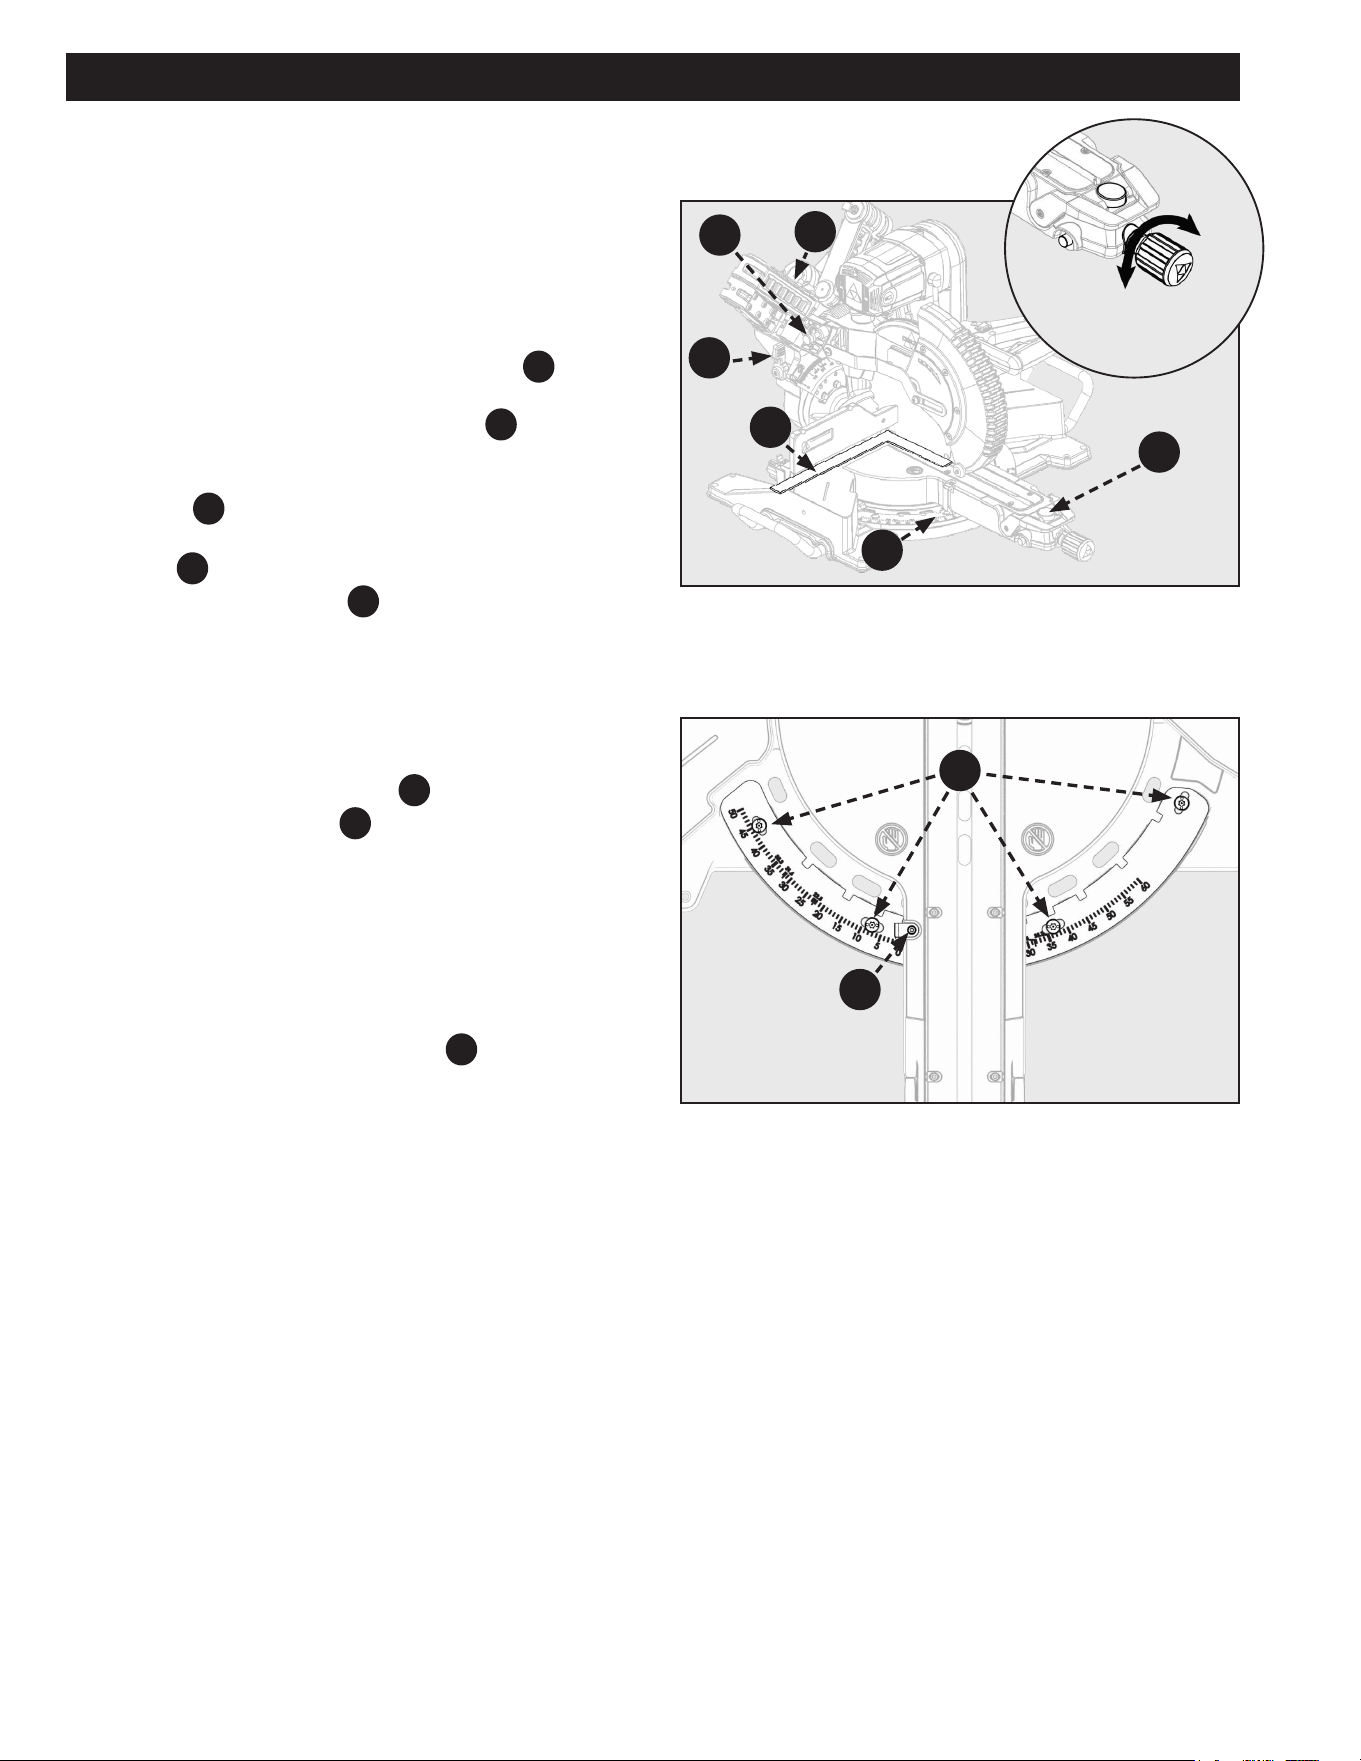
See Figure 14.
6. If the blade face is not ush with the square you will
need to adjust the miter scale
B
.
7. Loosen the four screws
C
and move the miter table to
adjust the miter scale position. Set so the fence and
blade are ush against the framing square. Make sure
the miter lock knob is not locked, so the miter scale may
be adjusted.
8. Re-tighten the four screws and re-check the miter scale
alignment.
NOTE: After squaring adjustments have been made, it may be
necessary to loosen the indicator screws
D
and reset them
to zero.
Figure 14
Figure 13
LOCK
UNLOCK
C
D
A
B
F31
F28
F21
F20
Loading ...
Loading ...
Loading ...