
Loading ...
Loading ...
Loading ...
25
OPERATION
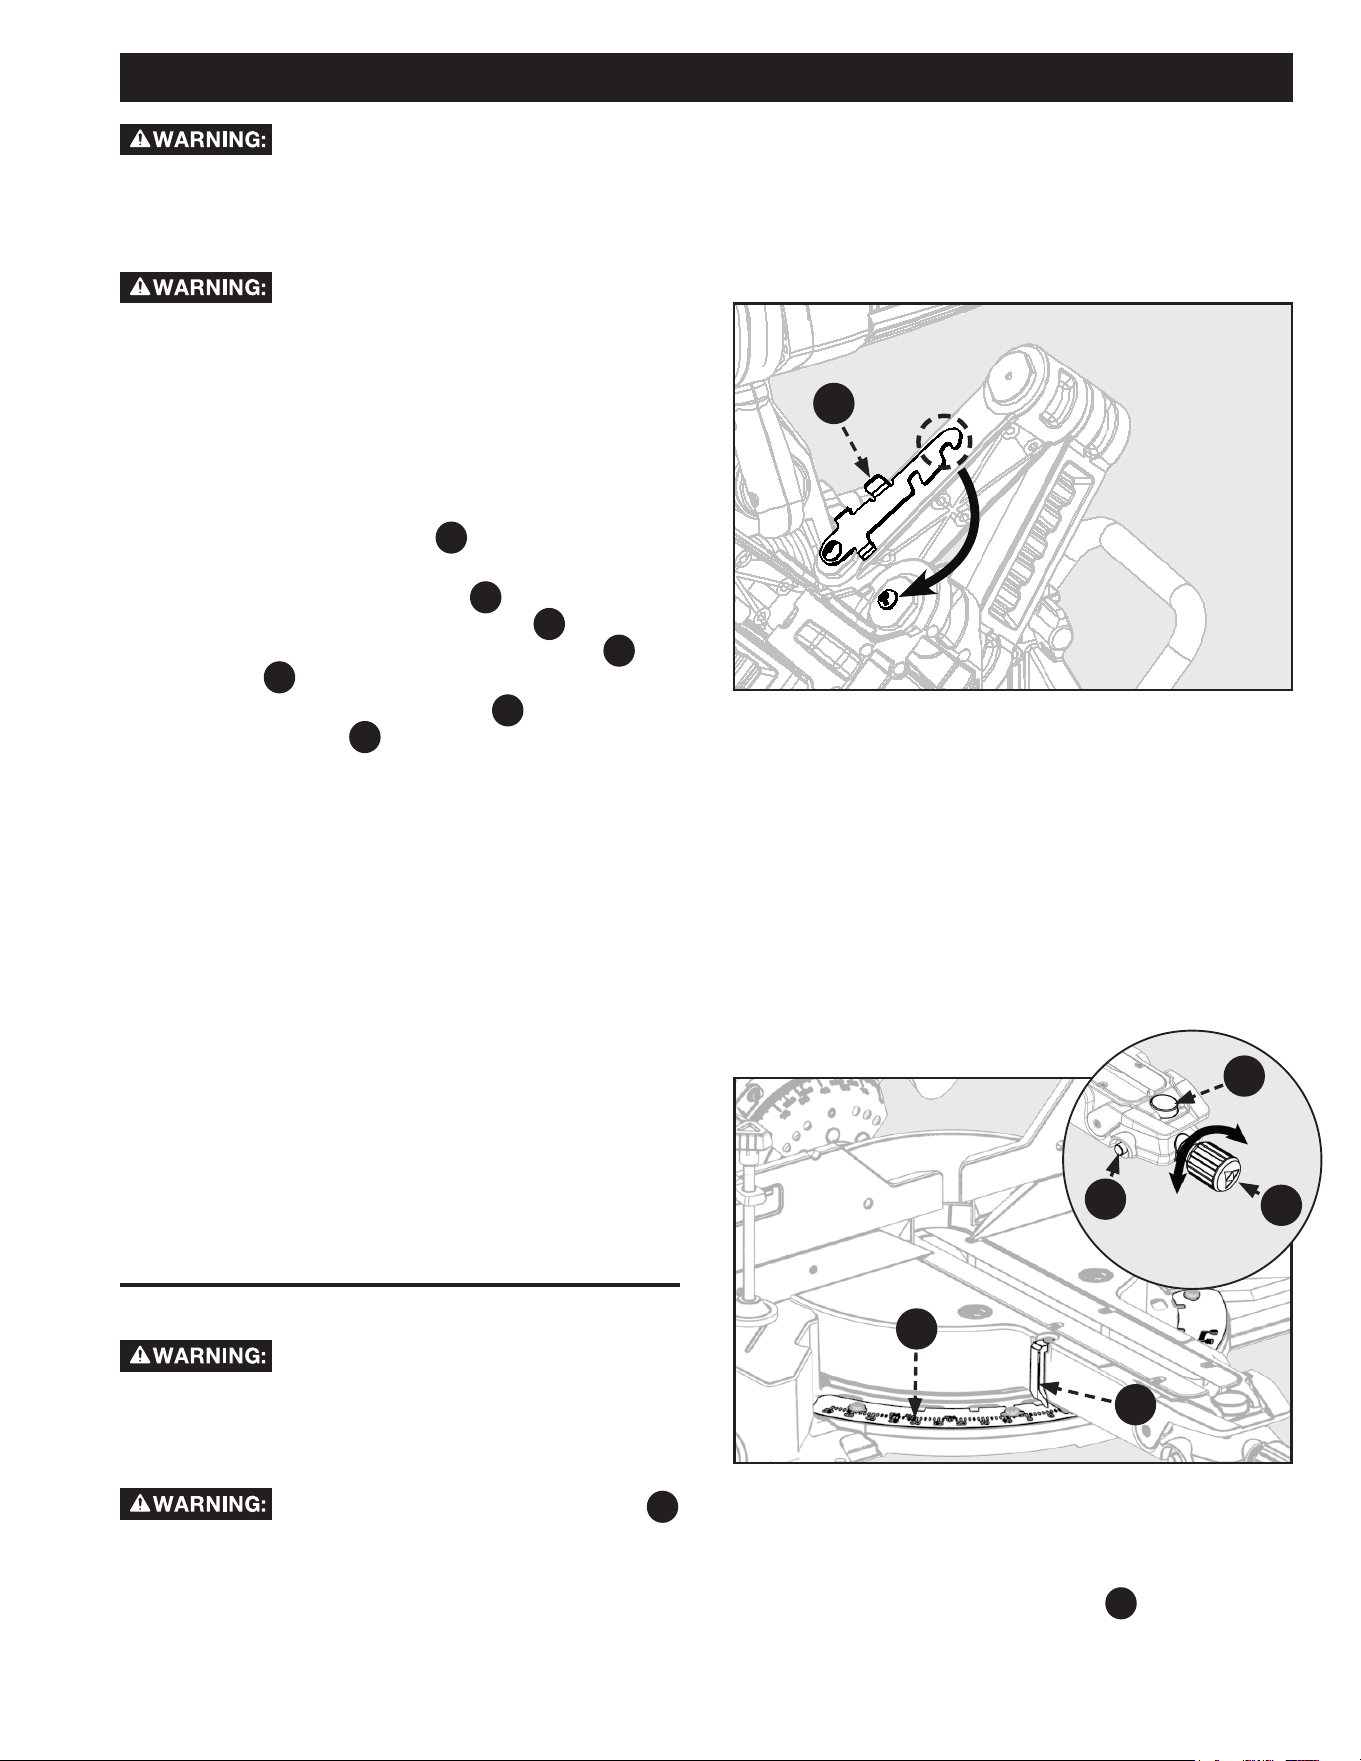
Figure 30
Figure 31
LOCK
UNLOCK
NON-SLIDING CUTS
Before turning the saw power ON, check to make sure saw head and blade will not make contact with the
provided work clamp or fence during the cutting operation. Position the work clamp and fence to avoid contact with the miter saw
head.
FOR CROSS CUTS
See Figure 30 and 31.
1. To use this saw as a traditional, non-sliding, miter saw:
slide the saw head into the fully retracted position and
engage the slide lock lever
F31
, baseboard notch. See
Figure 30.
2. Loosen the miter lock knob
F25
, use your thumb
to push in the miter detent lock button
F28
, and set the
miter arm angle to 0°. Use the miter scale
A
and
indicator
B
to locate the 0° miter position.
3. Release the miter detent button
F28
and tighten the
miter lock knob
F25
. Check that the worktable is
securely locked into position.
4. Raise the saw head to its UP position.
5. Position the workpiece so that it is securely supported
by the worktable and fence. If the board is warped,
read and follow the instructions under “Cutting Warped
Material” in the “Operation” section of this manual.
6. Secure the workpiece to the table and against the
fence, using the provided clamp.
7. Before turning the power switch ON, perform a
simulated cut to check your cut alignment. Also check to
make sure the blade will not come into contact with the
provided work clamp the fence or anything other than
the workpiece.
8. Engage the power ON switch. Allow the blade to reach
maximum speed.
9. Lower the saw blade through the workpiece.
10. Disengage the power switch and allow blade to come to
a complete stop before raising the saw head.
MITER CUTS
ALWAYS engage the slide prevention lock
before making any non-sliding cuts. Failure to engage this lock
could result in saw head movement during the cutting
operation.
To avoid personal injury, before turning the
saw power ON, check to make sure saw head and blade will
not make contact with the provided work clamp or fence
during the cutting operation. Position the work clamp and
fence to avoid contact with the miter saw head.
ALWAYS tighten the miter lock knob
F25
before any cutting operation. Failure to do so may result in
serious personal injury.
See Figure 31.
1. To make miter cuts on this saw, using it as traditional,
non-sliding miter saw, slide the saw head into the fully
retracted position and engage the slide lock lever.
F24
B
A
F28
F25
2. Rotate miter arm to one of the preset miter angles (0°,
15°, 22.5°, 31.6°, or 45°).
3. Use miter detent override button
F24
for your desired
angle position if it is not provided.
4. Follow steps 3-10 of the Instructions for cross cuts in
“NON-SLIDING CUTS” section.
F31
Loading ...
Loading ...
Loading ...