Loading ...
Loading ...
Loading ...
User Manual of DS-6700 Series Audio/Video Encoder
46
directory. When the parent directory is selected, you have the option to use the Device Name, Device
Number or Device IP for the name of the directory; and when the Child Directory is selected, you can use
the Camera Name or Camera No. as the name of the directory.
Upload type: To enable uploading the captured picture to the FTP server.
4. Click Save to save the settings.
Note: If you want to upload the captured pictures to FTP server, you have to enable the event-triggered
snapshot on Snapshot page. For detailed information, please refer to Section 8.3.
7.3.10 Configuring SOCKS Settings
Purpose:
SOCKet Secure (SOCKS) is an Internet protocol that routes network packets between a client and server through
a proxy server. This feature is useful if the encoder is located on a local network behind a firewall, and Email
notifications, FTP uploads, alarms, and such need to be sent to a destination outside the local network (such as the
Internet). The SOCKS4 and SOCKS5 are supported, of which the SOCKS5 additionally provides authentication
so only authorized users may access a server.
Steps:
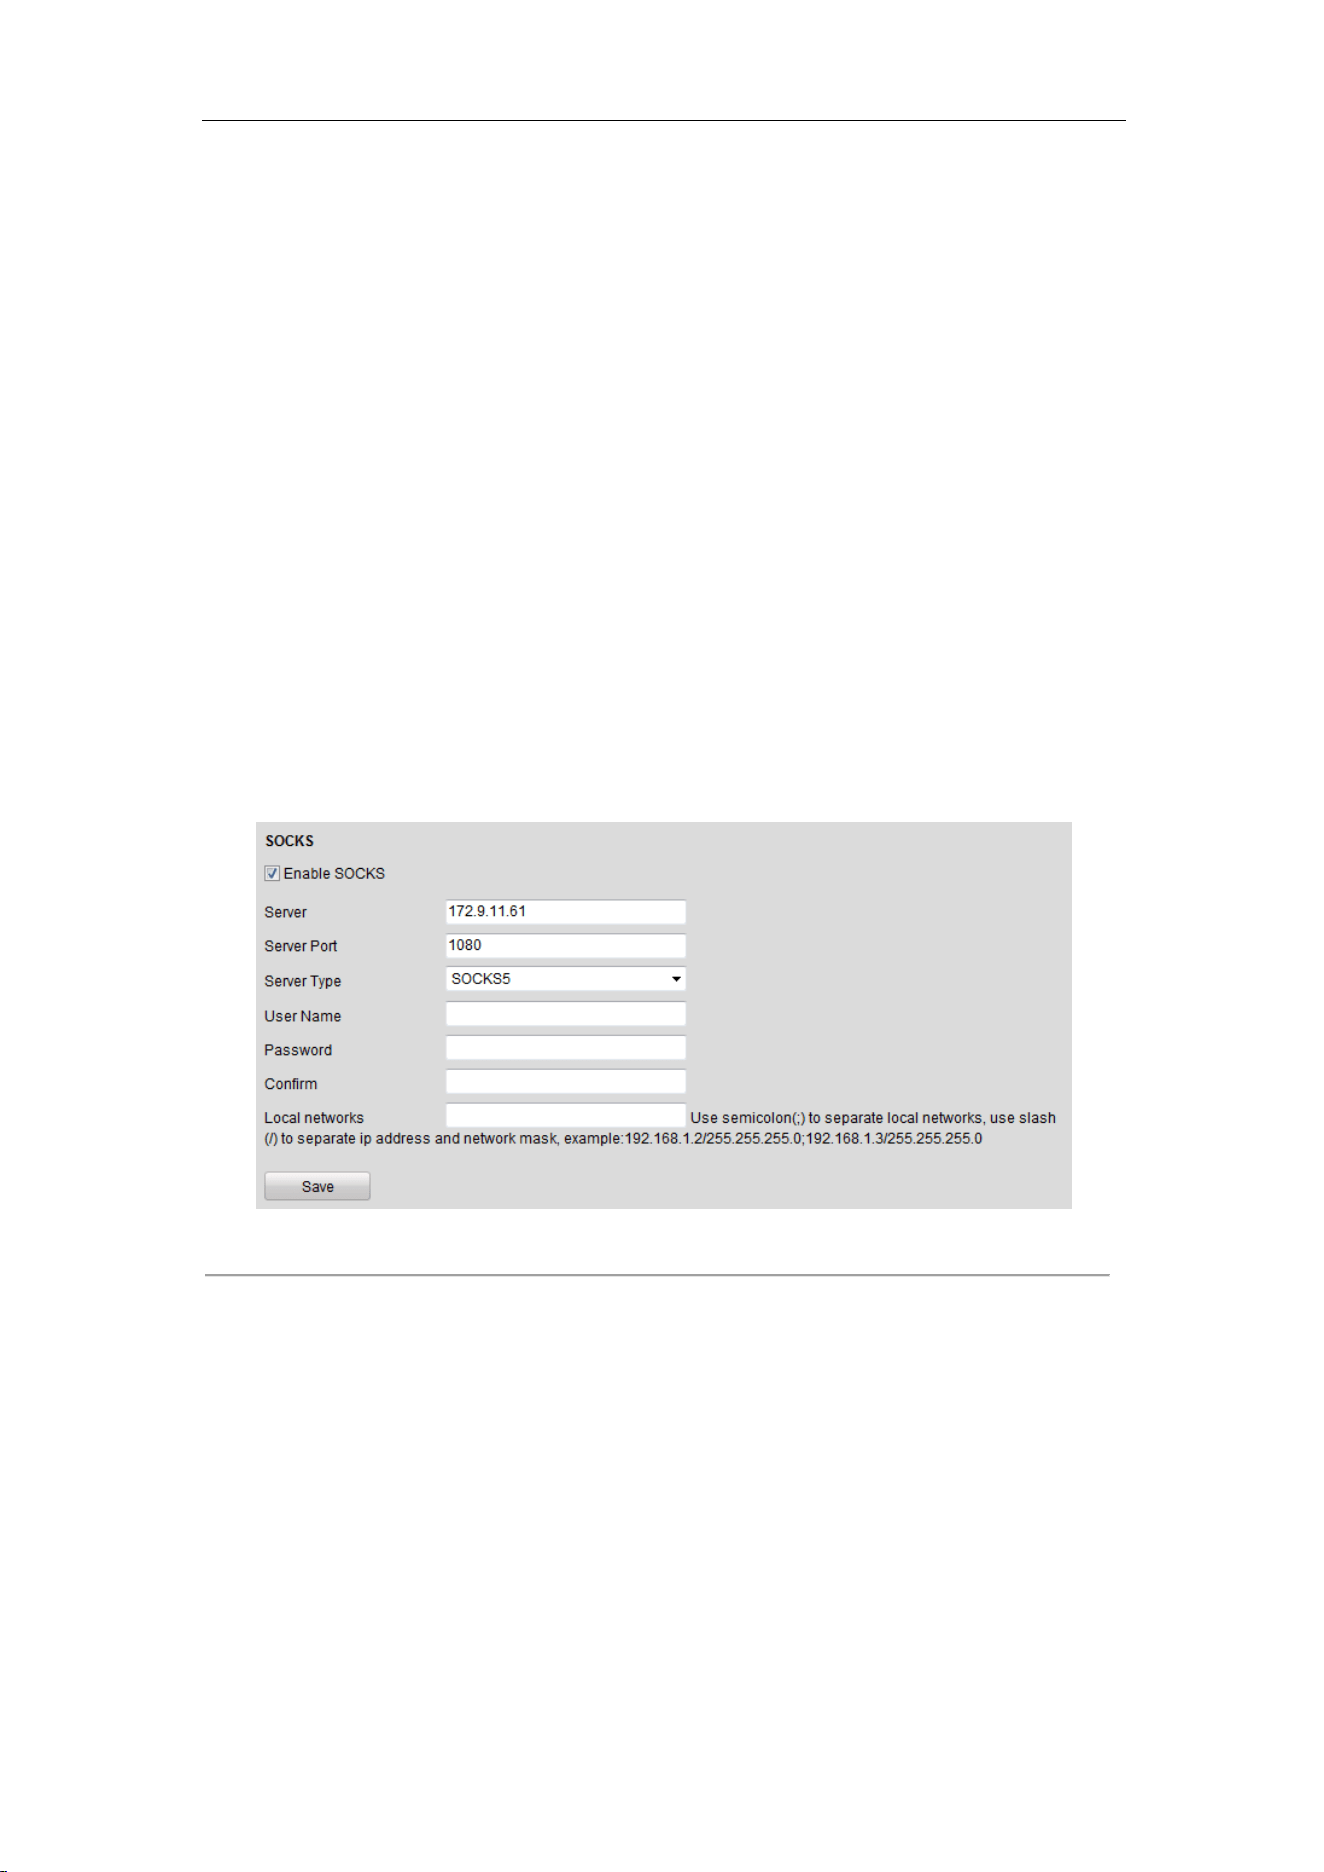
1. Click Remote Configuration > Network Settings > SOCKS to enter the SOCKS Settings interface:
Figure 7.24 SOCKS Settings
2. Configure the following settings:
Server: Enter the address of the SOCKS server.
Server Port: Enter the port of the SOCKS server (default: 1080).
Server Type: Select the server type to SOCKS4 or SOCKS5. When you select SOCKS5, you can enable the
user authentication on the server and then enter the login user name and password here.
Local networks: Define the local network segment which does not need to use SOCKS proxy server. You
can enter multiple network addresses and use the semicolon (;) to separate them, e.g., 10.0.0.0/255.0.0.0;
172.16.0.0/255.240.0.0.
3. Click Save to save the settings.
Loading ...
Loading ...
Loading ...