
Loading ...
Loading ...
Loading ...
56-VOLT LITHIUM-ION POLE SAW — PS1000/PS1000-FC 17
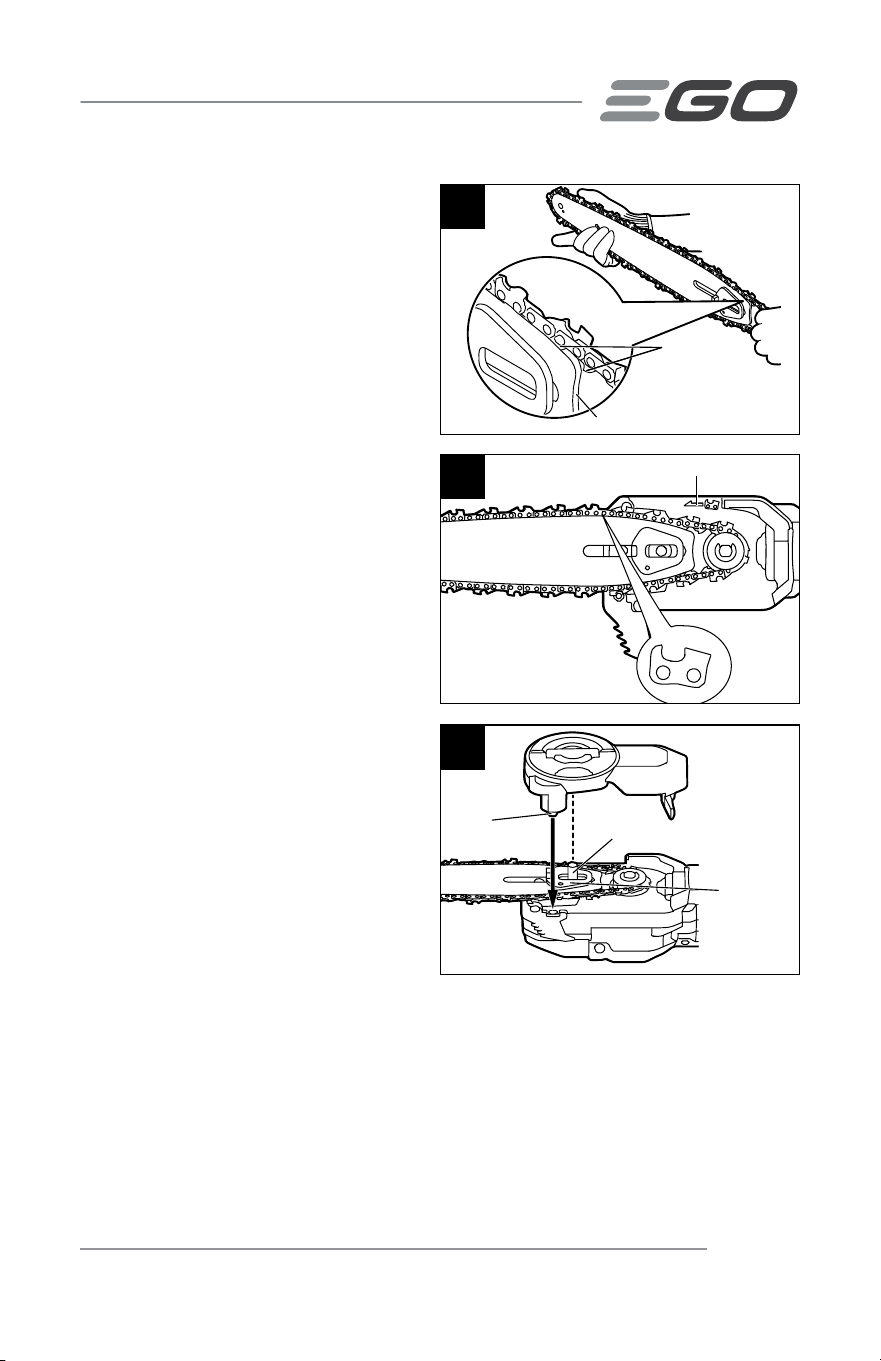
5. Place the chain drive links into the
guide bar groove. Position the chain
so there is a loop at the back of the
guide bar (Fig. 4).
6. Hold the chain in position on the
guide bar and place the loop around
the drive sprocket of the pole saw.
NOTICE: A small direction arrow and
a cutter pictogram is engraved in the
machine housing (Fig. 5). When looping
the saw chain onto the guide bar, make
sure that, after mounting the guide
bar, the direction of the saw chain will
correspond to the rotation direction arrow
on the machine housing and the shape
of the cutters on the top of the guide
bar are consistent with that of the cutter
pictogram on the housing. If they face in
opposite directions, reassemble the saw
chain onto the guide bar with the arrows
facing the same direction. The guide bar
should be mounted with the adjustment
plate facing away from the housing.
7. Keep the bar and chain parallel
to the mounting surface with
one hand. Attach the side cover
to the housing so that the holes/
pins and fastening bolt /thread
hole are aligned with each other
properly (Fig. 6). Press the side
cover towards the housing, then fully tighten the quick chain-tension adjust knob
clockwise. The eccentric gear inside the side cover is designed to ensure that the
chain will not be over-tensioned.
NOTE: If the chain gets loose, turn the quick chain-tension adjust knob
counterclockwise at least one turn, then fully tighten the knob clockwise.
8. Rotate the chain by hand to check whether the chain is properly assembled
without binding. Otherwise, reassemble the chain and bar.
5
Rotation Direction Arrow
4
Chain Drive
Links
Guide Bar Groove
6
Adjustment
Plate
Facing Out
Fastening Bolt
Pin
Loading ...
Loading ...
Loading ...