
Loading ...
Loading ...
Loading ...
petsafe.com 13
Step 5: Position, Twist and Splice the Boundary Wire
Once you have designed your layout, the next step is to position the wire along your property. Hold off on burying the wire until you have
tested the system first.
1. Start with one end of the wire at the surge protector, but do not plug it in yet. Run the wire outdoors all the way around your planned
perimeter and back to the surge protector.
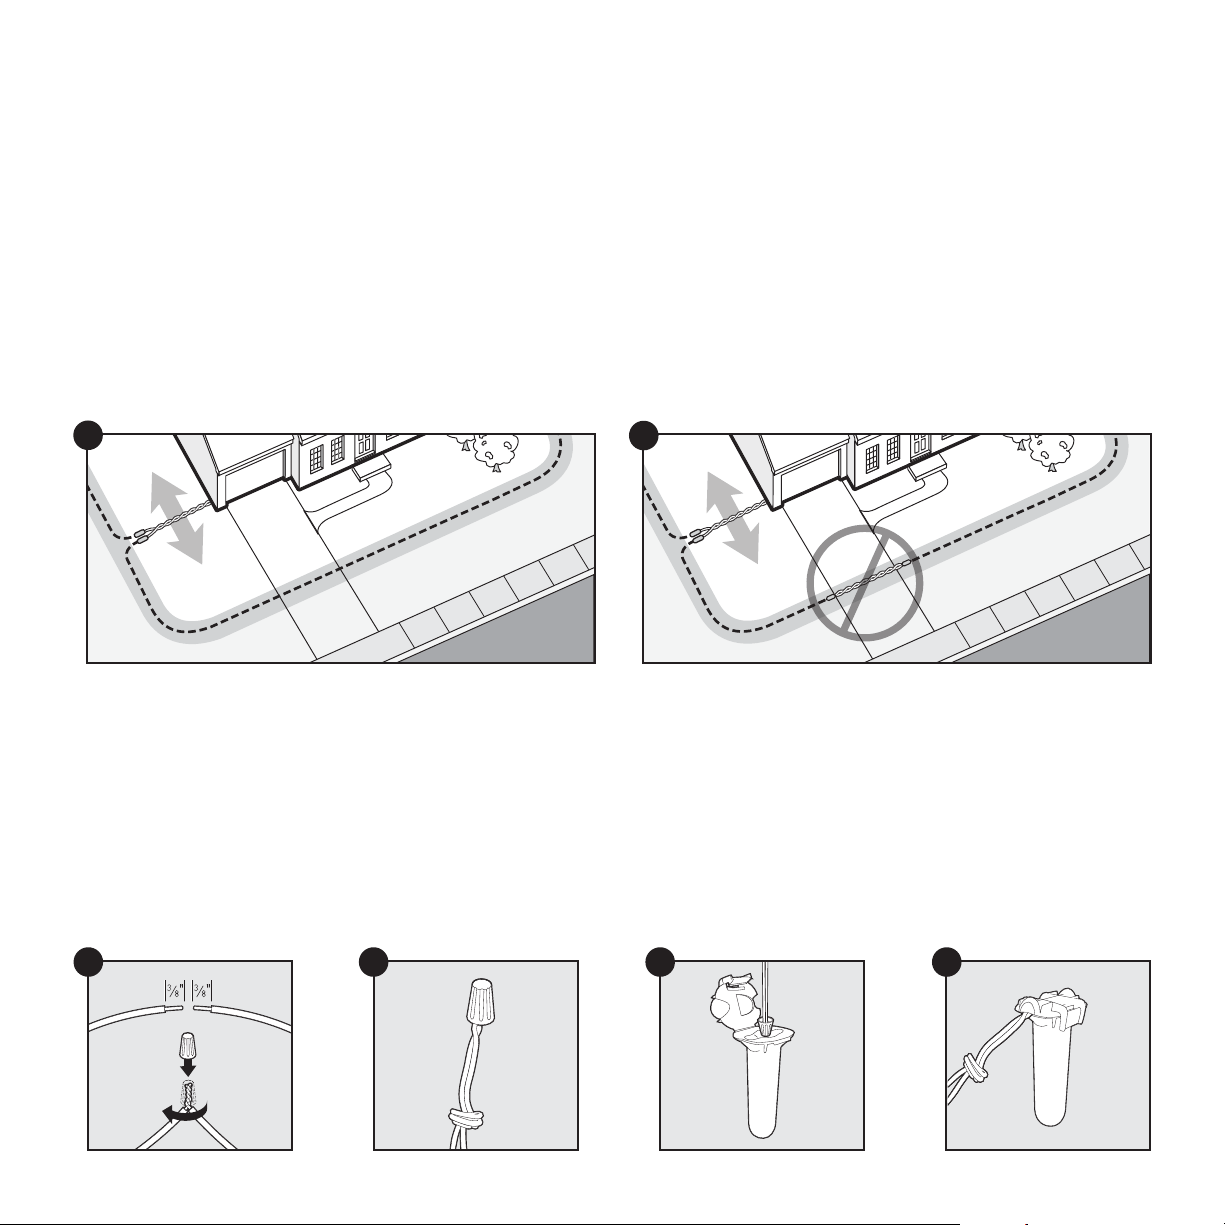
2. You will need to twist the 2 wires together for the area running from the transmitter inside your home out to the yard so that your pet can
cross this section without a correction (5A). Twisting both ends of the wire together 10–12 times per ft. cancels the signal. Keep in mind
that crossover areas will only work when set up within the containment area. Straight crossover breaks along the perimeter, such as across
driveways (5B), cannot be created and the signal will not be canceled.
Quick tip: The fastest way to twist 2 wires is to cut 2 pieces a little longer than the length you need, twist them and then “splice” in that section.
Anchor one end of the 2 wires to something secure (or have a partner hold them), and insert the other end into a power drill. Pull the wire taut.
Then use the drill to twist the wire quickly. Go slowly. Follow the splicing guide below to learn how to reconnect this twisted portion back to the
main boundary wire.
Splicing Guide
Although not required, it is recommended that you cut and splice the wire between each twisted section. Your Rechargeable In-Ground Fence
™
system comes with 2 gel-filled splice capsules to ensure that your splices are waterproof. You can give us a call if you would like to purchase more
splice capsules.
a. Strip approximately
3
⁄8 in. of insulation off the ends of the wires to be spliced (5C).
b. Insert the stripped ends into the wire connector and twist the wire connector around the wires. Make sure there is no copper exposed
beyond the end of the wire connector.
c. Tie a knot 3 to 4 in. from the wire connector (5D). Ensure that the wire connector is secure on the wire splice.
d. Once you have securely spliced the wires together, open the lid of the gel-filled splice capsule and insert the wire connector as deeply
as possible into the waterproof gel inside the capsule (5E).
e. Snap the lid of the capsule shut (5F).
5B
5A
1
2
5C 5D 5E 5F
Loading ...
Loading ...
Loading ...