Loading ...
Loading ...
Loading ...

www.SereneLifeHome.com
8
5. Set the Wire Speed Dial and the Current Switch to the desired settings. Refer to
the chart on the Welder or the chart on the facing page.
WARNING: Do not switch the current while welding.
6. Flip the Power Switch to the OFF position, then plug the Welder into a dedicated,
120 VAC, 20 A circuit with delayed action type circuit breaker or fuses.
7. Hold the Gun, without touching the Trigger, with the wire and tip clearly away
from any grounded objects. Then, turn the Power Switch to ON.
BASIC WELDING TECHNIQUE
1. Press (and hold) Trigger and contact area to be welded with electrode wire to
ignite arc.
2. For a narrow weld, you can usually draw the wire in a steady straight line. This is
called a stringer bead. For a wider weld, draw the wire back and forth across the
joint. This is called a weave bead.
3. Hold Gun in one hand and the face shield in the other. If a hands-free welding
shield is used, then both hands can be used to control Gun.
4. Direct the welding wire straight into the joint. This gives an angle of 90° (straight
up and down) for butt (end to end) welds and an angle of 45° for llet (T-shaped)
welds.
5. The end of Gun should be tilted so that wire is angled anywhere in-between
straight on and 15° in the direction you are welding. The amount of tilt is called
the drag angle.
6. The welding wire should extend no more than 1/2" past the tip. This distance is
called stick out or CTWD.
7. After welding the test weld on a piece of scrap for a few seconds, stop, and check
your progress.
8. When the weld is complete, lift the Gun and welding wire clearly away from any
grounded object, and turn the Power Switch o.
9. Set the Gun down on a heat-proof, electrically non-conductive surface.
Unplug the Power Cord.
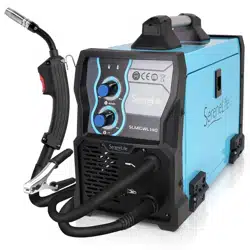
GETTING TO KNOW YOUR FLUX-CORED WIRE WELDER
1. HANDLE
The rugged, top-mounted handle allows for easy transport of your welder and a
place to wrap your cables.
2. INPUT VOLTAGE INDICATOR LED
This will be illuminated when the input voltage to the machine is present and
the ON/OFF SWITCH is in the ON position.
Loading ...
Loading ...
Loading ...
