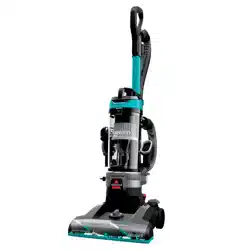
Meet your new BISSELL product!
Go to support.BISSELL.com for a comprehensive walkthrough
of your new purchase, including videos, tips, support, and more.
Want to get started right away? This guide has all the information
you need to set up your new product. Let’s take a look…
6 BISSELL.comBISSELL.com 3
Product Overview
1. Handle
2. Stretch Hose
3. Wand Release Button
4. Tank Release Button
5. Carry Handle
6. Dirt Tank
7. Cord Rewind Button
8. Power Pedal
9. Recline Pedal
10. Height Adjustment
Important Safety Instructions ................................ 2
Warranty ............................................................................... 2
What’s in the Box? ......................................................... 2
Assembly .............................................................................. 3
Using the Vacuum .......................................................... 3
Emptying the Dirt Tank............................................... 5
Cleaning the Pre-Motor Filter ................................. 5
Maintaining Your Vacuum .........................................6
Troubleshooting ............................................................... 6
CLEANVIEW® REWIND
UPRIGHT VACUUM
MODELS 3534, 3675, 3676
1
2
5
6
8
9
3
4
10
7
Assembly
Go to support.BISSELL.com for assembly videos.
1. Attach wand to vacuum base. 2. Attach stretch hose to
wand and twist clockwise to
lock into place.
3. Attach stretch hose to back
of vacuum and twist clockwise
to lock into place.
4. Attach hose clip to body of
vacuum by sliding up until it
clicks into place. Remove hose
clip for extended cleaning
reach when in use.
5. The hose should sit on the
vacuum without any twists.
6. Attach tools to tool holders.
Using the Vacuum
For additional support videos and information, visit support.BISSELL.com.
WARNING
• To reduce the risk of electric shock, turn power OFF and disconnect plug from electrical outlet before performing maintenance or
troubleshooting checks.
• Do not operate vacuum with damp or wet filters or without all filters in place.
Maintaining Your Vacuum
For more helpful maintenance tips, check out support.BISSELL.com.
Maintaining the TurboBrush® Tool
1. Twist gray collar counterclockwise until slot
appears; separate faceplate and remove brush.
Replace belt and brush if needed.
2. If paddle wheel is dislodged, align two clips on
each side and click into place.
3. Faceplate will not close if all parts are not
aligned correctly.
Clearing a Clog
1. Remove hose from back of vacuum by twisting
left. Remove any debris.
2. Check foot hose on back of vacuum, towards
the bottom. If necessary, remove screw from foot
hose and check for clogs.
3. Check air passageway on the bottom of
vacuum. Remove bottom cover and brush.
Remove any debris.
Replacing the Brush and Belt
1. Unplug vacuum, turn over and unscrew six
Phillips-head screws to remove bottom cover.
2. Lift brush roll straight out. Inspect belt,
replace if it appears damaged.
3. If belt is not broken. Inspect brush roll by
placing it on its end and spinning. Brush roll
should spin freely, multiple times with one flick.
Replace brush roll if it doesn’t spin freely.
4. Replace brush roll and belt by looping belt
over motor shaft and brush roll. Line up endcaps
and pull brush forward into place. Belt will
stretch.
5. Once brush roll is installed, place bottom
cover back on and replace screws.
©2022 BISSELL Inc. All rights reserved.
Part Number 1630631 07/22 RevH
Every Purchase Saves Pets
™
BISSELL proudly supports BISSELL Pet Foundation® and its mission to help save homeless pets.
When you buy a BISSELL® product, you help save pets, too. We’re proud to design products that help
make pet messes, odors and pet homelessness disappear. Visit BISSELLsavespets.com to learn more.
For a comprehensive walkthrough of your product and support tips, visit support.BISSELL.com.
Troubleshooting
Cleaning the Pre-Motor Filter (continued)
1. Reinstall foam filter and
close lid.
2. Place tank back on vacuum
and press firmly until it clicks
into place.
1. Gently pull the cord out,
stopping at the yellow mark
on the cord. Do not pull past
the red mark.
2. Press the red power button
with your foot to turn the
vacuum ON
and OFF .
3. Press the recline pedal and
pull handle back towards you.
Loading ...
Loading ...
Loading ...
