
Loading ...
Loading ...
Loading ...
E E E E E E E E E E E E E E E E E E
E E E E E E E E E E E E E E E E E E
24E
CLEANING AND MAINTENANCE
MAINTAINING STAINLESS-STEEL
The stainless-steel drawer exterior and rangetop control panel
should be wiped often with a damp, soft cloth and polished to
maintain its beauty. There are many products designed speci-
cally for cleaning and shining the stainless exterior. Cleaner
should be applied to a soft cloth rather than sprayed directly on
the appliance. Follow all cleaning product package instructions
ca r ef ully.
TO POLISH STAINLESS STEEL
1 Dampen a clean, soft cloth with water or cider vinegar. For
heavy staining, use undiluted vinegar. For light staining,
dilute 2 tablespoons cider vinegar in 1 cup warm water.
2 Wipe the exterior stainless-steel in the direction of the grain.
3 Buff with a clean, dry, soft cloth until dry.
CONTROL PANEL CLEANING
CAUTION
ELECTRIC SHOCK HAZARD
• Do not use excessive water or cleaners to clean knob areas. Do
not spray kitchen cleaners directly into the openings behind
the knobs. If moisture is forced into openings behind knobs,
there is risk of electric shock.
IMPORTANT: Do not use scouring pads, abrasive cleaners,
strong liquid chemicals, steel wool or oven cleaners to clean
the control panel, as these may damage the nish and cause
cosmetic damage.
NOTE: The control panel and oven control can be disabled
during cleaning by activating the Control Lock. Touch and
hold Control Lock pad for 3 seconds to activate or deactivate
Control Lock.
TO CLEAN CONTROL PANEL
1 For best results and a prolonged life, clean the user interface
and control panel after each use. To remove knobs for easier
cleaning, ensure knobs are in the OFF position, then pull
straight back with rm pressure to remove knob from stem.
2 Clean entire panel with a slightly damp, non-abrasive cloth,
using mild soap and water. Glass cleaner can be used on oven
control panel to remove streaks, and stainless-steel cleaner
can be used on exposed metal to remove streaks.
3 Handwash knobs in warm, soapy water.
4 Replace knobs, taking care to align the prole in the knob
to the stem shape to ensure a smooth t and avoid damage
to knob or control.
OVEN INTERIOR CLEANING
CAUTION
BURN HAZARD
• Oven surfaces may be hot, and hot surfaces may create hot
steam in a wet sponge or cloth when cleaning. Use caution
to avoid contact with hot surfaces and if steam is evident,
wait until the oven has cooled completely.
TO CLEAN OVEN INTERIOR
1 For best results and a prolonged life, check oven after each
use for spills or spattering that require clean-up and wipe out
interior with a slightly damp, non-abrasive cloth, using mild
soap and water to remove light spills.
2 For moderate soil, use Steam Clean. For stubborn or heavy
soil, use Self Clean. See page 21.
OVEN LIGHTS
CAUTION
SHOCK, BURN, LACERATION HAZARDS
• Disconnect power to oven and allow oven to cool completely
before attempting to service light bulbs.
• Handle the glass lamp cover carefully. If the lamp cover is
difcult to remove, do not force it, as it may break. Contact
a qualied service provider for repairs.
• Never operate the oven without the glass lamp cover in place.
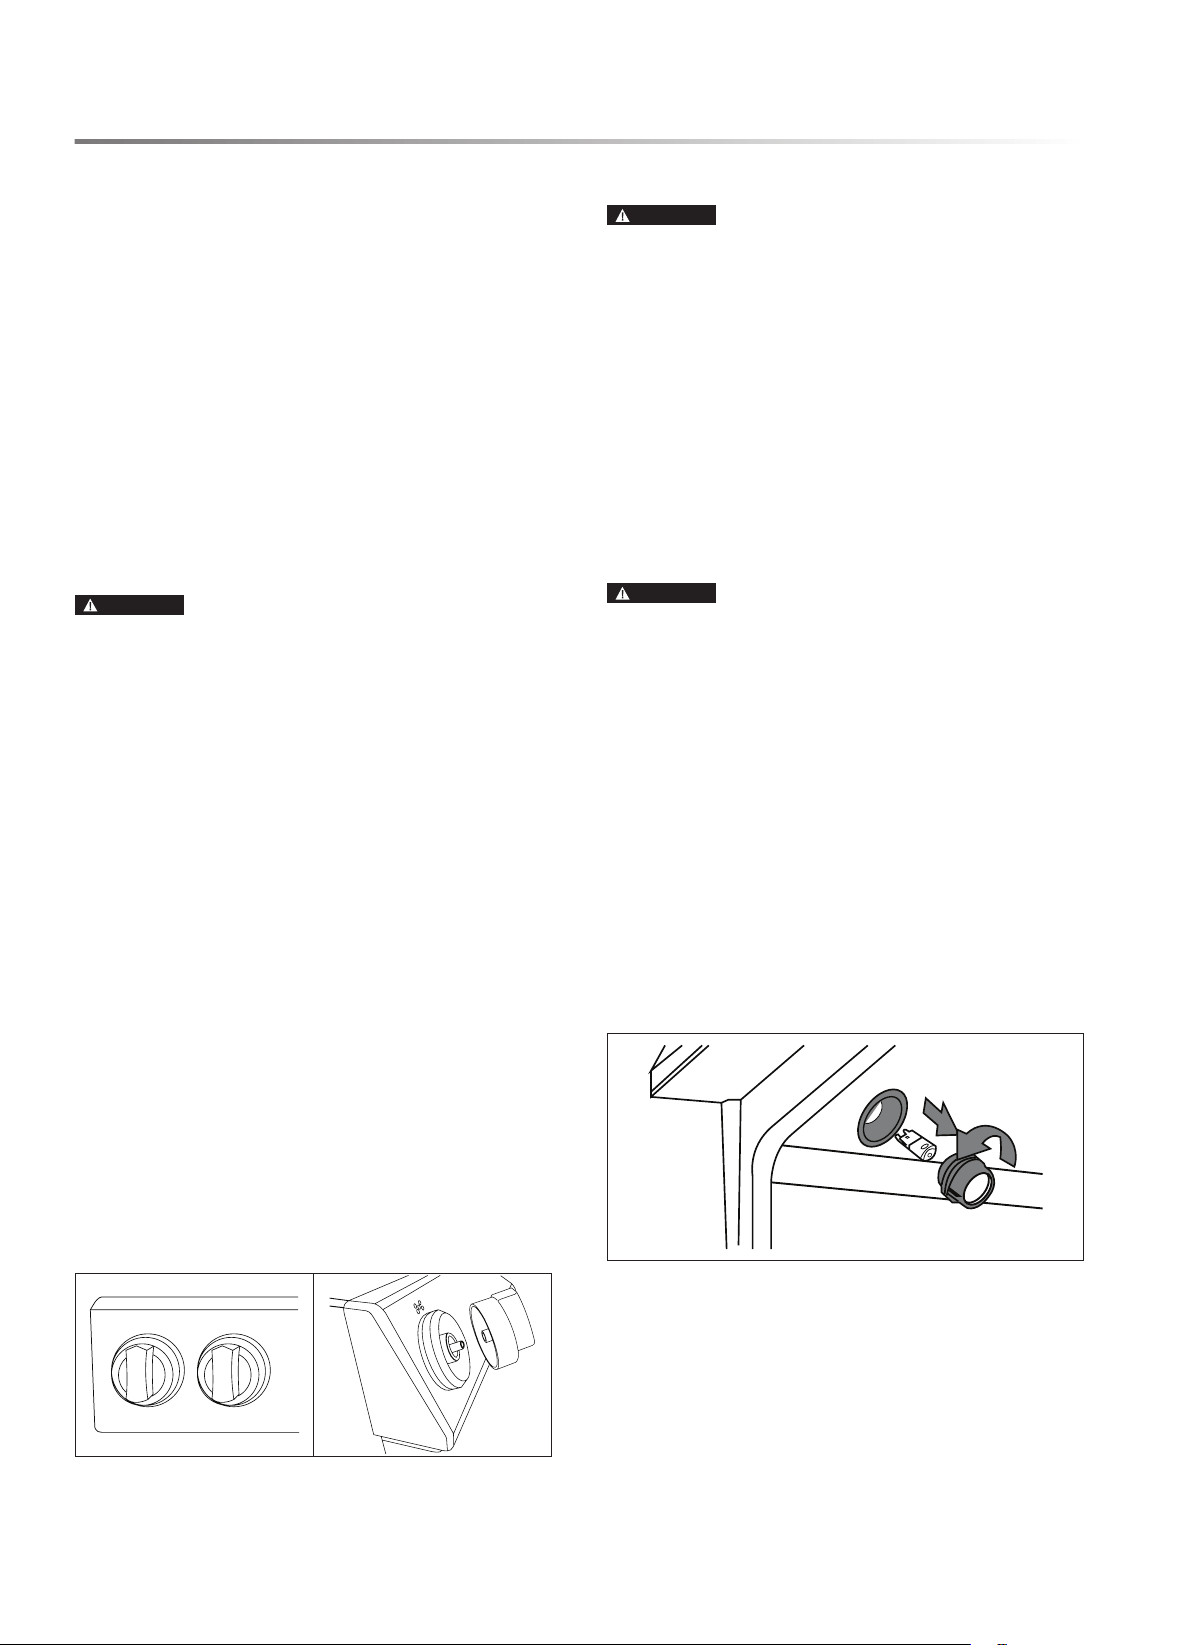
TO REPLACE OVEN LIGHT BULB
1 Locate oven lamps in the top of the oven, near the oven door.
2 Carefully unscrew the glass cover from the base. The light
bulb can be removed by rmly pulling straight out from the
light socket.
3 Replace the bulb only with G8 style 120V halogen bulb rated
25W or less.
4 Twist the glass cover back onto the lamp socket. Never oper-
ate the oven without the glass lamp cover in place.
Loading ...
Loading ...
Loading ...