
Loading ...
Loading ...
Loading ...
E E E E E E E E E E E E E E E E E E
E E E E E E E E E E E E E E E E E E
E17
USING THE OVEN
IMPORTANT Do not place anything, including dishes, foil and
oven trays, on the bottom of the oven when it is in operation to
avoid damaging the porcelain. Never set cookware directly on
the bottom of the oven cavity.
1 Preheating the oven is necessary for most oven cooking.
Unless the recipe specically instructs otherwise, place food
in the oven only after preheating is complete.
2 It is normal for steam or moisture to emit from the oven vent.
Moisture evaporates from food during any cooking process.
The moisture content of the food determines the amount of
steam or vapor emitted. The moisture may condense on any
surface cooler than the oven interior, such as door trim and
the control panel.
3 During operation, do not leave the oven door open longer than
necessary. If the door is left open too long during operation,
baking mode will automatically cancel.
4 During operation, the convection fan will automatically stop
when the oven door is opened.
5 All baking modes have a time limit of twelve hours. Broil
mode has a time limit of one hour. To continue cooking past
time limits, simply reset the oven.
6 Place a baking tray on a lower rack to catch drips and spills
during cooking.
7 If operating at altitudes greater than 3,000 feet, recipes may
require adjustment. Consult USDA or other trusted sources
for recommendations on high-altitude baking.
OVEN RACKS
The SSR3061JS model of the Sharp Slide-In Electric Range
comes with two wire at racks, which can be placed in any of
the seven rack positions in the oven.
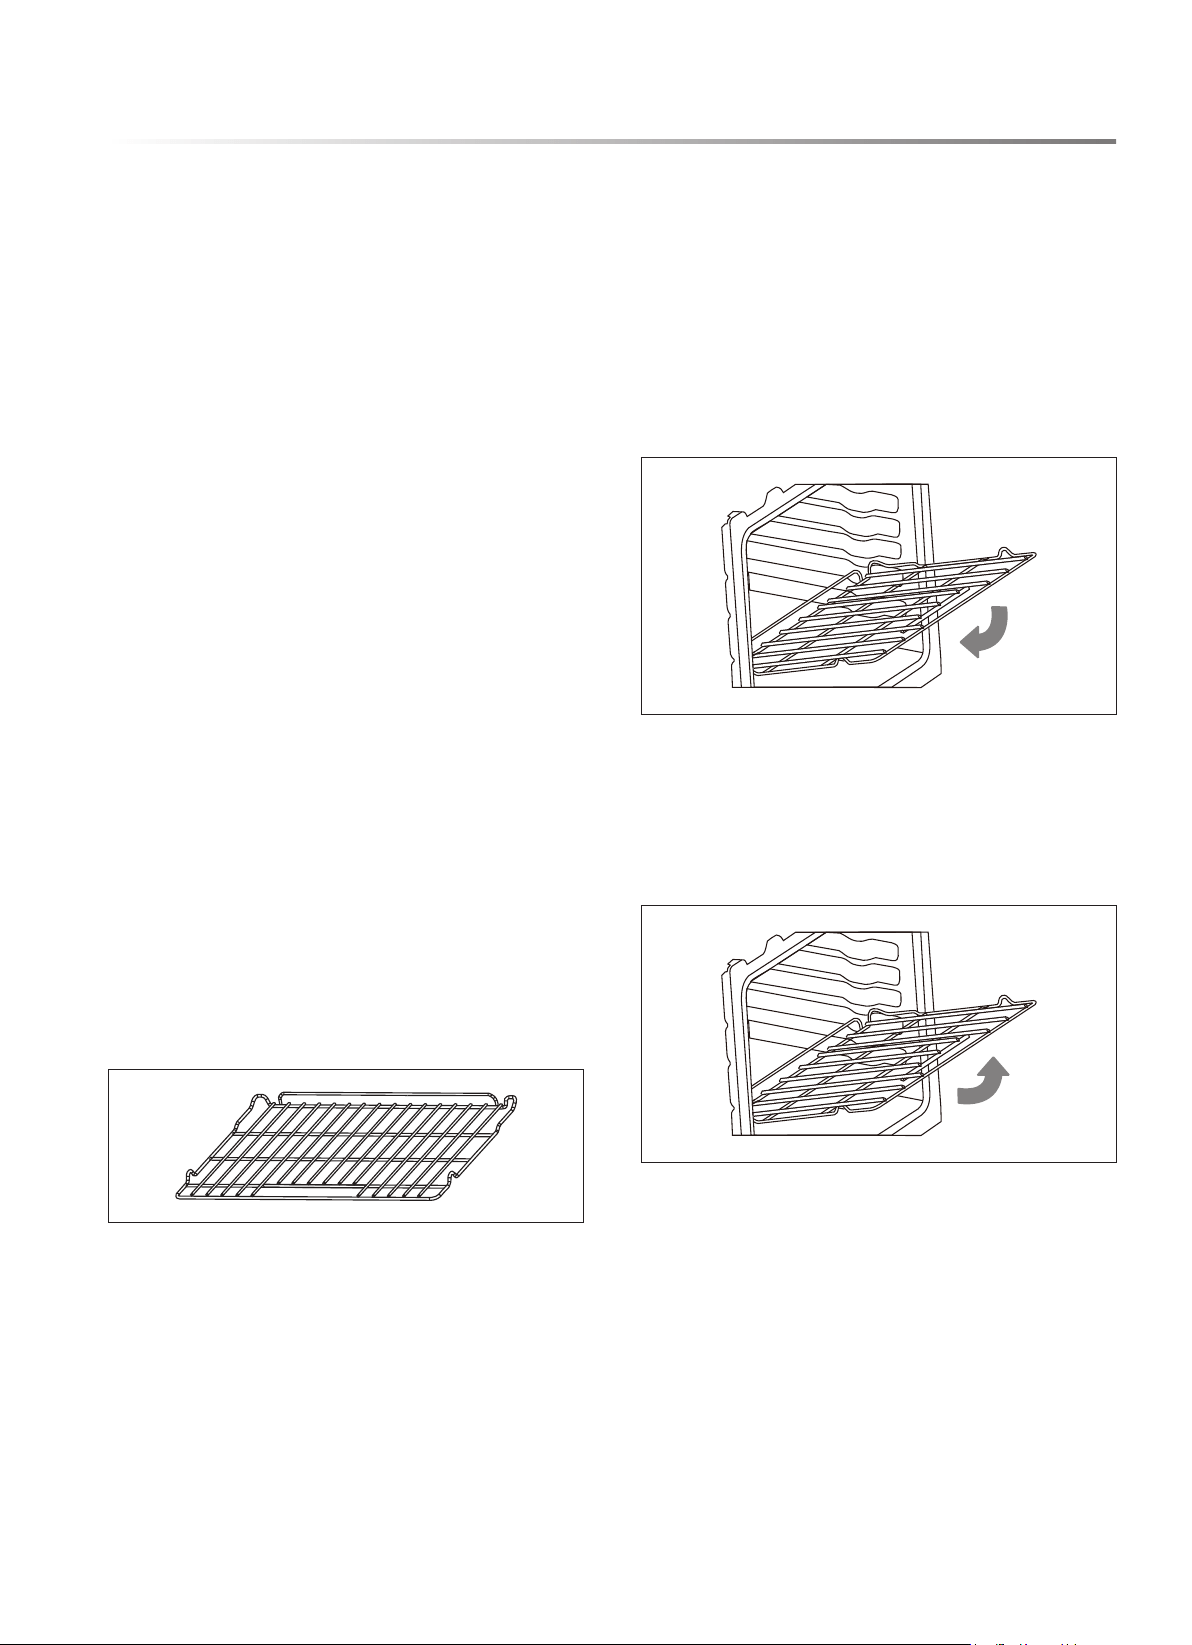
FL AT R ACK
The at racks are versatile and low prole and slide in and out of
the oven on rack guides. Multiple racks can be used simultaneously.
OVEN USE
INSERT/REMOVE RACKS
TO INSERT RACK
NOTE: The rack ca
n be installed in only one direction.
1 Orient the rack so the handle is toward the front and the
interlock features are on the top.
2 Tip the rack so the front is several inches higher than the back.
3 Slip the interlock features under the stop position on the
rack guides.
4 Lower the rack front while pushing back until completely
inserted.
TO REMOVE RACK
1 Remove all food and utensils from rack.
2 Firmly grasp rack from both sides.
3 Pull rack out until it reaches the stop position.
4 Lift up on the front of the rack and pull outward.
Loading ...
Loading ...
Loading ...