Loading ...
Loading ...
Loading ...
STAGEPAS 100BTR, STAGEPAS 100 Owner’s Manual
12
Installation and Usage Examples
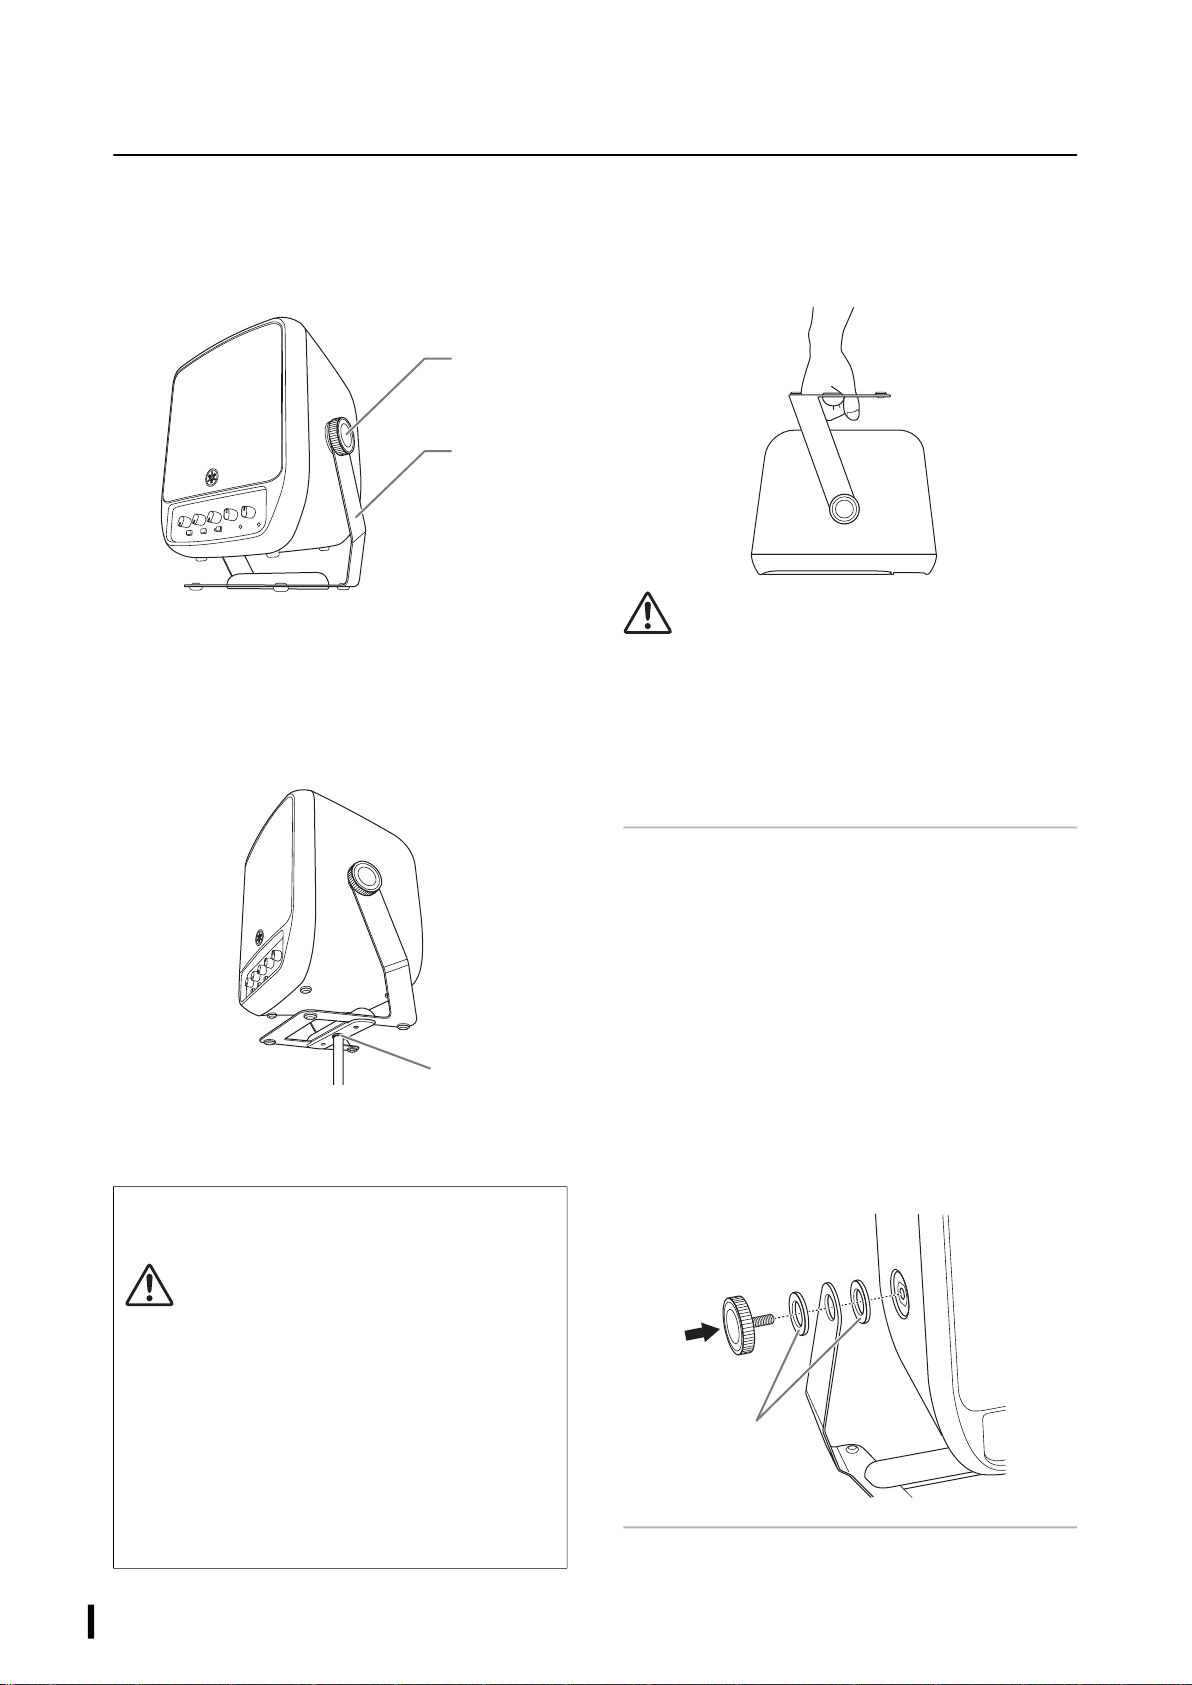
Installing the unit on the floor
This is an example of the standard installation. The handle
functions as a speaker stand, with the rubber feet on the
handle in contact with the floor.
Installing the unit on a
microphone stand
You can install this product on a commercially available
microphone stand, and adjust the height for using it as a
monitor speaker or simple PA system.
Use the screw hole (3/8 inch diameter) located on the
bottom of the handle and a screw of 9–11 mm length to
install the speaker on your microphone stand.
Using the handle to carry the
speaker
You can also use the handle to carry the speaker by hand.
CAUTION
• When you adjust the angle of the handle, pay attention not to
pinch your fingers. Otherwise, you might be injured.
• If you carry the speaker by holding the handle, be sure to
tighten the fixing screws securely so that the handle will not
move. If the handle is not securely fixed, the speaker may
rotate, possibly pinching your fingers between the handle and
the speaker, leading to injury.
Adjusting the speaker angle
1 Loosen both fixing screws.
2 Adjust the speaker angle.
3 Tighten the fixing screws to affix the unit.
NOTICE
If you loosen the fixing screws too much, the speaker may
separate from the handle and fall, possibly causing it to break.
NOTE
• You can also adjust the speaker angle by moving it by hand.
• If the fixing screws come off, refer to the illustration below to
attach them again.
When you install this product on a microphone stand,
observe the following precautions to avoid damaging the
devices or injuring yourself:
CAUTION
• Extend the tripod legs of the microphone stand as wide as
possible to maximize stability.
• The height of this product installed on the microphone
stand should be 115 cm or lower.
• Do not set up the product on any unstable, uneven, or
tilted surface. Be sure to place the product on a stable and
horizontal surface.
• Make sure that there is adequate space around the
connected cables.
• After installing the product on a microphone stand, be
sure to tighten the fixing screws securely so that the
speaker will not rotate.
Tightening
screw
Handle
Screw hole
Rubber spacers
Loading ...
Loading ...
Loading ...