
Loading ...
Loading ...
Loading ...
- 10
Loosen the closing cap of the oil filling
opening.
Clean the filling area.
Refill hydraulic oil.
For oil type refer to Chapter "Technical
specifications".
Replace and tighten the closing cap of
the oil filling opening.
NOTICE
Only Kärcher Customer Service is author-
ised to carry out maintenance tasks on the
hydraulic unit.
Lock parking brake.
Start the motor.
Check all hydraulic hoses and connec-
tions and ensure that they are leak-
proof.
1 Coolant expansion tank
Check filling level while the motor is
cold.
Check the filling level in the coolant ex-
pansion tank.
The correct coolant level has to be be-
tween MIN and MAX.
DANGER
Risk of burning and scalding!
Allow the water cooler to cool down for
at least 20 minutes.
The coolant level of the water cooler is
checked at the coolant expansion tank.
See chapter "Checking the cooling wa-
ter level".
Clean cooler lamella.
Remove soiling by means of a soft
brush, compressed air or low water
pressure.
Check cooler hoses and connections
and ensure that they are leak-proof.
Clean the fan.
Start the motor.
Raise the waste container up to the
end-position.
Switch off engine.
Lock parking brake.
Use the safety bar for emptying from a
height.
Remove belts or cords from roller
brush.
Remove the safety bar.
Start the motor.
Lower the waste container up to the
end-position.
Switch off engine.
1Key
2 Side panels
Drive the waste container up and sup-
port it with the safety rod.
Open the side covers using a key.
1 Holding bow
2 Wing nut
3Side seal
Unscrew the wing nuts.
Remove the retaining clamp.
Flip the side seal out.
Uncscrew the retaining screw of the
roller brush intake, and swing the intake
to the outside.
Pull out roller brush.
Installation position of roller brush in direc-
tion of travel (top view)
Note: When installing the new roller brush,
ensure correct positioning of the bristle as-
sembly.
Install new roller brush. The nuts of the
roller brush must be inserted on the
notches of the opposite crank.
Note: Once the new roller brush has been
installed, the sweeping track must readjust-
ed.
Note: The sweeping track is factory-set to
80 mm; it is steplessly adjustable if the
brush roller wears down.
Check tyre pressure.
Switch off suction blower.
Drive sweeper on to a smooth, even
surface covered with a visible layer of
dust or chalk.
Roller brush and side brush control le-
ver (1) backwards: Switches the roller
brush on.
Roller brush control lever (3) back-
wards: Lowers the roller brush.
Allow the roller brush to run for approx.
10 seconds.
Roller brush and side brush control le-
ver (1) to middle position.
Roller brush control lever (3) forwards:
Raises the roller brush.
Drive machine backwards.
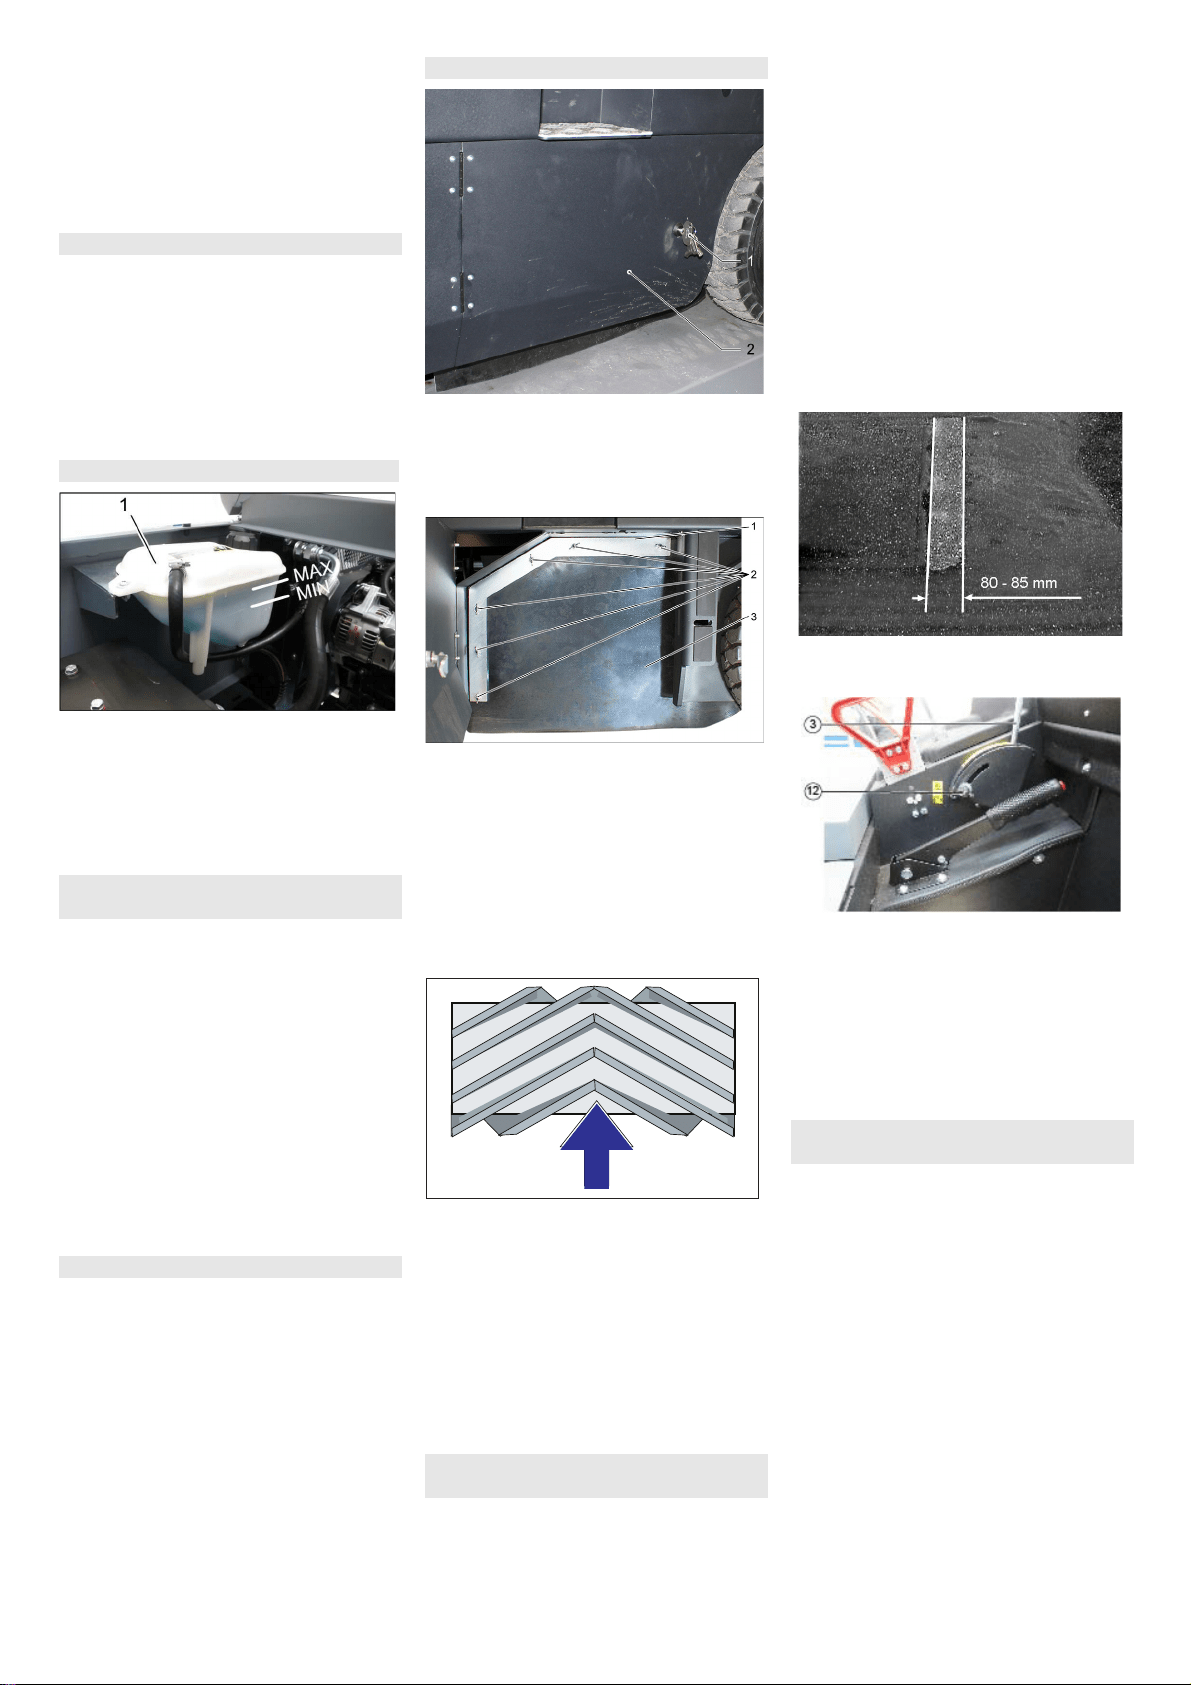
Check sweeping mirror.
The sweeping track should have an even
rectangular shape which is 80-85 mm wide.
Undo and adjust the stop screw for
wear adjustment (12).
Stop screw at the top: narrow sweeping
area.
Stop screw at the bottom: broad sweep-
ing area.
Tighten the stop screw again.
Check the sweeping area of the roller
brush again as described.
The side-brushes lift up.
Drive sweeper on to a smooth, even
surface covered with a visible layer of
dust or chalk.
Lower the side brushes using the con-
trol lever and allow them to run for ap-
prox. 10 seconds.
The side-brushes lift up.
Drive machine backwards.
Check sweeping mirror.
Check hydraulic unit
Check coolant level
Checking and cleaning water/hydraulic
oil cooler
Checking roller brush
Replacing roller brush
Check and adjust roller brush sweeping
track
Check and adjust sweeping track of the
side-brush
27EN
Loading ...
Loading ...
Loading ...