
Loading ...
Loading ...
Loading ...
- 5
9 Indicator light parking light/low beam
(option)
10 Tank indicator
11 Without function, only illuminates dur-
ing start-up of the motor (self-test)
12 Without function
13 Without function
14 Without function
Loosen parking brake; press brake
pedal at the same time.
Activate the parking brake; press brake
pedal at the same time.
Note
This procedure is necessary if the device
needs to be pushed off the palette or towed
away, or must be moved onto a transport
vehicle without its own drive.
ATTENTION
Do not move the machine for long distanc-
es without engaging self-propulsion; a
speed of 10 km/h should not be exceeded.
1Screw
2Key
Unscrew the screw.
Remove the spanner.
1 Hydraulic pump
2Key
3Nut
Loosen the nut using the spanner (open
freewheel) until the device can be
pushed.
IMPORTANT: Once pushed, reclose
the nut (close freewheel = drive posi-
tion).
Read the operating instructions of the
engine manufacturer before start-up
and follow the safety instructions care-
fully.
Park the sweeper on an even surface.
Remove ignition key.
Lock parking brake.
Check fill level of fuel tank.
Check engine oil level.
Check the filling level in the coolant ex-
pansion tank.
Check the sweeping roller and the side
brush for wear and wrapped belts.
Check the wheels for tied up belts.
Check the centrifugal separator and the
air filter, clean if required.
Check function of all operator control el-
ements.
Check appliance for damages.
Clean the dust filter with the filter clean-
ing button.
Note: For description, see section on Care
and maintenance.
DANGER
Risk of explosion!
Only use the fuels specified in the Op-
erations Manual.
Do not refuel the machine in enclosed
spaces.
Smoking and naked flames are strictly
prohibited.
Ensure that no fuel reaches the hot
open surfaces.
Check fuel level via the tank indicator.
Switch off engine.
Open fuel filler cap.
Fill in diesel.
Wipe off any spilt fuel and close fuel fill-
er cap.
1 Lever for seat adjustment
2 Driver seat
Pull seat adjustment lever outwards.
Slide seat, release lever and lock in
place.
Check that the seat is properly locked in
position by attempting to move it back-
wards and forwards.
Note: The machine is equipped with a seat
contact switch If the driver's seat is vacat-
ed, the machine is switched off.
1 Parking brake
2 Motor speed adjustment
Sit on the driver's seat.
Lock parking brake.
Engine speed adjustment - push for-
ward by 1/3.
Insert the ignition key into the ignition
switch.
Turn the ignition key to position "Fila-
ment".
Pre-heat lamp glows.
Press the brake pedal in order to start
the engine.
When the pre-heating lamp goes off,
turn the ignition key to position "II".
If the machine starts, release the igni-
tion key.
Note: Never operate the starter motor for
longer than 10 seconds. Wait at least 10
seconds before operating the starter motor
again.
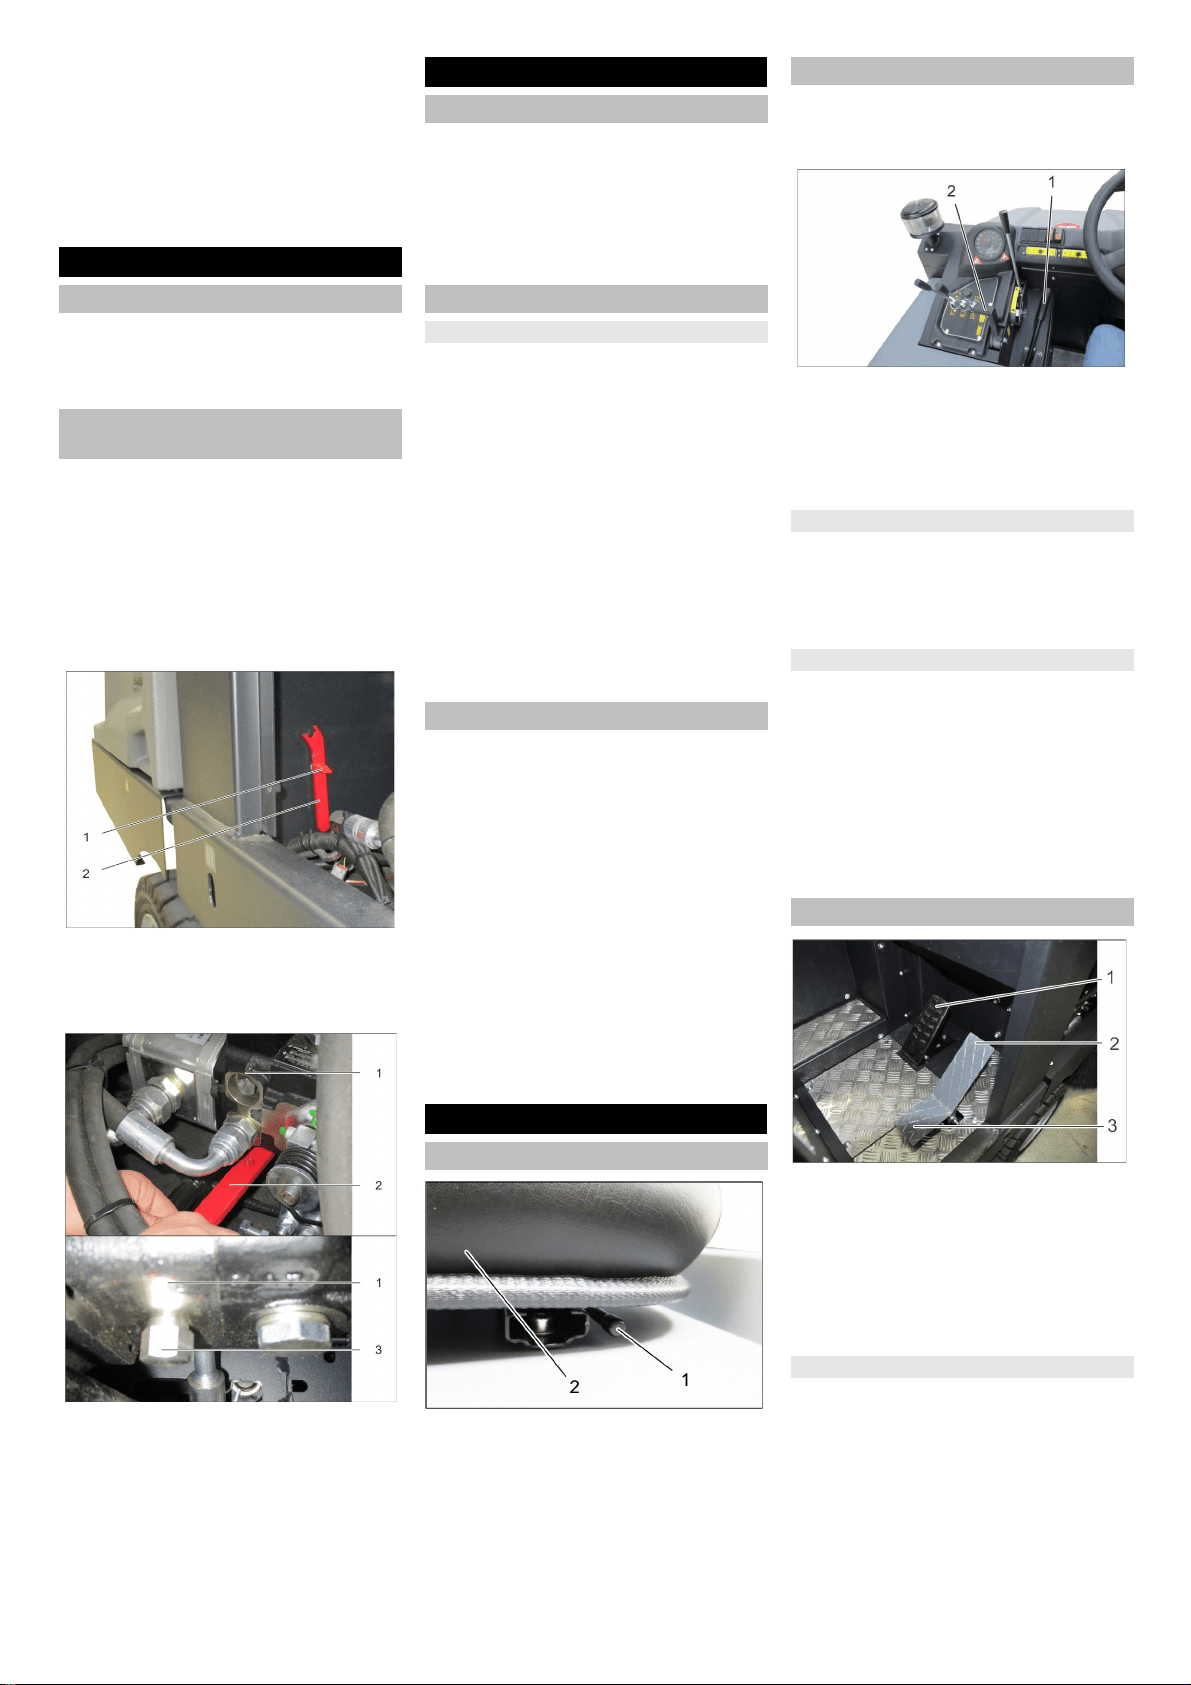
1 Brake pedal
2 Accelerator pedal, "forwards"
3 Accelerator pedal, "reverse"
Push the motor speed adjustment all
the way to the front (operating speed).
Press brake pedal and keep it de-
pressed.
Release parking brake.
Press slowly the accelerator pedal "for-
ward".
Before Startup
Lock/ release parking brake
Moving sweeper without engaging
self-propulsion
Start up
General notes
Inspection and maintenance work
Daily before starting operations
Refuelling
Operation
Adjusting driver's seat
Starting the machine
Pre-heat
Start the engine
Drive the machine
Drive forward
22 EN
Loading ...
Loading ...
Loading ...