Loading ...
Loading ...
Loading ...
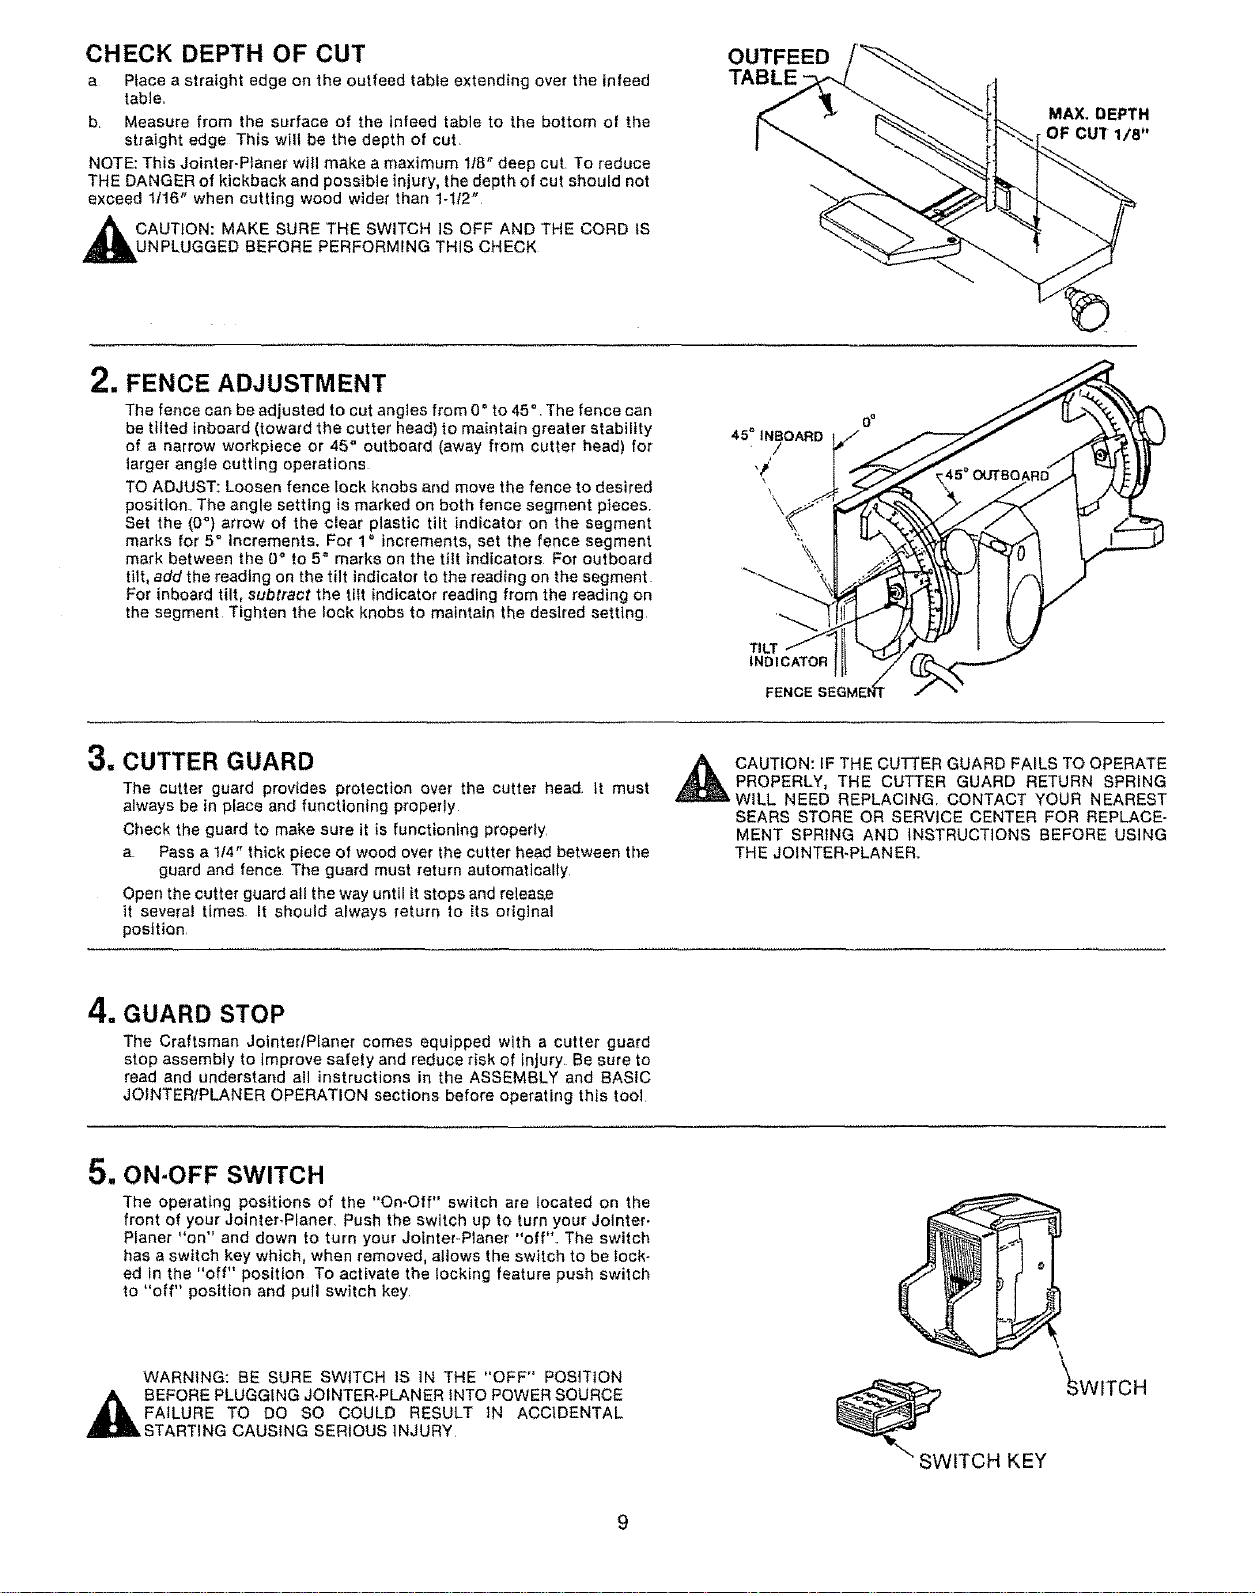
CHECK DEPTH OF CUT
a Place a straight edge on the outfeed table extending over the tnfeed
table.
b. Measure from the surface of the infeed table to the bottom of the
straight edge This will be the depth of cut.
NOTE: This Jointer-Ptaner will make a maximum 118" deep cut. To reduce
THE DANGER of kickback and possible injury, the depth of cut should not
exceed 1f16" when cutting wood wider than 1-1/2"
CAUTtON: MAKE SURE THE SWITCH IS OFF AND THE CORD IS
NPLUGGED BEFORE PERFORMING THIS CHECK
OUTFEED
TABLE
MAX. DEPTH
OF CUT 1/8"
2. FENCE ADJUSTMENT
The fence can be adjusted to cut angIes from 0 °to 45Q. The fence can
be tilted inboard (toward the cutter head) to maintain greater stability
of a narrow workpiece or 45" outboard (away from cutter head) for
larger angle cutting operations
TO ADJUST: Loosen fence lock knobs and move the fence to desired
position. The angle setting ts marked on both fence segment pteces.
Set the ({3°) arrow of the ciear plastic tilt indicator on the segment
marks for 5° Increments. For 1_ increments, set the fence segment
mark between the 0° to 5" marks on the titt indicators For outboard
tilt, add the reading on the tilt indicator to the reading on the segment
For inboard tilt, subtract the flit indicator reading from the reading on
the segment Tighten the lock knobs to maintain the desired setting
453 INBOARD
/
'\
TILT
iNDiCATOR
3. CUTTER GUARD
The cutter guard provides protection over the cutter head. it must
always be in place and functioning properly
Check the guard to make sure it is functioning properly
a Pass a tf4" thick piece of wood over the cutter head between the
guard and fence The guard must return automatically
Open the cutter guard ali the way until it stops and release
it several times it should always t"eturn to its orlg]na_
position
_Ak CAUTION: iF THE CUllER GUARD FALLS TO OPERATE
PROPERLY, THE CUTTER GUARD RETURN SPRING
WILL NEED REPLACING. CONTACT YOUR NEAREST
SEARS STORE OR SERVICE CENTER FOR REPLACE-
MENT SPRING AND INSTRUCTIONS BEFORE USING
THE JOINTER-PLANER.
4. GUARD STOP
The Craftsman JointedPlaner comes equipped with a cutter guard
stop assembly to improve safety and reduce risk of injury. Be sure to
read and understand all instructions in the ASSEMBLY and BASIC
JOINTERIPLANER OPERATION sections before operating this tool
5. ON-OFF SWITCH
The operating positions of the "On-Off" switch are located on the
front of your Jointer-Planer. Push the switch up to turn your Jolnter-
Planer "on" and down to turn your Jolnter--Planel "off". The switch
has a switch key which, when removed, allows the switch to be lock-
ed in the "off" position To activate the locking feature push switch
to "off" posttlon and pull switch key.
WARNING: BE SURE SWITCH iS iN THE "OFF" POS]T1ON
t_lL BEFORE PLUGGING JOINTER-pLANER INTO POWER SOURCE
FAILURE TO DO SO COULD RESULT _N ACCtDENTAL
STARTING CAUSING SERIOUS iNJURY
\
_SWITCH
SWITCH KEY
9
Loading ...
Loading ...
Loading ...