Loading ...
Loading ...
Loading ...

Connecting a MIDI Device
15
2. Refer to the Roland website for system requirements.
Roland website: http://www.roland.com/ As an
alternative, you can connect the BK-3s MIDI OUT and MIDI
IN sockets to a MIDI interface and connect the latter to
your computer.
If the computer doesn’t ‘see’ the BK-3
Normally, you don’t need to install a driver in order to connect the BK-3 to
your computer. However, if some problem occurs, or if the performance is
poor, using the Roland original driver may solve the problem.
For details on downloading and installing the Roland original driver, refer
to the Roland website:
http://www.roland.com/
Specify the USB driver you want to use, and then install the driver. For
details, refer to “USB Driver” (p. 52).
NOTE
• To avoid the risk of malfunction and/or damage to external
speakers, always turn the volume all the way down and switch o
the power on all devices before you make any connections.
• Only MIDI data can be transmitted and received via USB. Audio data
for a song recorded on the BK-3cannot be transmitted or received.
• Switch on the power to the BK-3 before you start up the MIDI
application on your computer. Never turn the BK-3’s power on/o
while your MIDI application is running.
Connecting an Optional Footswitch
or Hold Pedal
The BK-3 provides a PEDAL HOLD/SWITCH jack to which you can connect
an optional footswitch (Roland DP-series or BOSS FS-5U).
You can select the function that the footswitch should perform (p. 52).
By default, the footswitch will control the “Hold” function.
Connecting a MIDI Device
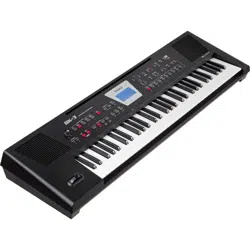
The BK-3 can transmit and receive performance data when connected to
an external MIDI device, which enables the two devices to control each
other’s performance.
Connection example
If you use a MIDI cable to connect this unit’s MIDI OUT connector to the
MIDI IN connector of your external MIDI sound module, you’ll be able to
produce sound on the external MIDI sound module by playing this unit’s
keyboard. As necessary, set the external MIDI sound module’s receive
channel to match this unit’s MIDI transmit channel.
MIDI channels
MIDI provides sixteen channels, numbered 1~16. Even if two MIDI devices
are connected, you won’t be able to select or play sounds on the other
device unless both devices are set to the same MIDI channel.
The BK-3 is capable of receiving on all channels, 1~16.
NOTE
Before making connections with other devices, you must turn
down the volume of all devices and turn o the power to avoid
malfunctions or speaker damage.
Connecting the BK-3 to Your
Computer
If you use a USB cable (commercially available) to connect the COMPUTER
port located on the BK-3’s rear panel to the USB port of your computer,
you’ll be able to do the following things:
• Use the BK-3 as a sound module.
• By transferring MIDI data between the BK-3 and your sequencer
software, you’ll be able to enjoy a wide range of possibilities for music
production and editing.
1. Use a standard USB cable (AgB-type connectors,
commercially available) to connect the BK-3 to your
computer as shown below.
What is MIDI?
MIDI, short for “Musical Instrument Digital Interface,” was developed
as a universal standard for the exchange of performance data
among electronic musical instruments and computers.
The BK-3 is equipped with MIDI connectors to let it exchange
performance data with external devices. These connectors can be
used to connect the unit to an external device for even greater
versatility.
BK-3 MIDI sound module/
sequencer
Using the BK-3 to play your MIDI sound module
Playing the BK-3’s sounds from your MIDI sequencer
Loading ...
Loading ...
Loading ...
