Loading ...
Loading ...
Loading ...

10
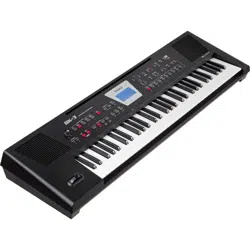
4. Panel Description
Left Front Panel
1
Pitch Bend/Modulation lever
You can raise or lower the pitch by moving this lever to the left
or right. Push the lever away from yourself to apply modulation
(normally vibrato) to the sound.
2
VOLUME knob
Use this knob to set BK-3’s global output volume (all signals
transmitted to the speakers and PHONES/OUTPUT sockets).
3
RHYTHM FAMILY buttons
These buttons are used to select the family of the next rhythm you
want to use. Pressing one of these buttons calls up a list of all rhythms
contained in the selected family. Pressing and holding this button
locks the currently selected rhythm (p. 39).
4
TAP TEMPO button
Pressing this button several times allows you to change the current
rhythm or song tempo to the value calculated from the speed at
which the button is pressed.
5
TEMPO buttons
These buttons can be used to decrease or increase the tempo of the
currently selected rhythm or song. Pressing them together recalls the
rhythm or song stored tempo value.
MEMO
You can also use the [TAP TEMPO] button to set the desired tempo
6
SYNC START button
This button is used to activate or switch o the BK-3’s Sync Start or
Sync Stop function. If it is on, rhythm playback can be started or
stopped by simply playing a note or chord on the keyboard. (p. 22).
While a song le is selected, this button stops playback.
7
BALANCE buttons
These buttons allow you to set the balance between the rhythms and
songs (BACKING) and the real-time parts (KEYBOARD).
8
BASS INV button
This button is used to switch the Bass Inversion function on and o (p.
23).Press and hold it while pressing the [AUTO FILL IN] button you
will activate/deactivate the Visual Control (p. 61).
9
AUTO FILL IN button
This button is used to activate the Auto Fill-In function, which causes
a transition to be played before selecting the new rhythm variation
(which is selected with the VARIATION buttons). Press and hold it
while pressing the [BASS INV] button you will activate/deactivate the
Visual Control (p.61).
10
VARIATION 1/2/3/4 buttons
These buttons are used to select a rhythm “Variation”, i.e. a simpler or
more complex arrangement of the selected rhythm. When a song is
selected the MARK buttons (Variation3/4) allow you to set and use
playback loops. See “Loop function (MARK A/B)” (p. 30).
11
INTRO button
When you activate this button, rhythm playback starts with a musical
introduction whose complexity depends on which VARIATION button
currently lights (there are four dierent introductions per rhythm).
After selecting a song le, this button allows you to rewind.
12
ENDING button
When you activate this button, rhythm playback stops with a musical
ending whose complexity depends on which VARIATION button
currently lights (there are four dierent ending phrases per rhythm).
After selecting a song le, this button allows you to fast-forward.
13
START/STOP button
This button allows you to start and stop rhythm playback. If you select
a song, it starts and temporarily stops (pause) song playback.
1
2
3
4
5
6
7 8 9
10 11 12 13
Loading ...
Loading ...
Loading ...