Loading ...
Loading ...
Loading ...

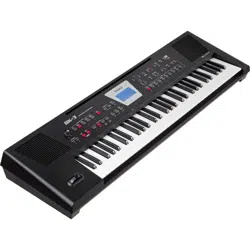
Panel Description
12
27
KEYBOARD SPLIT button
This button allows you to split the keyboard in two halves: the
left half is then used to provide the Rhythm function with chord
information, while the right half allows you to play melodies with
Upper (UPP) part (p.19). If the dual function is active ([DUAL]
button lights) the left half of the keyboard plays the Lower (LWR)
part too.
Pressing and holding this button calls up a display page where you
can select the split parameters.
Simultaneously pressing this button and [KEYBOARD DUAL] button
(without holding them) opens the display page where you can set
the volume of the Upper and Lower parts.
28
KEYBOARD DUAL button
Lets you play the Upper (UPP) and Lower (LWR) part
simultaneously. (p. 19)
Pressing and holding this button calls up a display page where you
can change the tone of the Lower part.
Simultaneously pressing this button and [KEYBOARD SPLIT] button
(without holding them) opens the display page where you can set
the volume of the Upper and Lower parts.
29
OCTAVE buttons
These buttons allow you to transpose the current selected part
(UPP, LWR) up or down in octave steps.
30
MELODY INTELL button
This buttons is used to add an automatic countermelody (second
or third voice) to your solos or melodies.
Pressing and holding it calls up a display page where you can view
the “Melody Intelligent” parameter.
31
FAVORITE button
Press this button if you want to use the [TONE] buttons to recall
your favorite sounds (p. 21).
32
NUMERIC button
Press this button if you want to use the [TONE] buttons to enter
numeric values (p. 20).
33
TONE buttons (Tone selection)/[0]~[9] (numeric buttons)
These buttons allow you to select Tones by category (p. 19).
You can also use them to input numeric values. To do so, rst
activate the [NUMERIC] button.
Pressing and holding any of these buttons locks the Tone (p. 39).
Rear Panel
1
POWER switch
Turns the power on/o (p. 16).
With the factory settings BK-3’s power will automatically be
switched o 30 minutes after you stop playing or operating the
BK-3.
If BK-3’s power has been turned o automatically, you can use the
[POWER] switch to turn the BK-3 back on. If you don’t want the
power to turn o automatically, set the “Auto O” parameter to
“OFF” (p. 52).
2
DC IN socket
Connect the supplied PSB-1U AC adapter here (p. 14).
3
PEDAL HOLD/SWITCH
Connect a separately available pedal switch (Roland DP-series), a
separately available foot switch (BOSS FS-5U).
4
MIDI IN & OUT sockets
You can connect MIDI devices to these sockets (p. 15).
7654321
5
PHONE/OUTPUT
This socket allows you to connect an optional headphone (Roland
RH-series) or connect the BK-3 to an external audio equipment.
For more information see “Connecting Headphones and External
Audio Equipment” (p. 14).
NOTE
When you use the PHONES/OUTPUT jack to connect
keyboard amplier, stereo system, or other stereo
audio device, you can activate the internal speakers by
“Speaker Mode” parameter (p. 51).
6
USB COMPUTER port
Use a USB cable to connect the BK-3 to your computer via this
connector (p. 15).
7
USB MEMORY port
Connect an optional USB memory here.
NOTE
* Carefully insert the USB memory all the way in-until it is rmly in place.
* Use USB memory sold by Roland. We cannot guarantee operation if any
another USB memory is used.
* Roland does not recommend using USB hubs, irrespective of whether they
are active or passive. Please connect only one USB memory to this port.
Loading ...
Loading ...
Loading ...