Loading ...
Loading ...
Loading ...
Additional Safety Instructions
Rip Type Cuts.
oNever use the miter gauge when ripping
oUse a push stick whenever the fence is 2 or more
inches from the blade
* When thru-sawing, use an auxiliary fence and push
block whenever the fence must be between 1/2 and 2
inches of the blade
oNever thru_saw rip cuts narrower than 1/2 inch (See
"Basic Saw Operations-Ripping and Bevel Ripping"
sections,)
• Never rip anything shorter than 10" long
. When using a push stick or push block, the trailing end
of the board must be square A push stick or block
against an uneven end could slip off or push the work
away from the fence
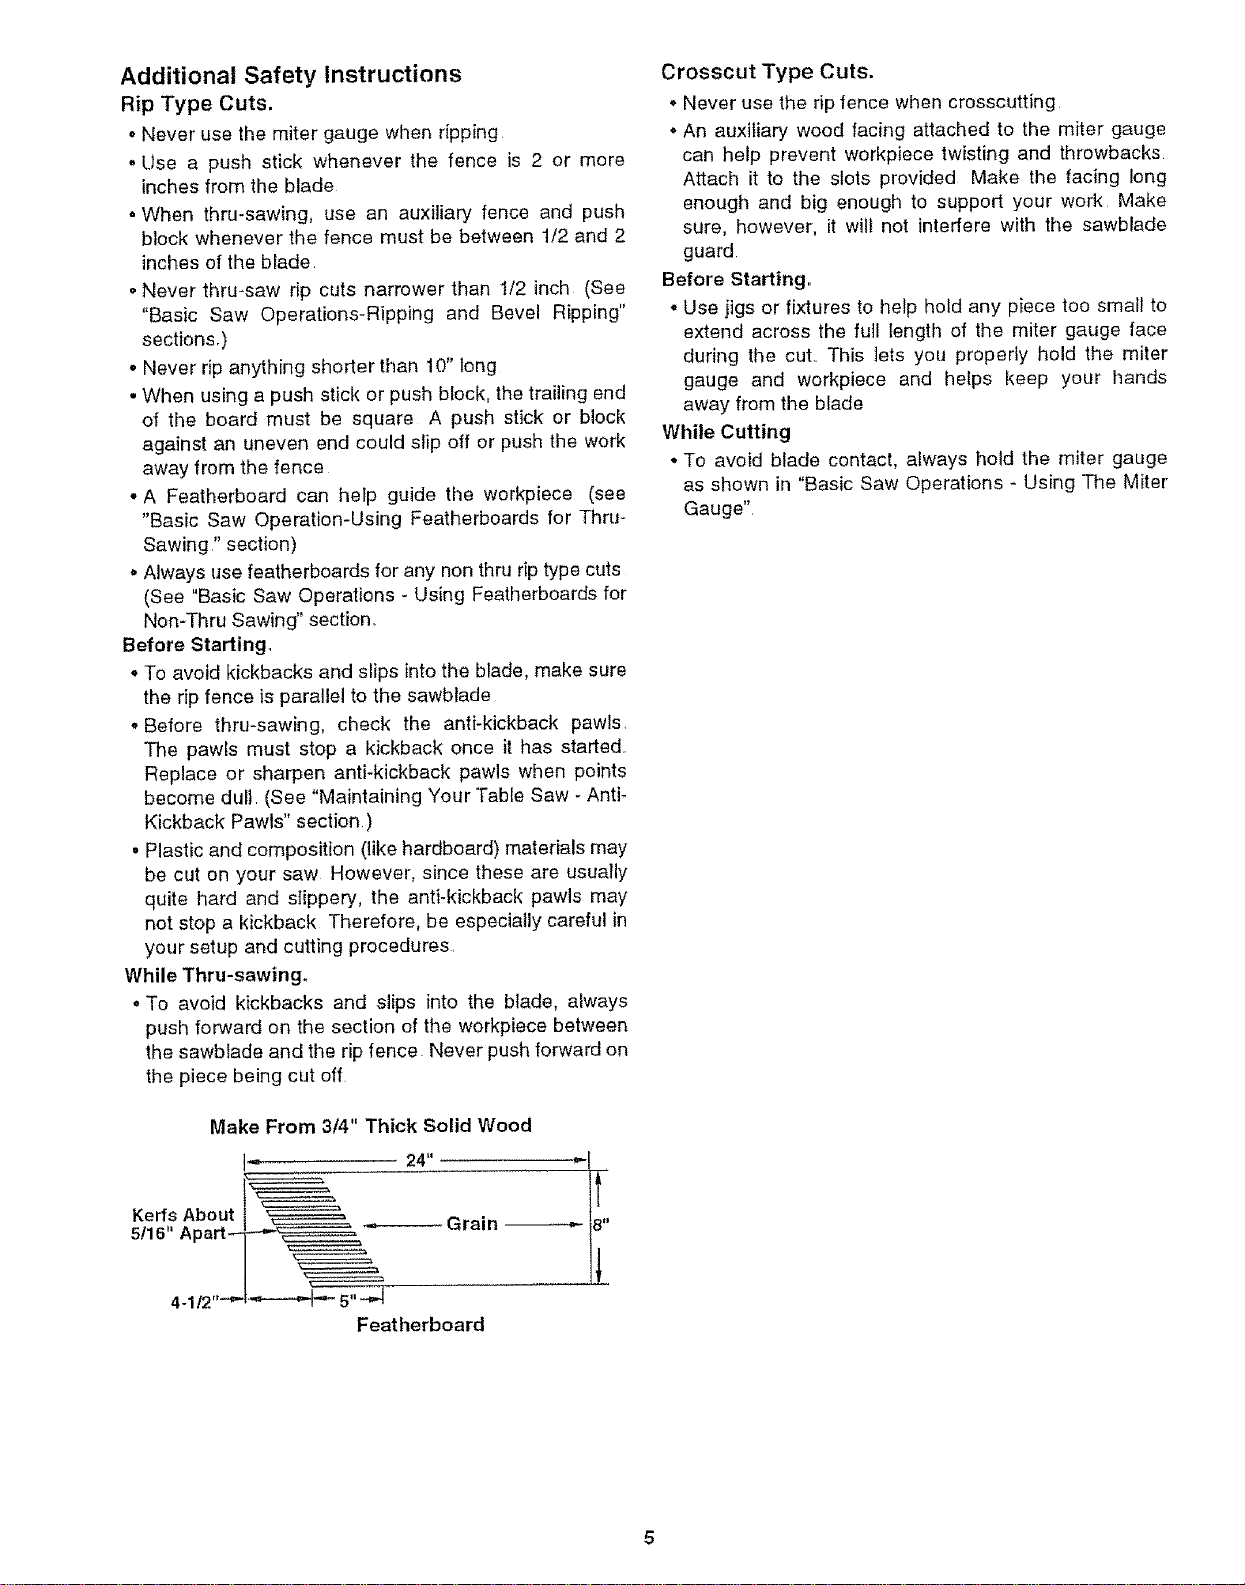
• A Featherboard can help guide the workpiece (see
"Basic Saw Operation-Using Featherboards for Thru-
Sawing" section)
oAlways use featherboards for any non thru rip type cuts
(See "Basic Saw Operations - Using Featherboards for
NomThru Sawing" section,
Before Starting,
o To avoid kickbacks and slips into the blade, make sure
the rip fence is parallel to the sawblade
oBefore thru-sawing, check the anti-kickback pawls
The pawls must stop a kickback once it has started.
Replace or sharpen antFkickback pawls when points
become dul} (See "Maintaining Your Table Saw - AntF
Kickback Pawls" section )
. Plastic and composition (like hardboard) materials may
be cut on your saw However, since these are usually
quite hard and sIippery, the anti-kickback pawls may
not stop a kickback Therefore, be especially careful in
your setup and cutting procedures,
While Thru-sawing.
• To avoid kickbacks and slips into the blade, always
push forward on the section of the workpiece between
the sawblade and the rip fence Never push forward on
the piece being cut off
Make From 3/4" Thick Solid Wood
Kerfs About
5116" Apart_
4.1/2,,-_-
24" _'i
it
Grain ----_
Featherboard
Crosscut Type Cuts.
o Never use the rip fence when crosscutting
o An auxiliary wood facing attached to the miter gauge
can help prevent workpiece twisting and throwbacks
Attach it to the slots provided Make the facing long
enough and big enough to support your work Make
sure, however, it wilt not interfere with the sawblade
guard
Before Starting.
* Use jigs or fixtures to help hold any piece too small to
extend across the full length of the miter gauge face
during the cut. This lets you properly hold the miter
gauge and workpiece and helps keep your hands
away from the blade
While Cutting
° To avoid blade contact, always hold the miter gauge
as shown in "Basic Saw Operations - Using The Miter
Gauge"
Loading ...
Loading ...
Loading ...