Loading ...
Loading ...
Loading ...

9
2.2.3 Test range
There are two ways to change the test range:
Method 1: Press [RANGE] key to switch between different test ranges.
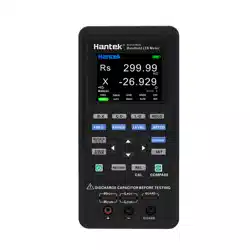
Method 2: Turn on the instrument and the measurement display is shown, press the left and right
arrow keys to move the cursor to the RANGE zone, and the up and down arrow keys to switch the
range (AUTO, 100Ω, 1kΩ, 10kΩ, 100kΩ).
2.2.4 Test speed
There are two ways to change the test speed:
Method 1: Turn on the instrument and the measurement display is shown, press [SPEED] to
switch to the next measurement speed (fast, medium, slow). Above the status bar the
corresponding measurement speed is displayed. Fast (4 times /s), Medium (2 times /s), Slow (1
time /s).
Method 2: Turn on the instrument and the measurement display is shown, press the left and right
arrow keys to move the cursor to the SPEED zone, and the up and down arrow keys to switch the
test speed.
2.2.5 Main parameters
Parameter and symbol
R: resistance C: capacitance L: inductance Z: impedance
Select the type of measurement parameter, then select the main parameter.
Press [AUTO/R/L/C/Z] key to switch the main parameters(R, L, C, Z and AUTO) in sequence.
When AUTO is selected for the main parameter, the main parameter font is shown in red.
2.2.6 Secondary parameters
Parameter and symbol
X: reactance D: dissipation factor Q: quality factor θ: phase angle
ESR: equivalent series resistance
If necessary, press [X/D/Q/θ/ESR] key to select the secondary parameter.
If the main parameter select as Auto, this key will not work.
2.2.7 Set nominal value of tolerance mode
The method of setting the nominal value is as follows:
1. Turn on the instrument and the measurement display is shown, the component with required
nominal should be placed on the test clip of the instrument.
2. Long press [COMPARE] to turn on the comparator, and the nominal value is the value of the
measured element.
The nominal value and tolerance will be displayed in the status bar as shown in the below figure.
Loading ...
Loading ...
Loading ...