Loading ...
Loading ...
Loading ...
10
TIPS WHEN USING THE FOOD PROCESSOR TO
SLICE AND SHRED
1. Assemble clear work bowl on collar and base in the
usual way. (See page 8.)
2. Use moderate pressure to push down on food with
pusher button, with one hand, while using your other
hand to push the Low or High button. Slicing and
shredding only take a few seconds.
3. Wait until disc stops spinning before removing cover.
When it stops, remove cover before removing work
bowl. Never try to remove cover and work bowl
together; this could damage work bowl.
4. Remove slicing/shredding disc before removing work
bowl. To remove it, grasp flat top section of adapter
stem and lift it straight up. Holding work bowl collar,
turn work bowl counterclockwise and lift it straight
up to remove it from base.
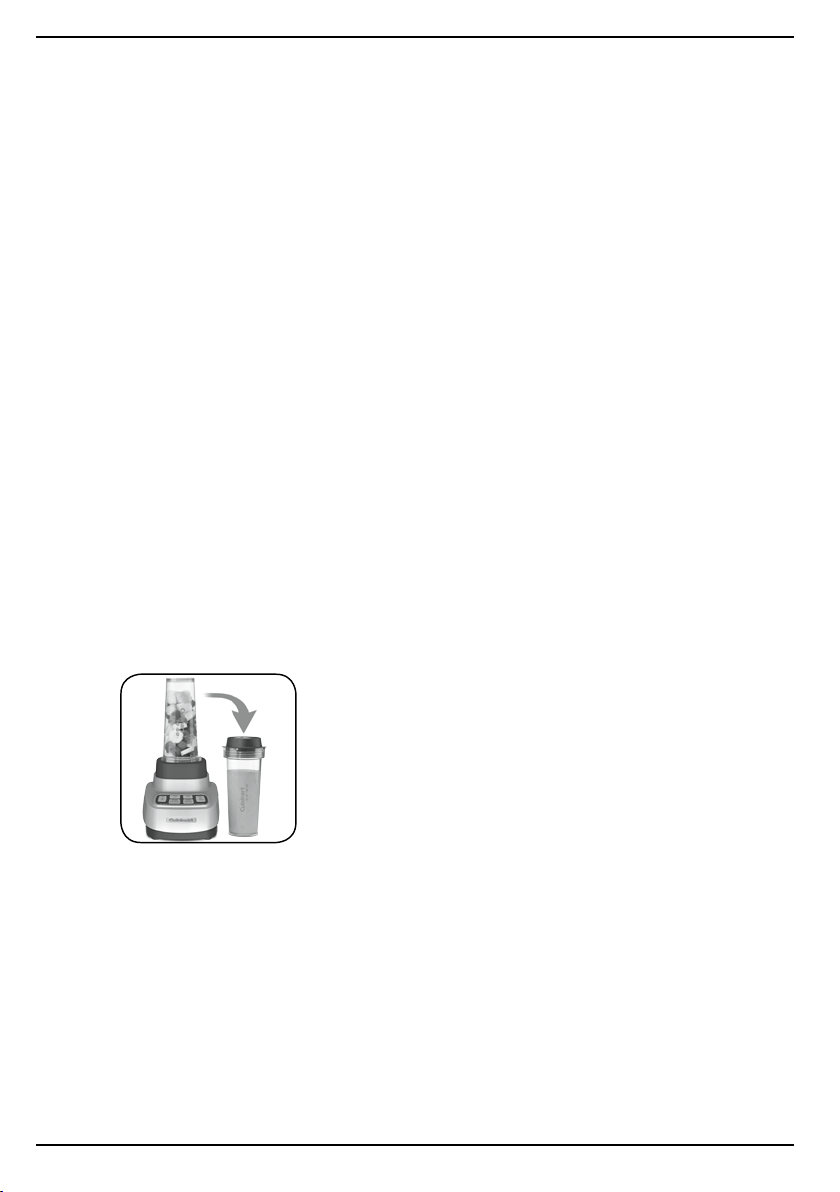
TRAVEL CUP OPERATION
1. The travel cups use the same blade assembly as the
blender jar. Put food ingredients into the travel cup,
and then attach blade assembly.
2. Place the blender base on the tabletop and plug in
the power cord. Turn the filled travel cup upside
down and place it on the base, aligning the 4 tabs on
the travel cup rim with the 4 openings on the blender
base. Using both hands, firmly push down on the
cup, and turn it clockwise to lock into place. NOTE:
To ensure cup is properly installed, check to see that
the small black button in the back-left tab opening is
fully visible.
3. Press the ON/OFF button and then the desired
speed or function. The blue LED light will illuminate,
indicating that the blender is on and running. It is
possible to switch between speeds by simply
pushing the desired speed button.
4. To pause the blending process, press the activated
speed or pre-programmed button. The blending
process will stop. The red Standby indicator light will
continue to flash to let you know that the blender is
still activated. To re-engage the unit, choose the
desired speed.
5. When you have finished blending, press the ON/OFF
button. Remove the travel cup from the base by
pressing down firmly, and turning counterclockwise.
Unplug the unit.
6. Turn cup right side up, turn blade assembly
counterclockwise to remove. Attach travel cup lid by
twisting clockwise.
RECIPE TIPS
You’ll find many easy ways to prepare savory, healthful
meals with your Cuisinart
®
VELOCITY Ultra Trio 1 HP
Blender/Food Processor with Travel Cups. The simple
recipes that follow include some old Cuisinart favorites as
well as some creative combinations that are sure to
please your friends and family. Thanks to the superior
ice-crushing power of the Cuisinart
®
VELOCITY Ultra Trio
1 HP Blender/Food Processor with Travel Cups, you’ll
also be able to make delicious frozen drinks.
• When using the blender to purée hot mixtures such as
creamed soups and baby foods, strain the solids from
the liquid, reserving the cooking liquid. Then put a
portion of the reserved cooking liquid into the blender
jar along with the cooked solids. Blend on Low until
desired consistency/purée is reached.
• Allow hot foods to cool slightly before blending to
prevent steam buildup, which may cause the lid to lift
up from the blender jar. When blending hot foods,
remove the measured pour lid and hold lid down with
a dishtowel in hand to hold in place.
• Keep ice cubes made of juices, yogurt, milk or fruit
purées on hand to substitute for plain ice when
making smoothies and frosty beverages to prevent
diluting the drink.
• Keep your blender out on the counter within easy
reach, and you will be surprised how often you will
use it.
• For quick cleaning, add 1 cup of warm water and a
drop of liquid dish soap to the blender jar. Cover and
run on Low or High for 15 to 30 seconds, or more as
needed. Discard the soapy water and rinse blender
thoroughly before the next use.
• When using the travel cups, ingredients should be
added in the reverse order of a regular blender jar —
solids first, then liquids.
Loading ...
Loading ...
Loading ...