Loading ...
Loading ...
Loading ...
14
E. MODE BUTTON
Press the Mode button to switch among the o perating option s. The corresponding indicator will light up:
Heat (on some models) – Heat the room to the set temperature
Cool – Cool the room to the set temperature
Dehum – Reduce the humidity in t he room
Fan – Circulate the air in the room without cooling
F. POWER BUTTON
Turn ON/OFF the power to th e air conditio ner.
NOTE: Turning off power by pressing the Power button does NOT disconnect the applia nce from the po wer sup p
ly.
•
Press the Power button. The Power indicator will light up.
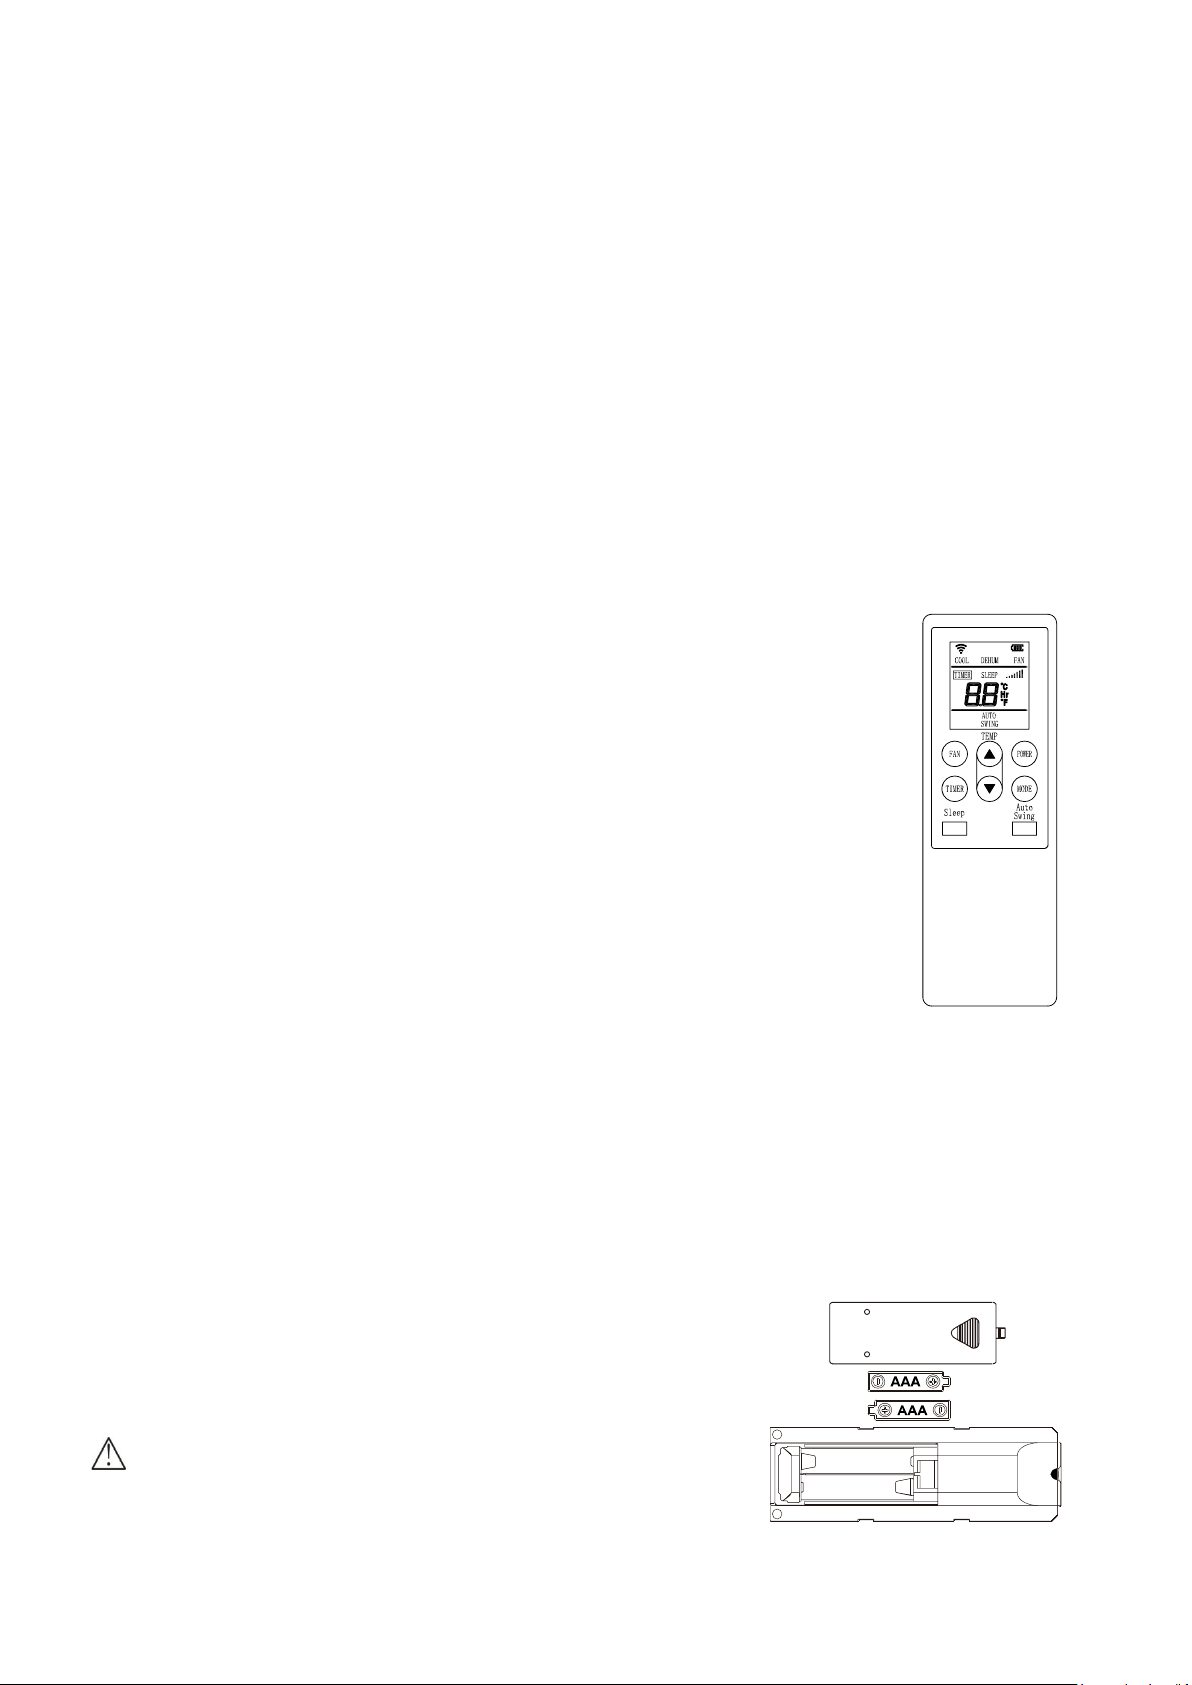
REMOTE CONTROL
1) Power On and Off - When the unit is plugged in, press the POWER button to tu r n on the unit. Press the POWER
button once more to turn off the unit.
2) Press the Mode Button to switch among the operating options. The corresponding indicator will light up:
Heat (on some models) - Heat t he room to the set temperature
Cool – Cool th e room to the set temperature
Dehum – Reduce the humidity in the room
Fan – Circul
ate the air in the room without cooling
3) Fan Speed – Press the Fan button to adjust the fan speed. When the unit is in Dehumidif
y
mode, the fan speed cannot be chan ged .
4) Temperature Setting – When the unit is in cool mod e, you can select your desired
temperature. Press the ▲ or ▼ to select your desired temperature setting.
5) SLEEP button
Increase the set temperature by 1
℉
(1
℃
) after 2 hours, and then increase the
temperature by an additio nal 1
℉
(1
℃
) after a nother 2 hours.
NOTE: The fan will operate at Low speed and cannot be adjusted while in Sleep mode.
Press the Sleep button to enter Sleep mode. The Sleep
indicator will light up.
To Cancel Sleep Mode:
• Press the Sleep button or the Mode button on the remote control.
6) TIMER
Auto-On: Press the TIMER button when the unit is off to set up the Auto-on timer. Press the
▲
or
▼
to set timer
within 1-24 hours.
Auto-Off: Press the TIMER button when the unit is on to set up the Auto-off t imer. Press the ▲ or ▼ to set timer
within 1-24 hours. To cancel the timer, p ress the TIMER button until the timer mode is turned off.
7)
Open and close the lo uvers t o
direct the airflow.
NOTE:
Insert two AAA batteries.
Do not use rechargeable batteries.
When replacing the battery, please replace 2 batteries at the same
time. Do not mix old batteries with new ones.
If you do not use this unit for a long time, please take out the battery
of the remote control and store it properly.
WARNING
If the batt ery liquid of th e remote control leaks on your skin or
clothes, please rinse with plenty of water as soon as possible; if you
Auto Swing
Loading ...
Loading ...
Loading ...