Loading ...
Loading ...
Loading ...
Rinnai 27 ES_FT_OIM
HEATER INSTALLATION
1. UNPACKING THE APPLIANCE
The heater is supplied in one carton containing; Heater, Standard Rear Cover Set and Bolt Pack (refer to the
“CARTON CONTENTS / ITEM CHECKLIST” on page 4 for a full list of the items packed with each heater model).
Remove all packaging materials and check for damage. If any damage is evident DO NOT install or operate this
appliance and contact your supplier for advice.
Before installing the heater, check it is labelled for the correct gas type, (refer to the data label at the rear of the
heater). Refer to the local gas authority for confirmation of gas type if you are in doubt.
2. CONNECTING THE APPLIANCE TO THE CONSUMER GAS PIPE
1. Remove the plastic protection cap from the
threaded gas inlet located at the rear of the
appliance.
2. Position the appliance gas inlet in line with gas
supply from wall.
3. Attach gas supply pipe to the appliance gas inlet
and tighten - finger tight. Appliance has R1/2
fitting.
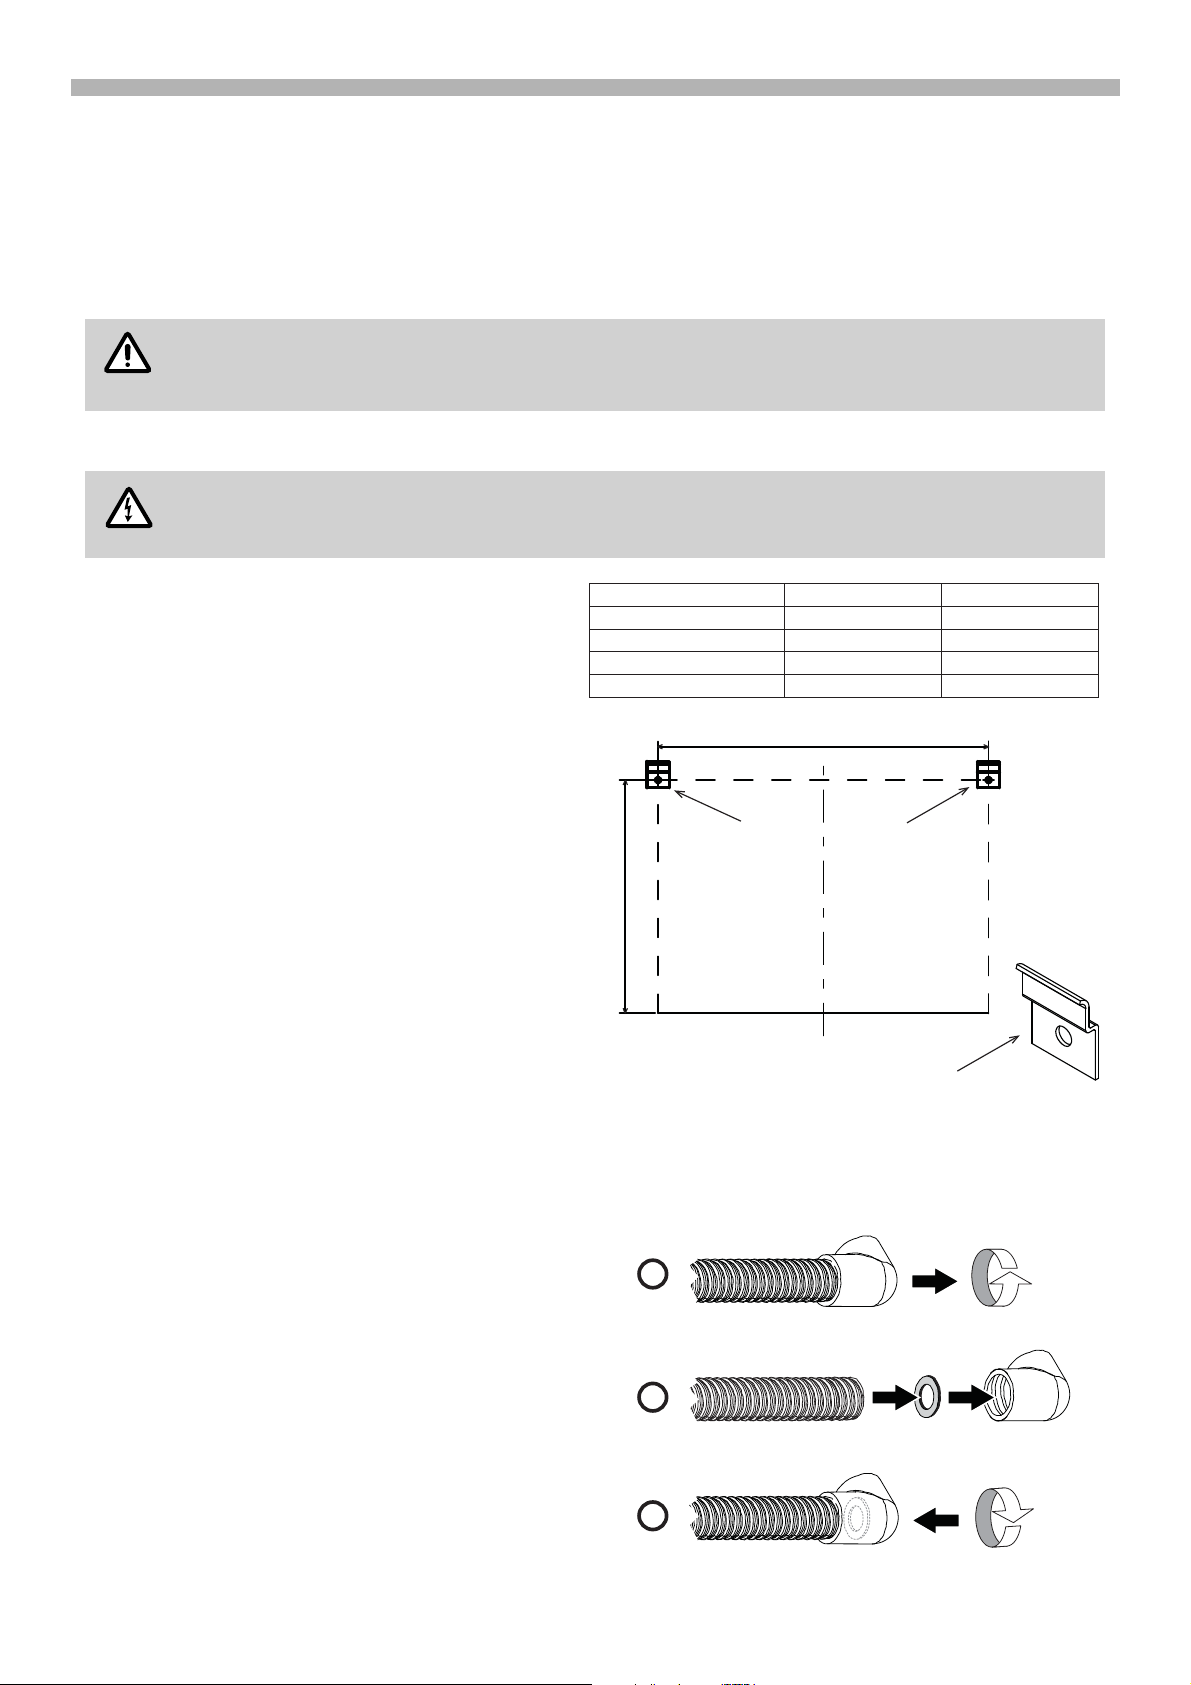
4. On the wall behind the appliance, at a level of
about midway of the heaters height, mark the
vertical centre line of the heater, marked as “ ”
(centre line) in accordance the table and the
diagram below.
5. Mark the flue penetration position in accordance
with ‘Energysaver Space Heater Co-Axial Flue
System Installation’ manual.
6. Undo the gas connection, remove the heater.
7. Cut flue penetration(s)
8. Mark out the securing bracket screw holes in
accordance with the table and the diagram right,
using the appliance’s centre line as reference.
9. Attach the two securing brackets supplied to the
wall using the two 8g x 30mm screws supplied, or
suitable equivalent refer to diagram A.
10. For RHFE-309FT and RHFE-559FT - direct flue
kit `ESDFK´ installations ONLY install air intake
baffle ring as follows:
i. Unscrew the air intake elbow from the air intake
hose (left handed thread, clockwise to undo).
ii. Insert the air intake baffle ring into the
appliance end of the air intake elbow.
iii. Screw the air intake hose back into the air
intake elbow (left handed thread, anti-
clockwise to tighten), ensuring that the air
intake baffle ring is seated flush against the
end of the air intake hose.
The heater does not come supplied with flue components. These are purchased separately and
ONLY Rinnai Energysaver Co-Axial Flue System Flue components can be used with this
appliance.
240 VOLTS RISK OF ELECTRICAL SHOCK!
ISOLATE THE ELECTRICITY SUPPLY FROM THE APPLIANCE BEFORE CONTINUING.
N OT E
WARN I N G
A
B
C
L
Floor Level
Heater Centre Line
Securing brackets
Securing brackets
i
ii
iii
Model A B
RHFE-309FT 250 mm 624 mm
RHFE-559FT 350 mm 537 mm
RHFE-561FT 280 mm 688 mm
RHFE-1005FT / FDT 875 mm 622 mm
C
L
Loading ...
Loading ...
Loading ...