Loading ...
Loading ...
Loading ...
14
Bench Mount (B) Models
1. Check that all the feet are fitted and adjust to make the hob steady and level.
Optional Accessories (Refer to Replacement Parts List)
Plinth Kit. For installation details, refer to the instructions supplied with each kit.
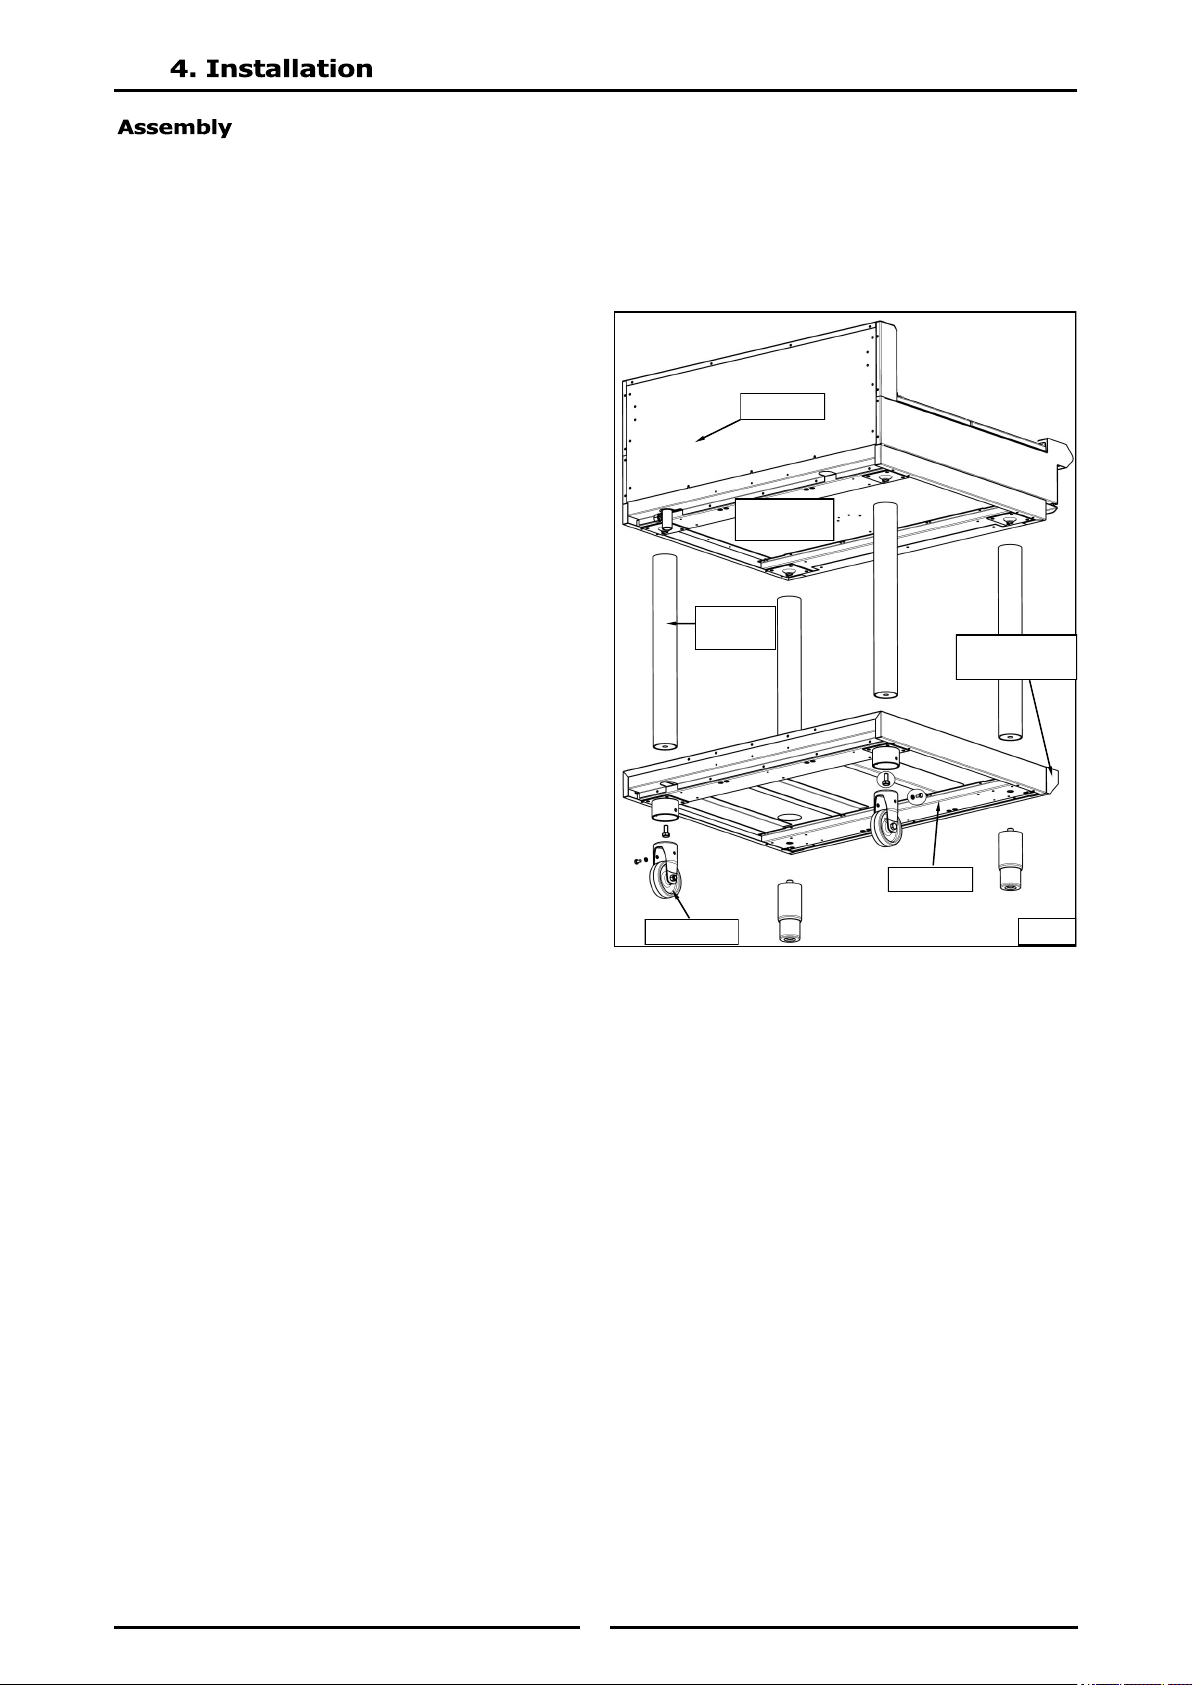
Leg Stand (LS) Models Only
1. Lower the appliance onto its rear face.
2. Attach the four Cooktop legs to the leg
mount points on the underside of the
Cooktop unit.
3. Secure each leg hand tight.
4. Align the 4 round holes in the corners of
the base tray with the 4 Cooktop legs
already fitted. (Ensure that the base
tray is orientated with the sloping edge
of the base tray facing the front of the
appliance).
5. Slot the base tray onto the 4 Cooktop
legs and push fully home.
6. Secure the base tray to the front cooktop
legs by screwing the adjustable feet
supplied, into the base of the front
cooktop legs. Secure each adjustable
foot, hand tight.
7. Fit the rear rollers to the rear leg ring
plates and secure using the locating bolts
supplied and tighten bolts using a 10mm
spanner.
8. Lift the Cooktop back onto its legs.
NOTE: This appliance is fitted with adjustable
feet / rear rollers to enable the appliance to
be positioned securely and level. This
should be carried out on completion of the
electrical connection. Refer to the
‘Electrical Connection’ section.
All Other Models
All other models come pre-assembled.
Fig 1
Sloping Edge
of Base Tray
Rear Roller
Base Tray
Cooktop
Legs
Leg Mount
Points
Cooktop
Loading ...
Loading ...
Loading ...