Loading ...
Loading ...
Loading ...
2B
3B
3B
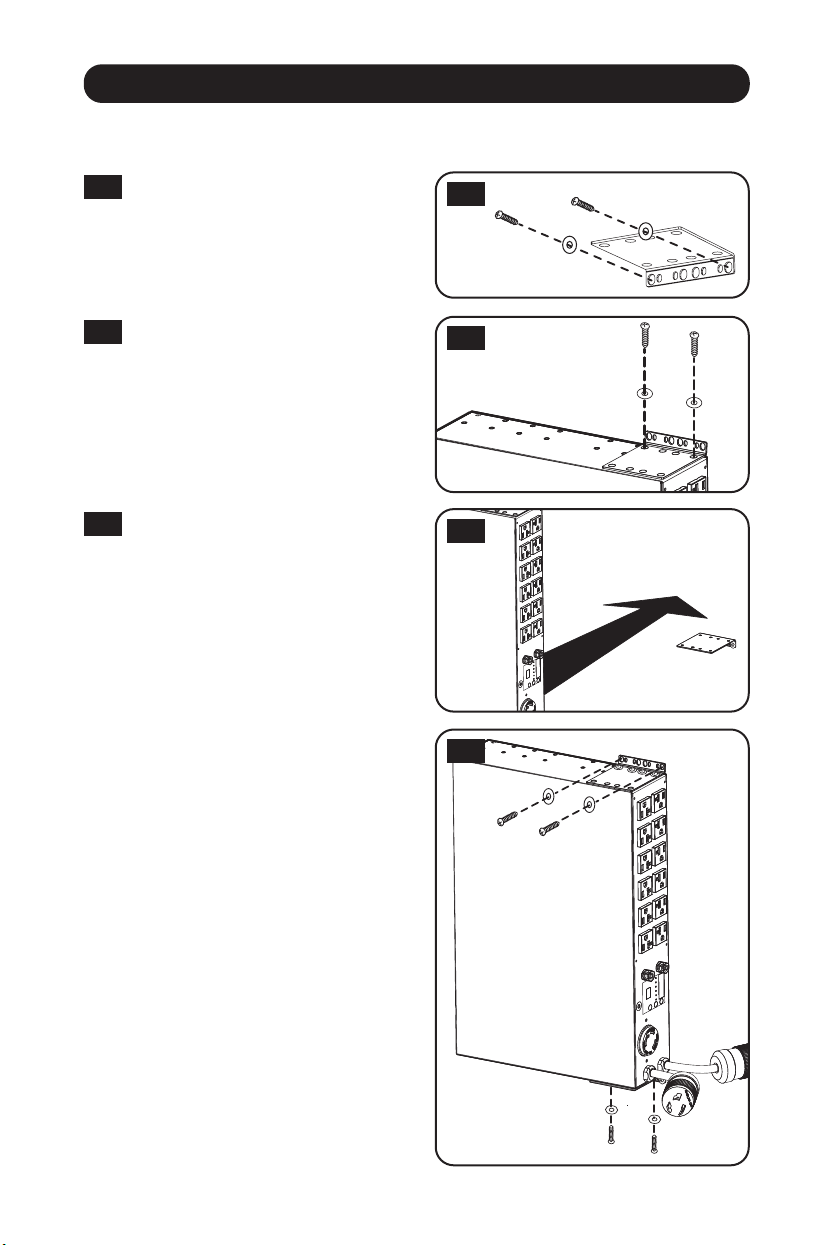
Installation
1B
5
Wall Mounting (not applicable to series AG-0151 for PDUMH32HVAT,
PDUMNH32VAT2 or PDUMH32HVATNET)
1B
Attach one of the supplied
mounting brackets to the wall with
user-supplied screws. Make sure
screws and any other hardware are
appropriate for the surface type.
2B
Attach a mounting bracket to the
PDU with the included screws.
3B
Place the PDU on the wall-mounted
bracket and secure the PDU to the
bracket and wall as shown.
Loading ...
Loading ...
Loading ...