Loading ...
Loading ...
Loading ...
IMPORTANT: Never jump your tractor's dead battery
with the battery of a running vehicle.
• Connect end of one jumper cable to the positive
terminal of the good battery, then the other end to
the positive terminal of the dead battery.
• Connect the other jumper cable to the negative
terminal of the good battery, then to the frame of
the unit with the dead battery.
WARNING: Failure to use this procedure
could cause sparking, and the gas in either
battery could explode.
Cleaning
Clean the battery by removing it from the tractor and
washing with a baking soda and water solution. If
necessary, scrape the battery terminals with a wire
brush to remove deposits. Coat terminals and exposed
wiring with grease or petroleum jelly to prevent
corrosion.
BatteryFailures
Some common causes for battery failure are:
• incorrect initial activation • undercharging
• overcharging • corroded connections
• freezing
These failures are NOT covered by your tractor's
warranty.
Tires
Recommended operating tire pressure is
approximately 10 p.s.i. Maximum tire pressure under
any circumstances is 30 p.s.i. Equal tire pressure
should be maintained on all tires.
When installing a tire to the rim, be certain rim is clean
and free of rust. Lubricate both the tire and rim
generously. Never inflate to over 30 p.s.i, to seat
beads.
,_ WARNING: Excessive pressure (over 30
p.s.i.) when seating beads may cause tire/rim
assembly to burst with force sufficient to
cause serious injury.
BeltReplacement
WARNING: Shut the engine off, remove
ignition key, set the parking brake, disconnect
the spark plug wire(s) and ground against the
engine to prevent unintended starting before
replacing belts.
For performing service on your tractor and in order to
properly mount some (separately available)
attachments, it may be necessary to remove the
tractor's cutting deck. To due so, proceed as follows:
BeckBelt(38- and42-inch Decks)
WARNING: Shut the engine off, remove
ignition key, set the parking brake, disconnect
the spark plug wire(s) and ground against the
engine to prevent unintended starting before
removing the cutting deck.
_ ARNING: Always wear safety glasses or
safety goggles to protect your eyes while
removing the cutting deck.
• Remove the cutting deck from the tractor (Refer to
CuttingDeckRemovalon page 22, for detailed
instructions).
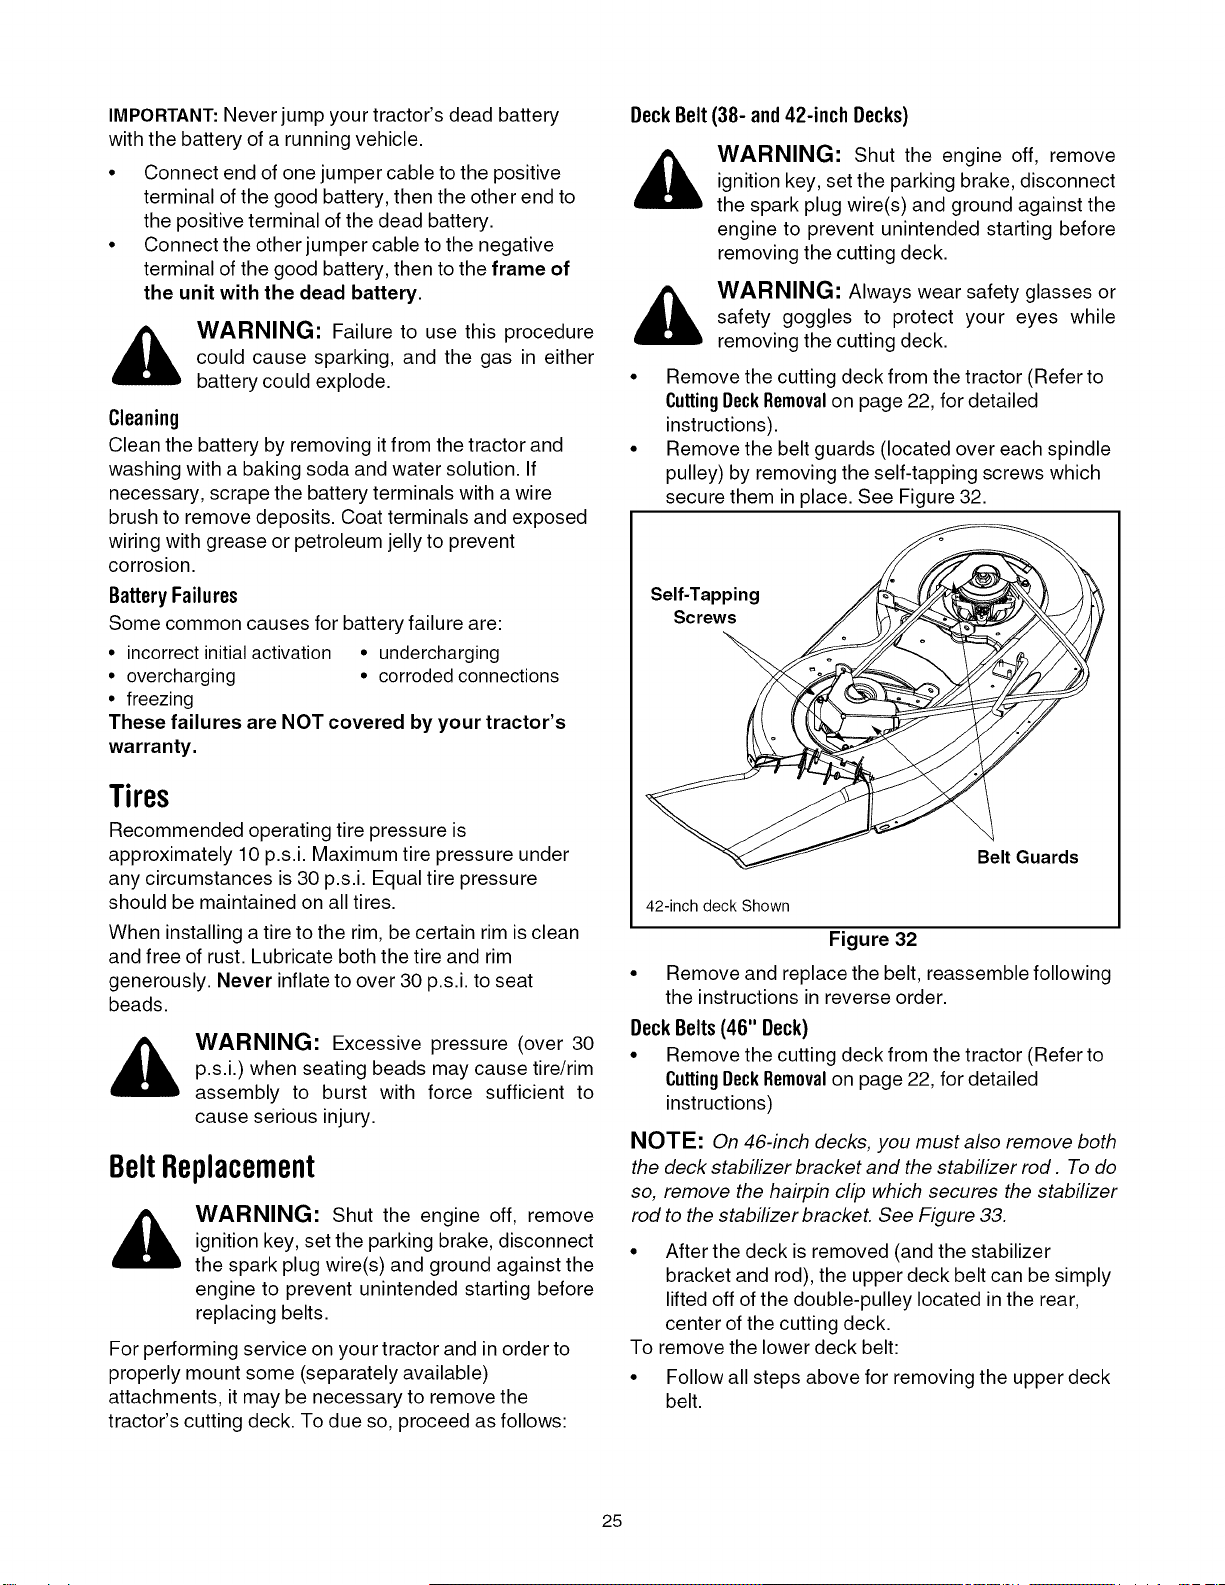
• Remove the belt guards (located over each spindle
pulley) by removing the self-tapping screws which
secure them in place. See Figure 32.
Self-Tapping
Screws
Belt Guards
42-inch deck Shown
Figure 32
• Remove and replace the belt, reassemble following
the instructions in reverse order.
DeckBelts(48" Deck)
• Remove the cutting deck from the tractor (Refer to
CuttingDeckRemovalon page 22, for detailed
instructions)
NOTE: On 46-inch decks, you must also remove both
the deck stabilizer bracket and the stabilizer rod. To do
so, remove the hairpin clip which secures the stabilizer
rod to the stabilizer bracket. See Figure 33.
• After the deck is removed (and the stabilizer
bracket and rod), the upper deck belt can be simply
lifted off of the double-pulley located in the rear,
center of the cutting deck.
To remove the lower deck belt:
• Follow all steps above for removing the upper deck
belt.
25
Loading ...
Loading ...
Loading ...