Loading ...
Loading ...
Loading ...
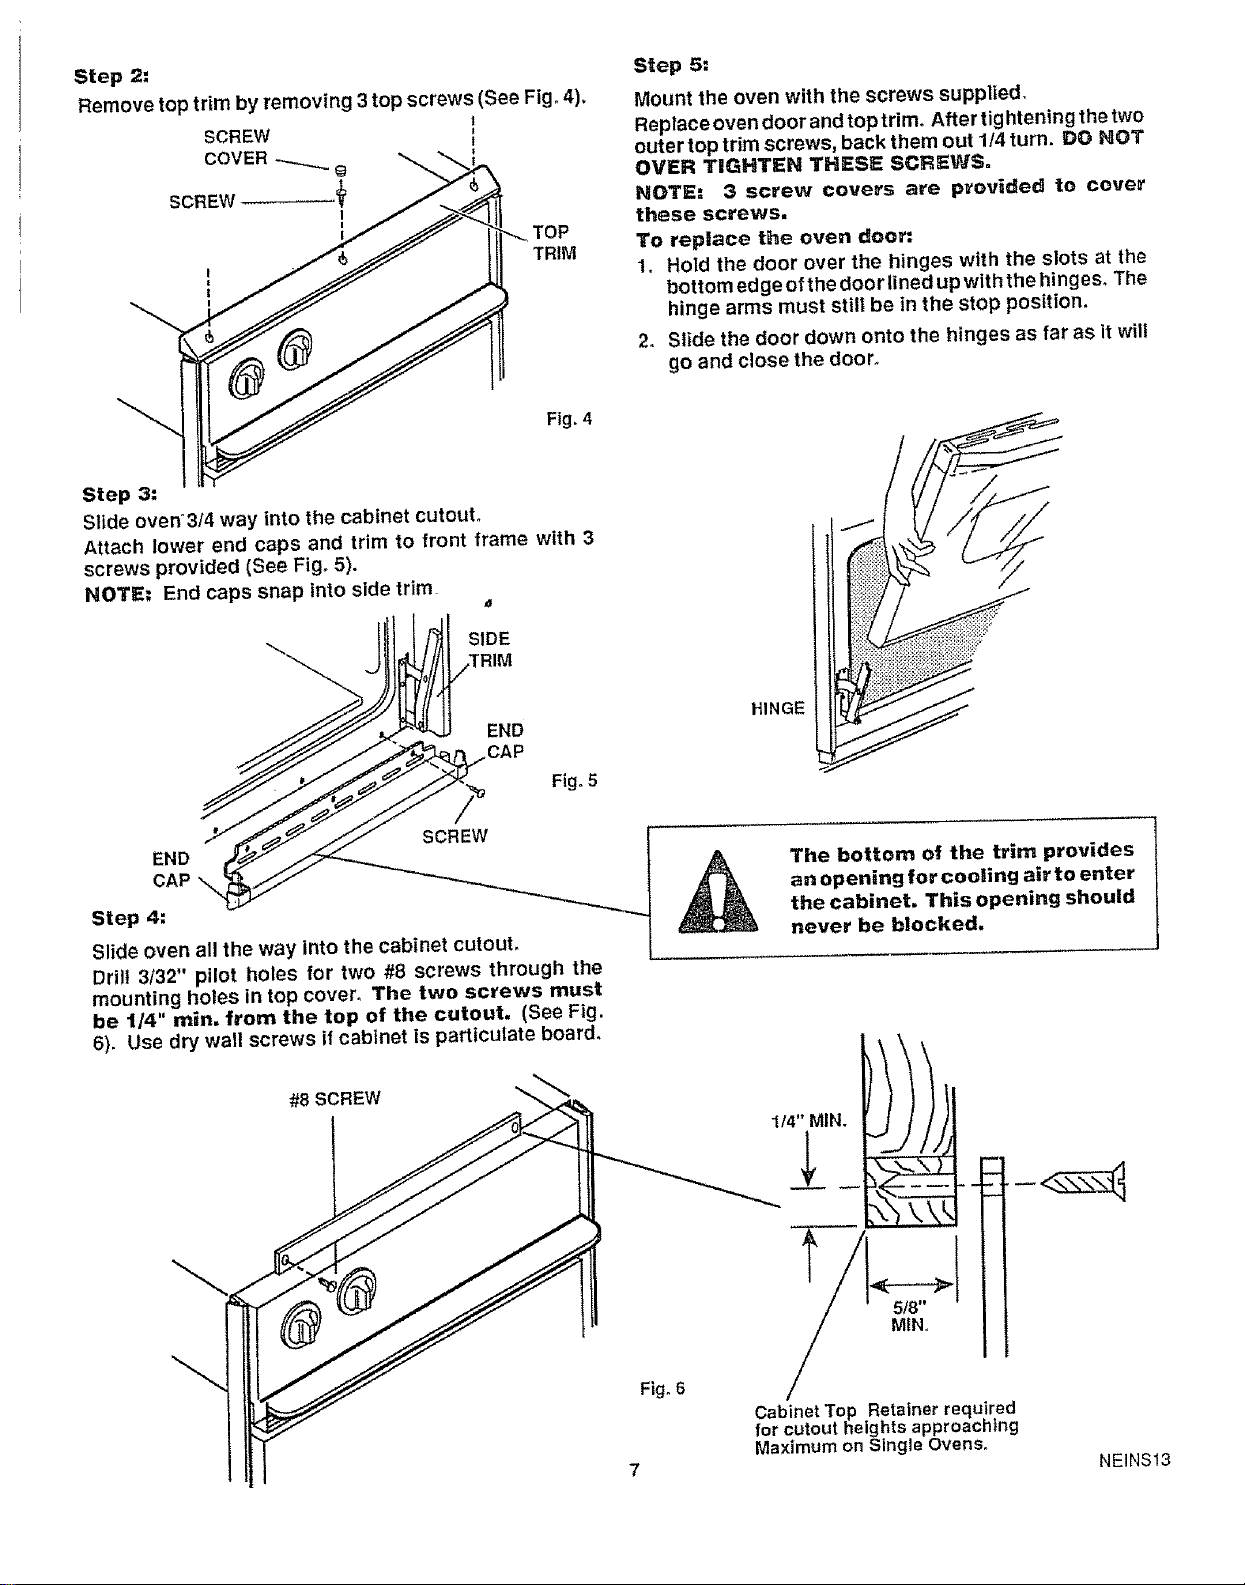
Step 2=
Remove top trim by removing 3 top screws (See Fig. 4),
TOP
TRIM
Step 5:
Mount the oven with the screws supplied
Replace oven door and top trim. After rightening the two
outer top trim screws, back them out 1/4 turn. DO NOT
OVER TIGHTEN THESE SCREWS°
NOTE= 3 screw covers are provided to cover
these screws,
To replace the oven door:
1. Hold the door over the hinges with the slots at the
bottom edge ofthe door lined up with the hinges. The
hinge arms must still be in the stop position.
2. Slide the door down onto the hinges as far as it will
go and close the door.
Fig. 4
Step 3:
Slide oven°314 way into the cabinet cutout°
Attach lower end caps and trim to front frame with 3
screws provided (See Fig. 5).
NOTE= End caps snap into side trim
CAP Fig°5/
CAP
Step 4:
The bottom of the trim provides
an opening for cooling air to enter
the cabinet. This opening should
never be blocked.
HINGE
Slide oven all the way into the cabinet cutout,
Drill 3/32" pilot holes for two #8 screws through the
mounting holes in top cover. The two screws must
be 1/4" rain, from the top of the cutout, (See Fig
6). Use dry wall screws if cabinet ls particulate board.
518"
MIN.,
Fig°6
Cabinet Top Retainer required
for cutout heights approaching
Maximum on Single Ovens_
NEINS13
Loading ...
Loading ...
Loading ...