Loading ...
Loading ...
Loading ...
ng for Service
POSSIBLE CAUSE
• Controls not set properly
• Clean cycle interrupted
Before Call
PROBLEM
, Oven does not clean or poor
cleaning results
• Oven door will not open
• "Door" appears on display
• Oven too dirty
• Possible range function prob-
lem
(Co.t.)
DON'T CALL FOR SERVICE
UNTIL YOU CHECK
............. ]
• Check self-clean instructions°
• Heavily soiled ovens require a 3 1/2
hour clean cycle.
• Heavy spitlovers should be removed
before setting clean cycle. Repeat clean
cycle.
Clean cycle not complete Oven must cool before lock tempera-
ture (approximately 30 minutes alter
clean cycle is complete).
• Cancel and wait until oven cools. Then,
resume normal operation by resetting
the control,. If function error occurs
again, call for service.
• Oven door not closed after
self-clean cycle selected
° Close door'
ADJUSTING OVEN TEMPERATURE (Lower Oven)
The temperature in your new oven has been set cor-
rectly at the factory, so be sure to follow the recipe
temperatures and times the first few times you bake in
your new oven,
If you think the oven should be hotter or cooler, you can
adjust it yourself° To decide how much to change the
temperature, set the oven temperature 25°F higher or
Iowerthan the temperature in your recipe, then bake. The
results of this "test" should give you an idea of how
much the temperature should be changed_
To adjust temperature=
1 Turn OVEN SET knob to OFF and remove the knob by
pulling straight of L
2o Look at the back of the knob. The arrow pointing to
the center o! the upper screw indicates the original
factory setting. The knob can be adjusted up to 50°F
hotter or 50°F cooler, in 10° increments.
3. Use a screwdriver to loosen the two screws about t
turn each_
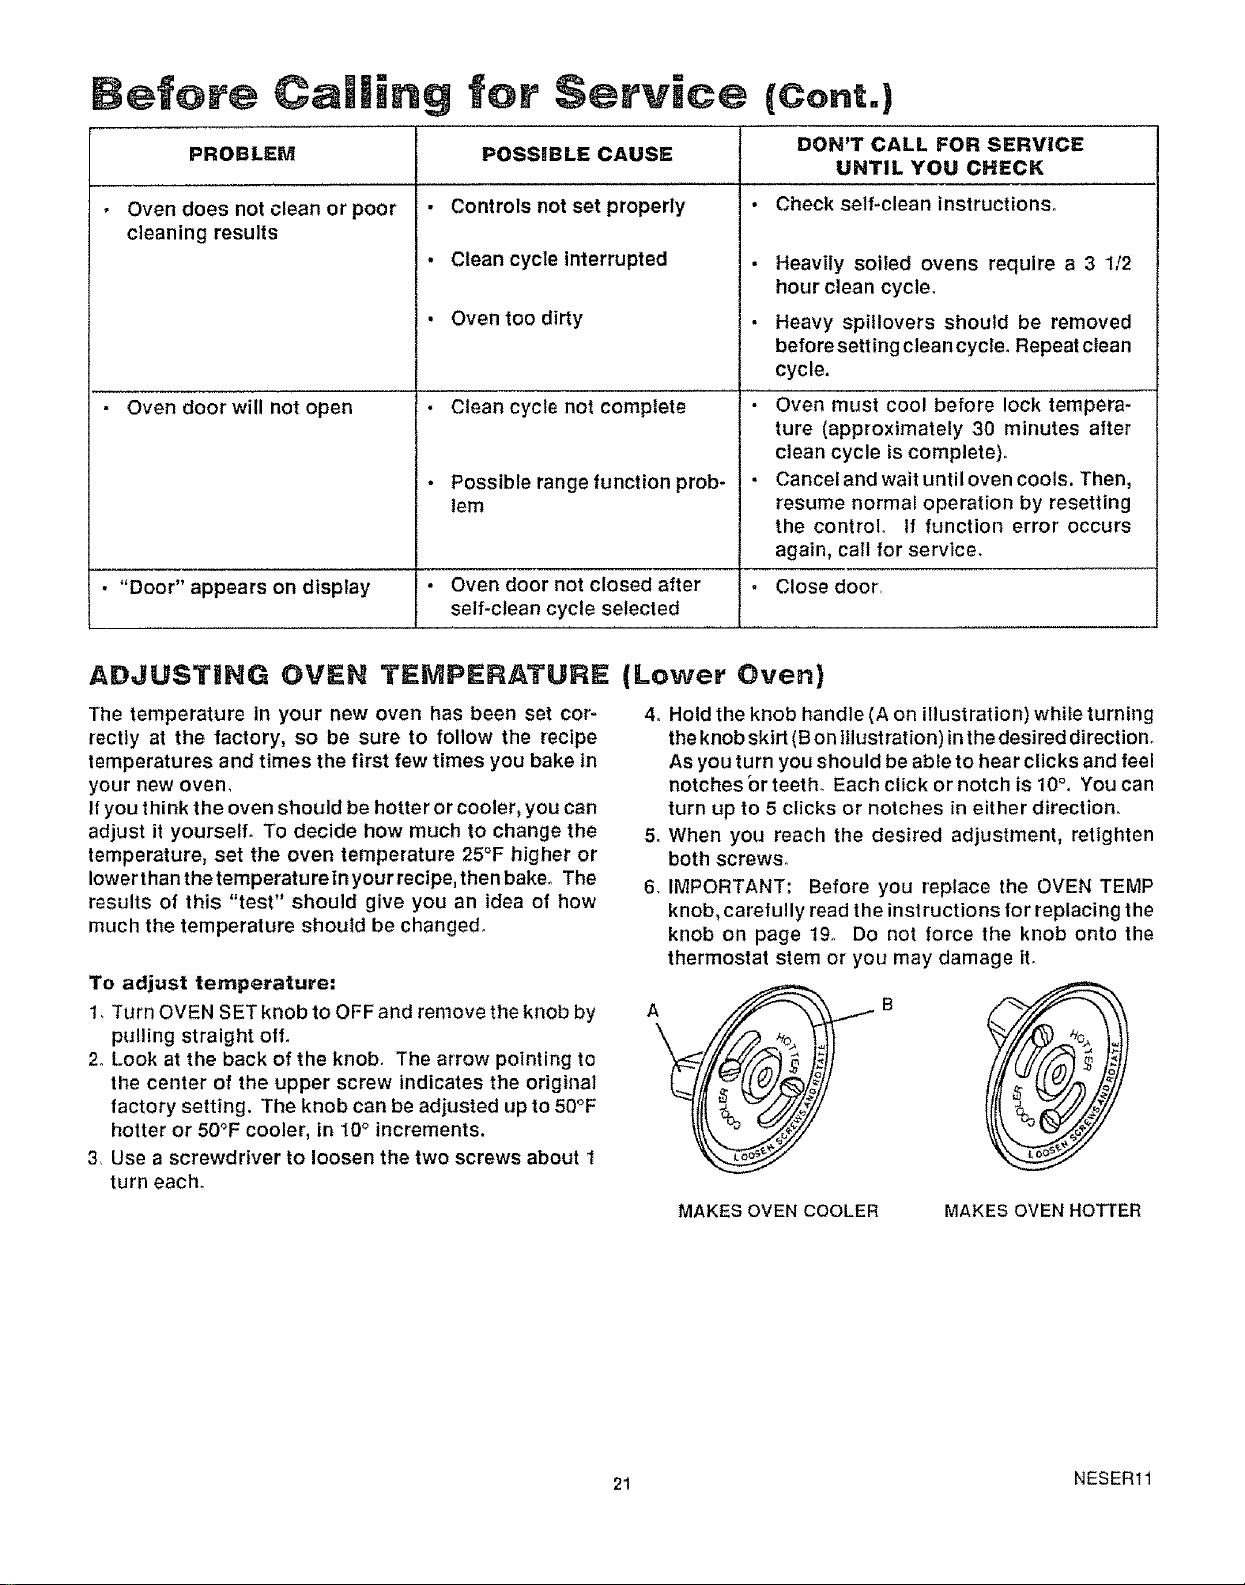
4o Hold the knob handle (A on illustration) while turning
the knob skirt (B on illustration) in the desired direction°
As you turn you should be able to hear clicks and feel
notches or teeth_ Each click or notch is 10°o You can
turn up to 5 clicks or notches in either direction.
5. When you reach the desired adjustment, retighten
both screws.
6. IMPORTANT: Before you replace the OVEN TEMP
knob, careiully read the instructions for replacing the
knob on page 19. Do not force the knob onto the
thermostat stem or you may damage iL
MAKES OVEN COOLER MAKES OVEN HOTTER
21 NESER11
Loading ...
Loading ...