Loading ...
Loading ...
Loading ...
ASSEMBLY
11
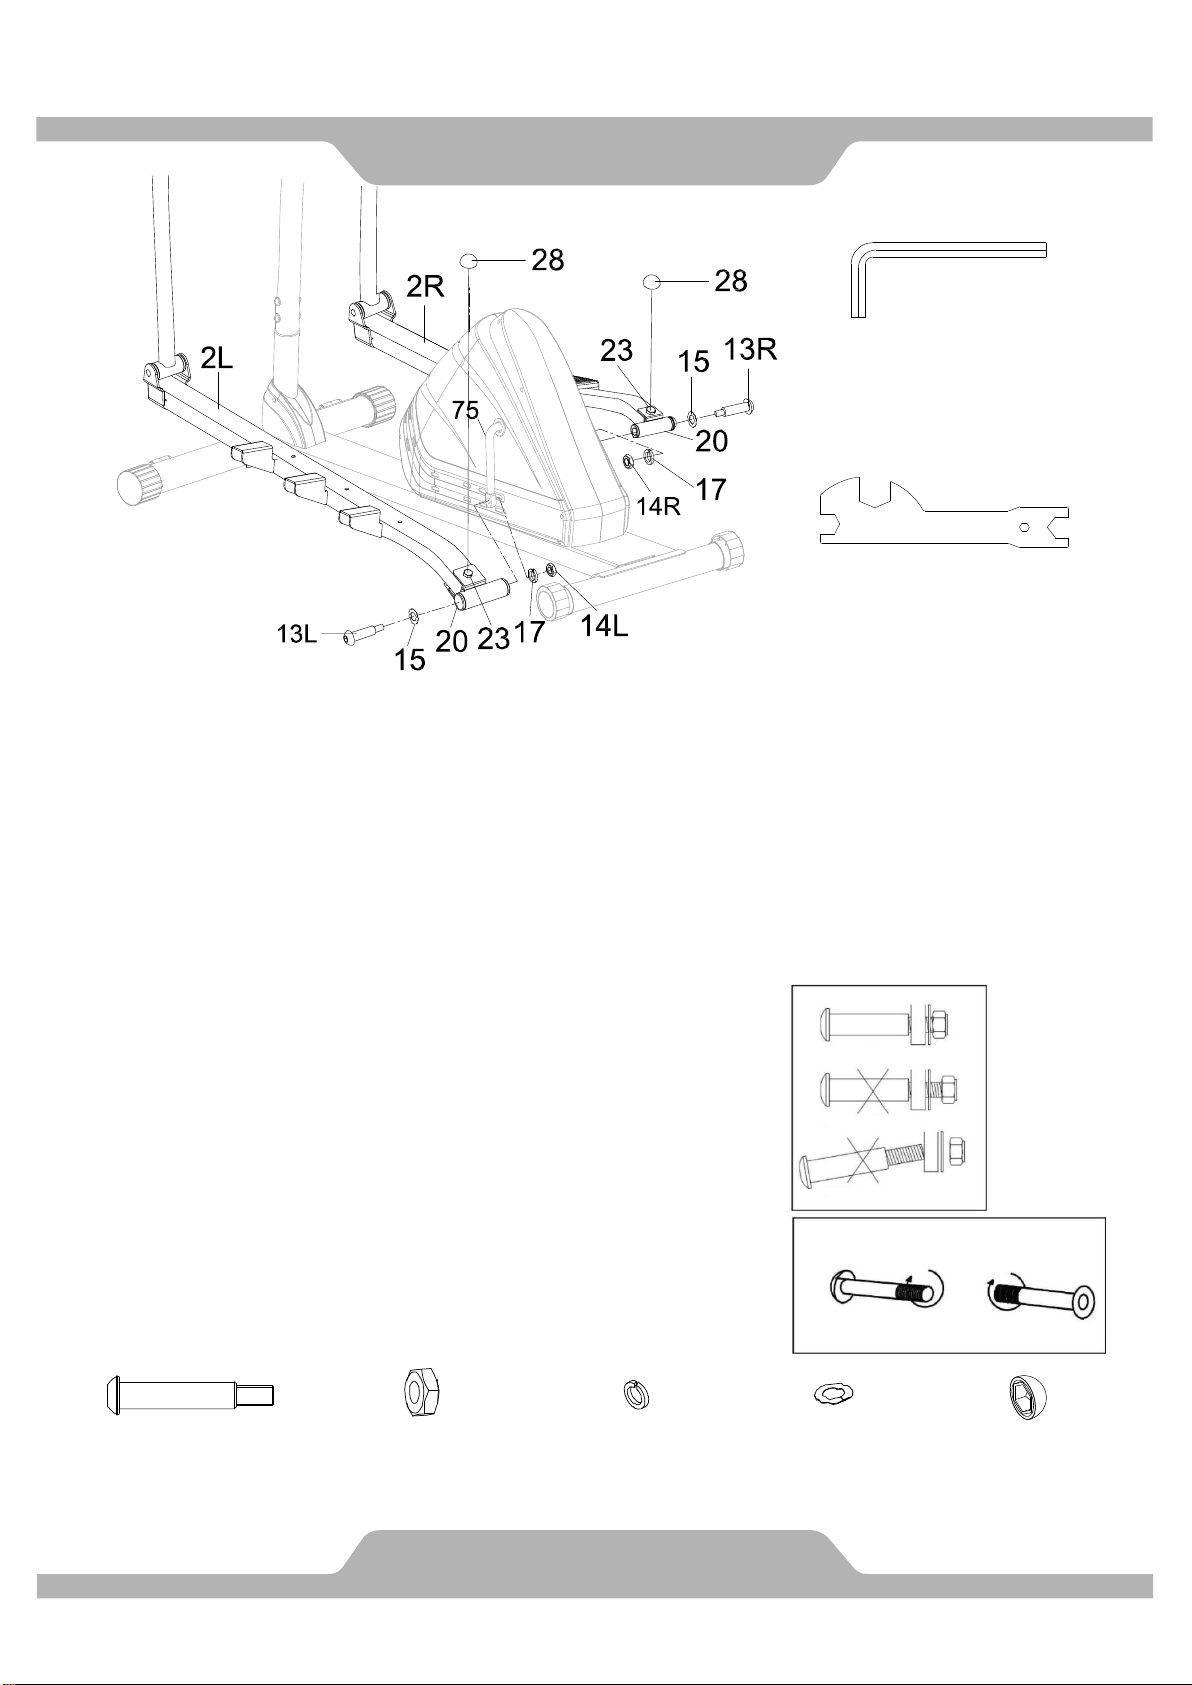
4. Foot Bar Installation
Insert the Left Bracket Bolt (13L) along with a Wave Washer (15) through the U Shaped Bracket
(20) located on the back of the Left Foot Bar (2L). Secure the Left Bracket Bolt (13L) to the Left side
of the Crank (75) by turning the Bolt Counter-Clockwise. Tighten the Left Bracket Bolt with the
8mm Allen Wrench provided. Next, install a Spring Washer (17) and Left Nylon Nut (14L) on the
remaining threads of the Left Bracket Bolt (13L). Turn the Left Nylon Nut (14L) in a Clockwise
direction, and then tighten using the 8mm Allen Wrench and Multi Hex Tool Provided. Then place
the Cap (28) onto the Head of the Bolt (23).
*Repeat these steps for the Right Foot Bar (2R).
NOTE: Before attaching the Nylon Nut (14L) be sure that the Left Bracket Bolt (13L) is screwed as
far into the Crank (75) as possible (See Figure C).
In order to install the Bracket Bolts properly, keep it
perfectly straight while screwing into the threaded hole of
the Crank (75). If the Bracket Bolt is inserted incorrectly it
may cause damage to the threads (See Figure C).
CORRECT
INCORRECT
INCORRECT
13L
13R
Important:
Turn the Right Bracket Bolt (13R) in a Clockwise
direction.
Turn the Left Bracket Bolt (13L) in a
Counter-Clockwise direction. (See Figure D)
8mm Allen Wrench
1 PC
Multi Hex Tool
1 PC
Hardware:
(17) Spring Washer
Ø20 2PCS
(15) Wave Washer
Ø28xØ17x0.3
2PCS
(13R/L) Right / Left
Bracket Bolt 1/2”
2PCS
(14R/L) Right / Left
Nylon Nut 1/2”
2PCS
(28) Cap S13
2 PCS
C
D
Loading ...
Loading ...
Loading ...