Loading ...
Loading ...
Loading ...
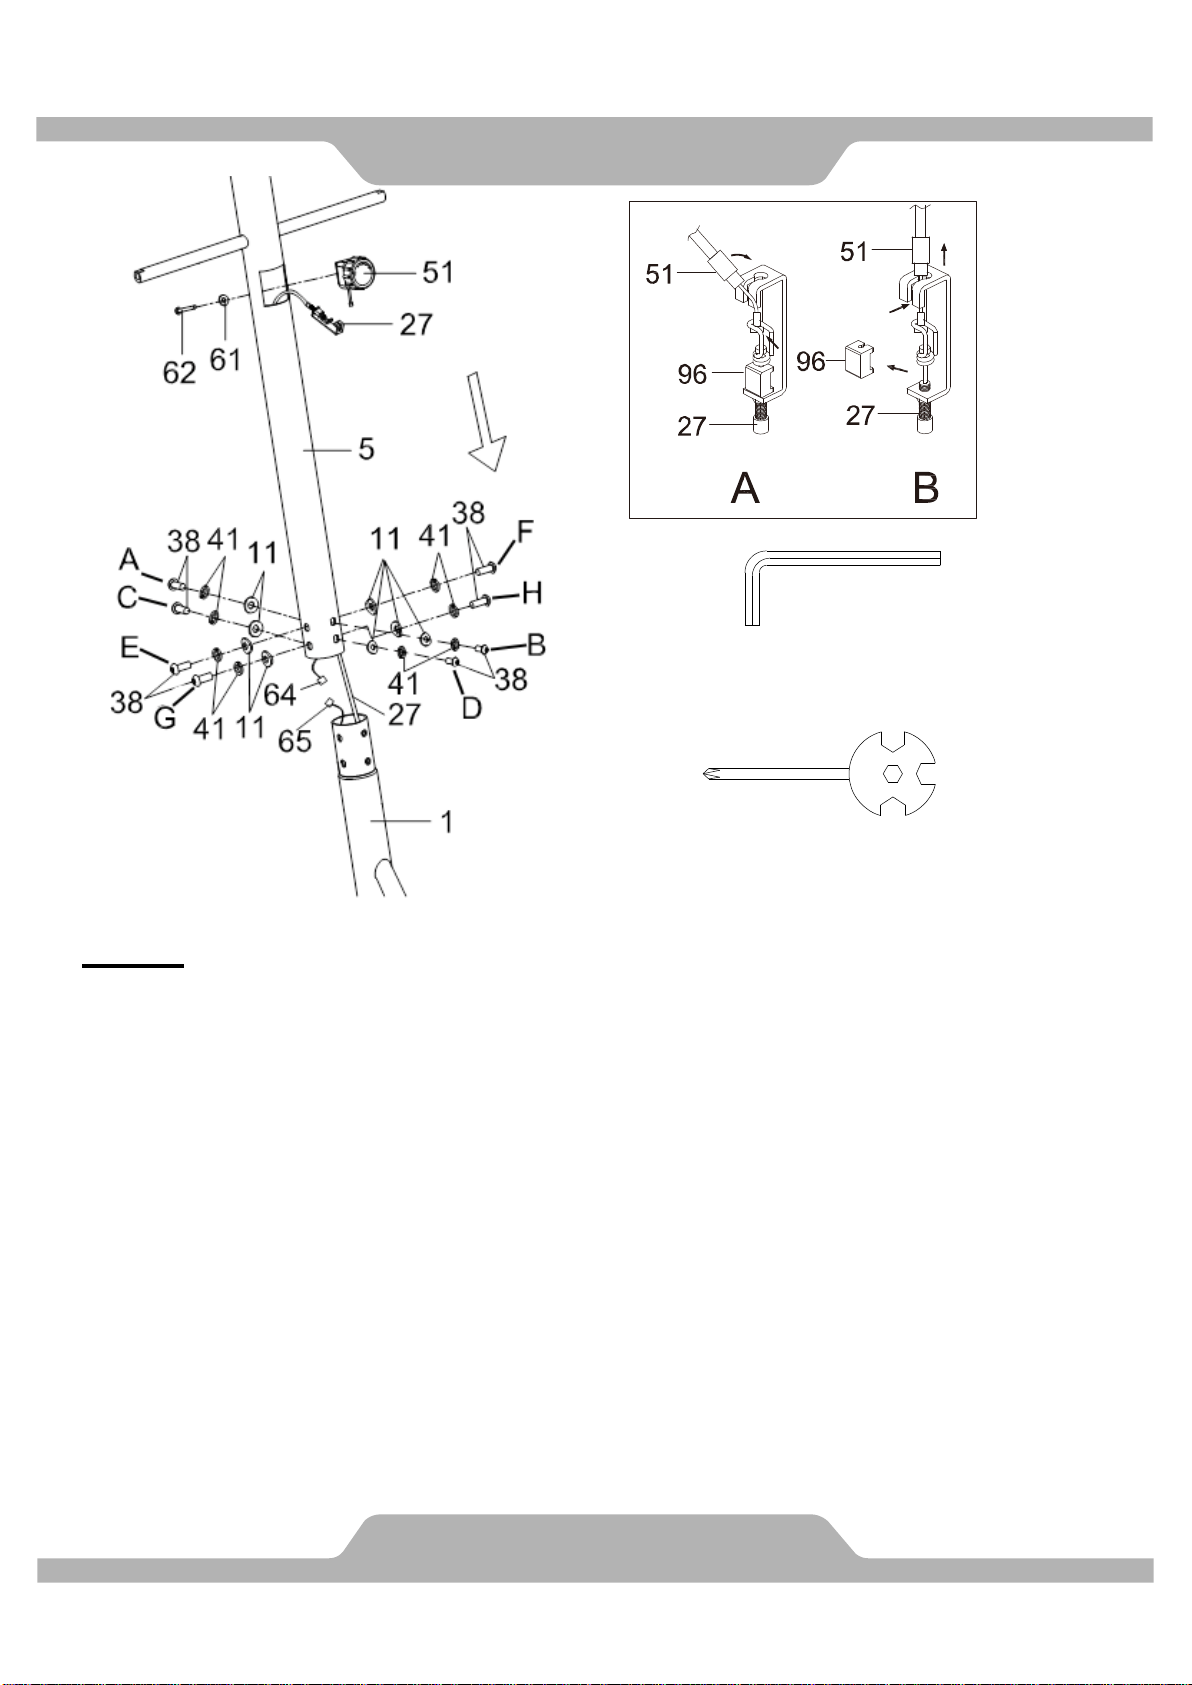
MUST TIGHTEN IN SEQUENCE: A,B,C,D,E,F,G,H.
2. Front Post and Tension Control Knob Installation
Remove the eight Hexagon Socket Head Bolts (38), eight Big Curve Washers (11), and eight
Spring Washers (41) from the Main Frame (1) first. Insert the Tension Cable (27) into the Front
Post (5) and pull it out through the square hole on the top of the Front Post (5). Connect the
Sensor Wires (64) and (65). Make sure the wires stay connected. Then secure the Front Post (5)
to the Main Frame (1) using the eight Hexagon Socket Head Bolts (38), eight Big Curve Washers
(11), and eight Spring Washers (41) that were previously removed. Tighten with the 6mm Allen
Wrench provided. Remove the Bolt (62) and Curve Washer (61) from the back of the Tension
Control Knob (51). Turn the Tension Control Knob (5) to the highest tension setting. Attach the
end of the resistance cable on the Tension Control Knob (51) into the spring hook of the Tension
Cable (27) (See Figure A). Pull the Resistance Cable of the Tension Control Knob (51) up and
gently remove the Clip (96) (See Figure B). Install the Tension Control Knob (51) in to the Front
Post (5) using the Bolt (62) and Curve Washer (61) previously removed. Then tighten with the
Multi Hex tool with Phillips Screwdriver provided.
ASSEMBLY
9
6mm Allen Wrench
1 PC
Multi Hex Tool with Phillips Screwdriver
S8, S13, S14, S15
1 PC
Loading ...
Loading ...
Loading ...