Loading ...
Loading ...
Loading ...
• Make sure that the engine is cool before you refuel.
• Before you refuel, open the fuel tank cap slowly and
release the pressure carefully.
• Make sure there are sufficient airflow when refueling
and mixing fuel (petrol and two-stroke oil) or draining
the fuel tank.
• Fuel and fuel vapor are highly flammable and can
cause serious injury when inhaled or allowed to
come into contact with the skin. For this reason,
observe caution when handling fuel and make sure
there is sufficient airflow.
• Tighten the fuel tank cap carefully or a fire can
occur.
• Move the product at a minimum of 3 m (10 ft) from
the position where you filled the tank before a start.
• Do not put too much fuel in the fuel tank.
• Make sure that a leak cannot occur when you move
the product or fuel container.
• Do not put the product or a fuel container where
there is an open flame, spark or pilot light. Make
sure that the storage area does not contain an open
flame.
• Only use approved containers when you move the
fuel or put the fuel into storage.
• Empty the fuel tank before long-term storage. Obey
the local law on where to dispose fuel.
• Clean the product before long-term storage.
• Remove the spark plug cap before you put the
product into storage to make sure that the engine
does not start accidentally.
Assembly
Introduction
WARNING: Before you assemble the
product, you must read and understand the
safety chapter.
WARNING: Remove the spark plug
cable from the spark plug before you
assemble the product.
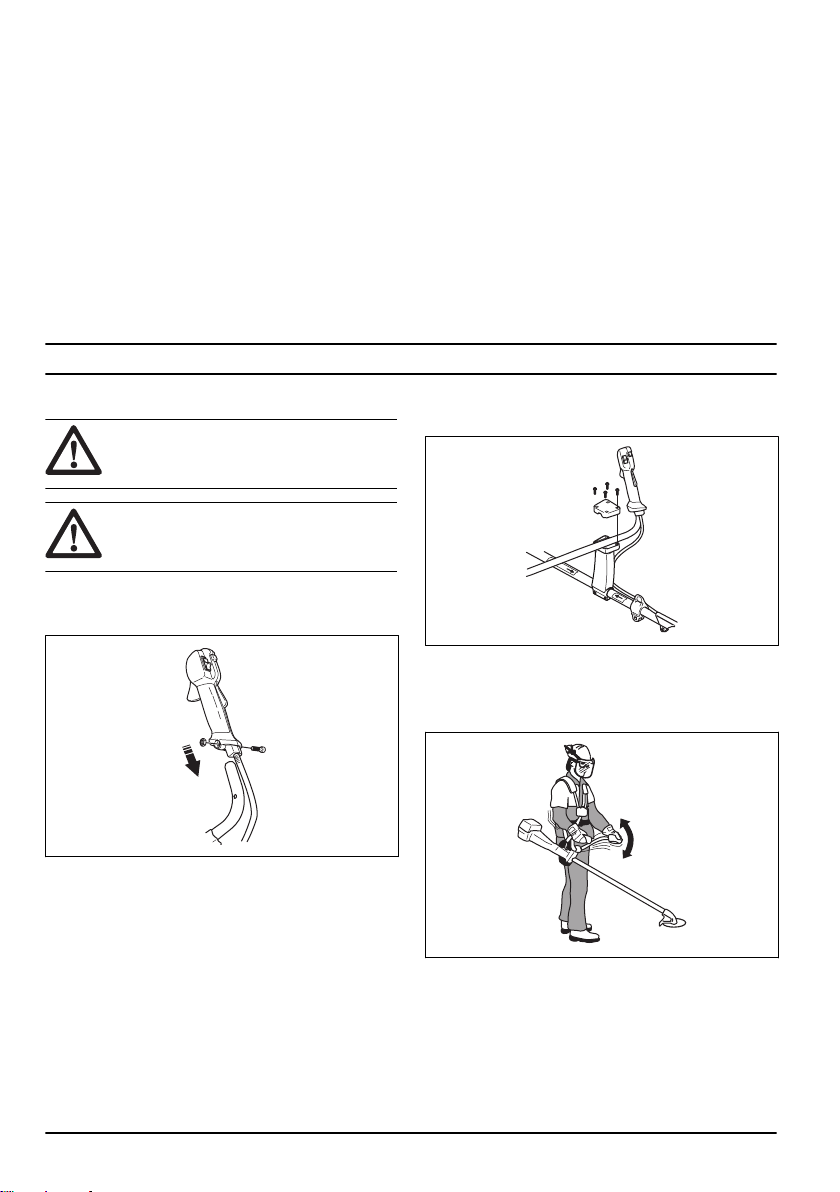
To assemble the throttle handle
1. Remove the screw behind the throttle handle.
2. Move the throttle handle to the right side of the
handlebar.
3. Align the hole behind the throttle handle with the
hole in the handlebar.
4. Put the screw through the holes. Tighten the screw.
To assemble the handlebar
1. Put the handlebar into the bracket.
2. Make sure that the holes for the screws align.
3. Attach the 4 screws but do not tighten fully.
4. Adjust the handlebar to put the product in a good
operation position.
5. Tighten the 4 screws fully.
10
1069 - 009 - 13.06.2023
Loading ...
Loading ...
Loading ...