Loading ...
Loading ...
Loading ...
Connecting the Projector
0
Do not turn on the power until connection is complete.
0
The
connection
procedures differ according to the device used. For details, please refer to the instruction manual of
the device to be connected.
0
This projector is used for projecting images. To output the audio of connected devices, please connect a separate
audio output device, such as an amplifier or speaker.
0
Projector has no audio pass through or eARC output.
0
The images may not be displayed depending on the devices and cables to be connected. When using an HDMI
cable (sold separately), make use of one with the Ultra High Speed HDMI Cable certification (supports 48 Gbps).
0
Also, please refer to
“HDMI EDID Setting”P.
76.
0
Some cables cannot be connected to this unit due to the size of their connector cover.
0
Configuration of a network password is necessary before connecting to the LAN terminal. For details, refer to
“Network Password”P.
87.
(DLA-NZ9BK, DLA-NZ8BK, DLA-NZ7BK, DLA-NP5BK, DLA-RS4100K, DLA-RS3100K, DLA-RS2100K, DLA-
RS1100K)
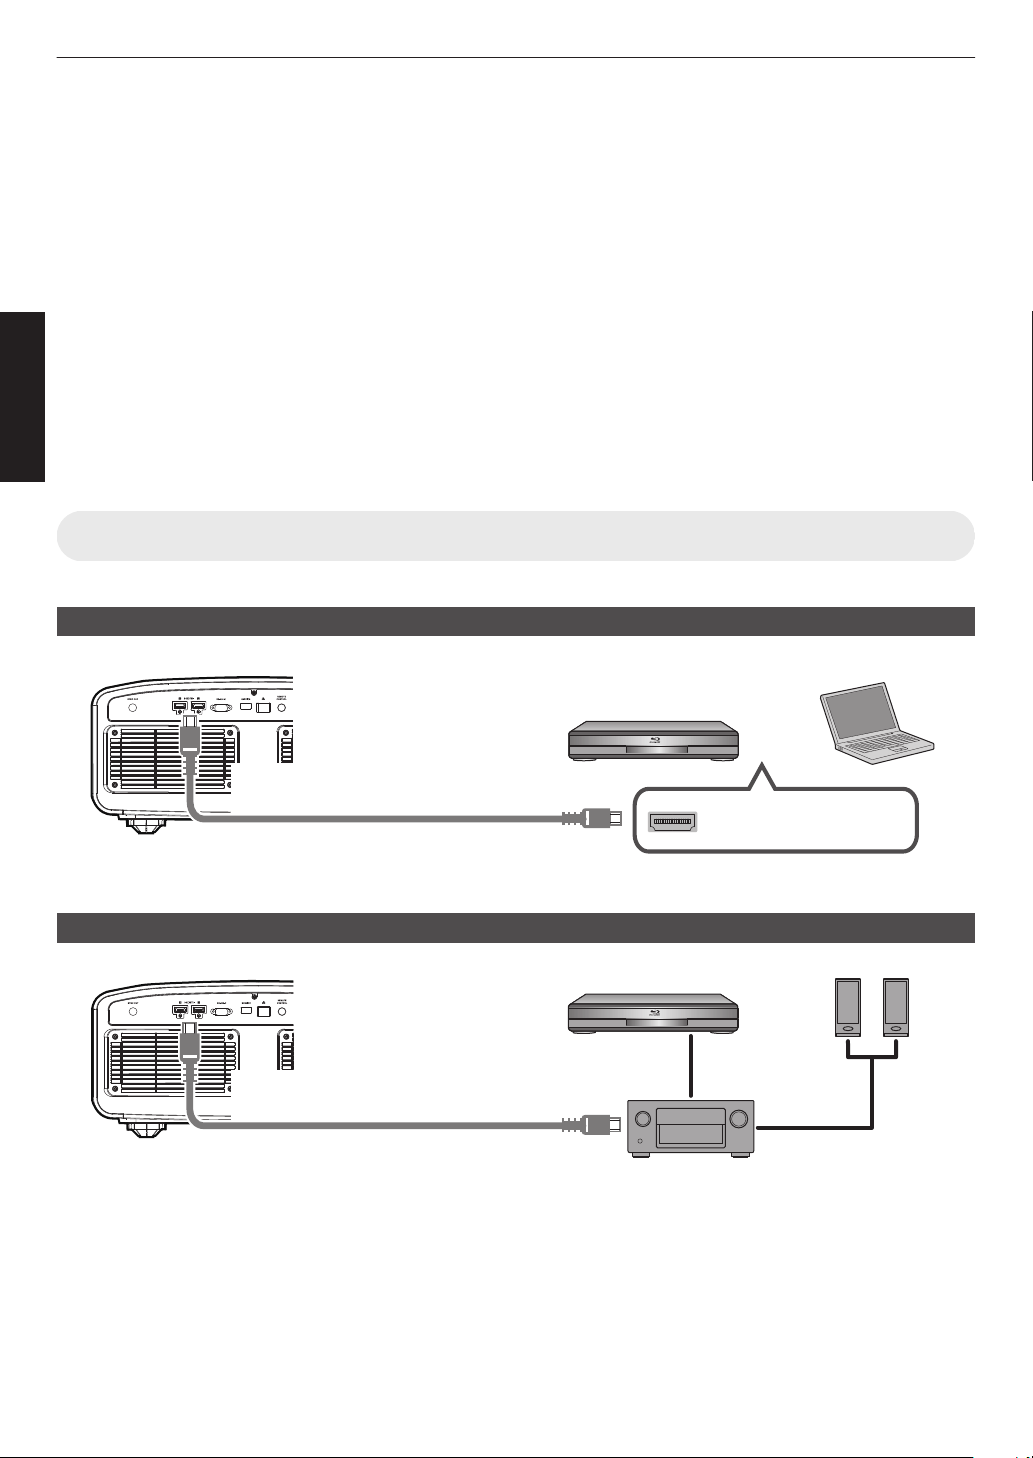
Connecting to the HDMI Input Terminal (Digital Input)
Connecting via HDMI cable
HDMI Output Terminal
BD/DVD Recorder, etc.
Laptop, etc.
HDMI Cable (Sold Separately)
This Unit
To [HDMI 1] or [HDMI 2]
input terminal
0
If noise occurs, move the laptop away from this unit.
Connecting through an AV amplifier
HDMI Cable
(Sold Separately)
BD/DVD Recorder, etc.
HDMI Cable (Sold Separately)
This Unit
HDMI Cable (Sold Separately)
To [HDMI 1] or [HDMI 2]
input terminal
Speaker
Cable (Sold
Separately)
Speakers
AV Amplifier
0
If the
source device is connected to the projector through an intermediate device such as an AV amplifier or divider,
the video image may not appear depending on the specifications of the intermediate device.
In this case, connect the source device directly to the projector, and check whether the video image is displayed.
30
Set up
Loading ...
Loading ...
Loading ...