Loading ...
Loading ...
Loading ...
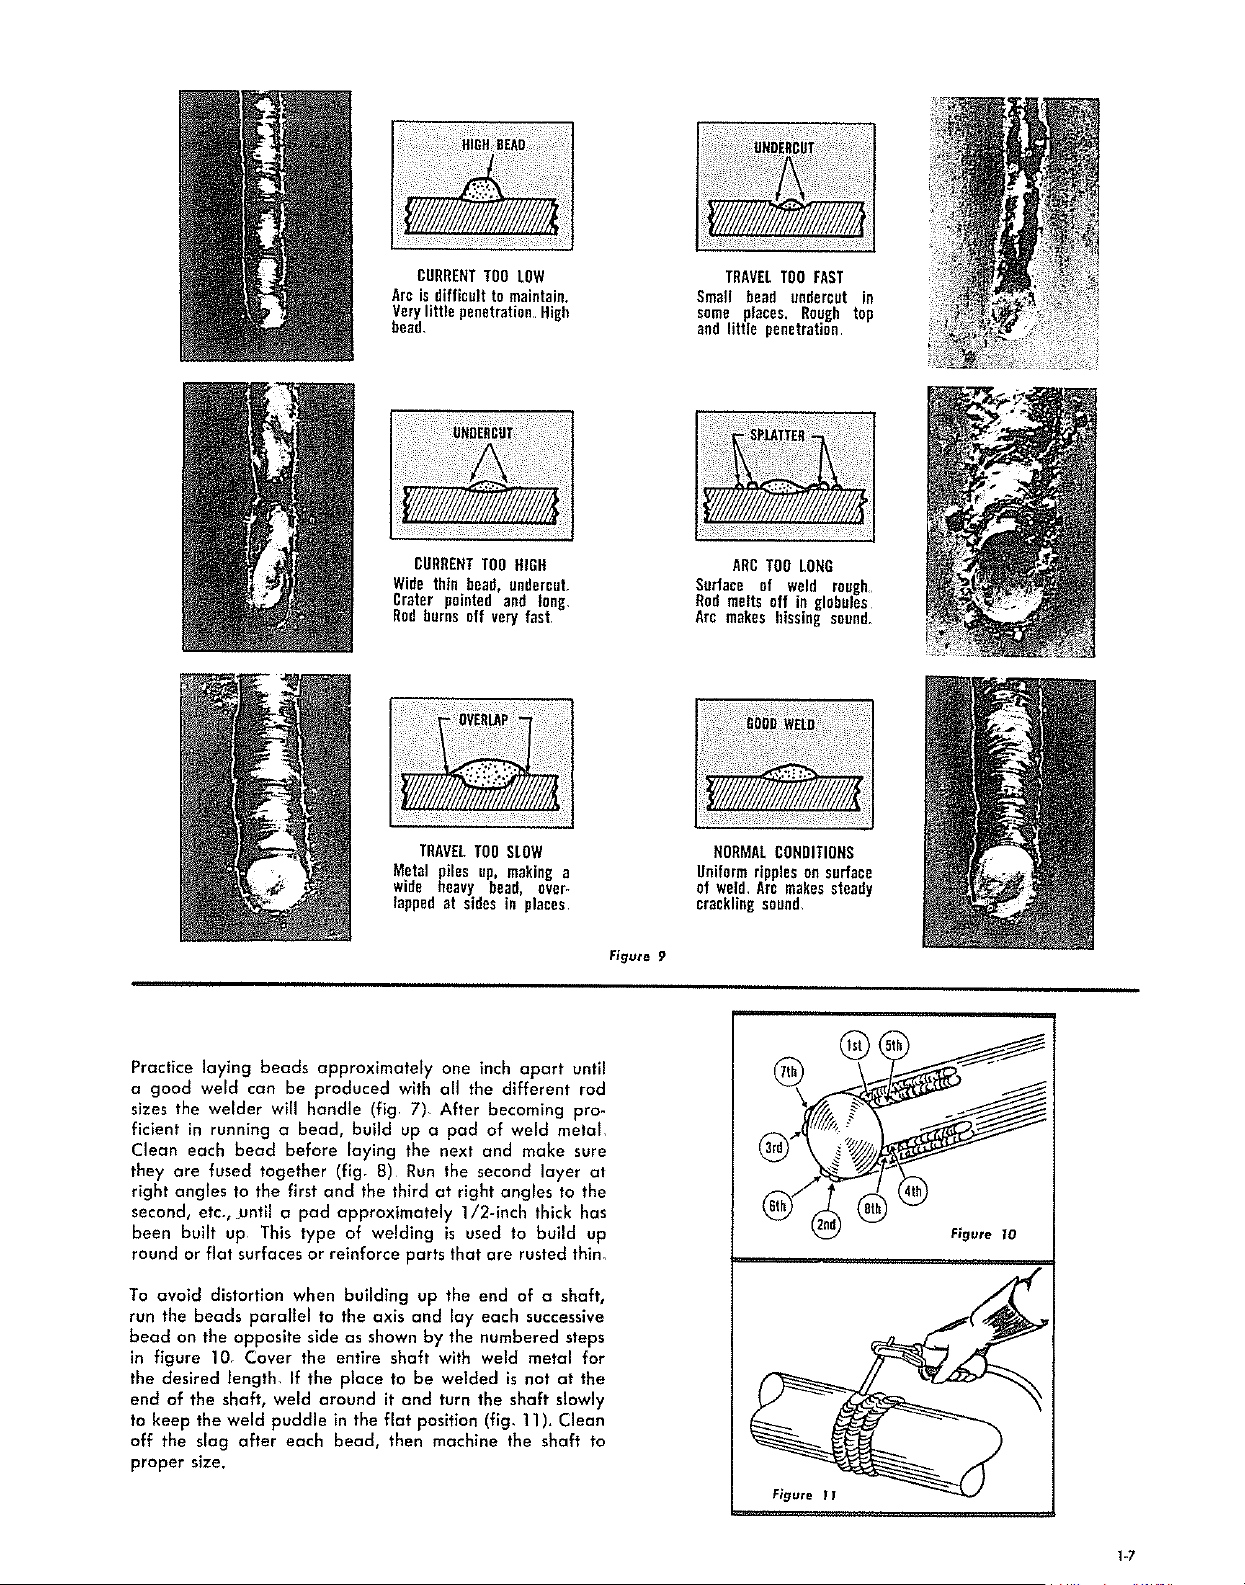
CURRENTTOO LOW
Arc is difficult to maintain.
Vurylittle peflctrationHigh
bead,
TRAVELTOO FAST
Small bead undercut in
some places. Rough top
and little penetration
CURRENTTOO HIGH
Wide thin bead, undercut,
Crater pointed and long,
Rod hurns off very fast,
ARCTOO LONG
Surface of weld rough
Rod melts off in globules
Arc makes hissing sound.
TRAVELTOO SLOW
Metal piles up. making a
wide heavy bead, over°
lapped at sides in places
NORMALCONDITIONS
Uniformripples on surface
of weld, Arc makessteady
cracklingsound,
Figure 9
Practice laying beads approximately one inch apart until
a good weld can be produced with all the different rod
sizes the welder will handle (fig, 7). After becoming pro-
ficient in running a bead, build up a pad of weld metal,
Clean each bead before laying the next and make sure
they are fused together (fig. 8) Run the second layer at
right angles to the first and the third at right angles to the
second, etc_, _sntil a pad approximately 1/2-inch thick has
been built up This type of welding is used to build up
round or flat surfaces or reinforce parts that are rusted thin_
To avoid distortion when building up the end of a shaft,
run the beads parallel to the axis and lay each successive
bead on the opposite side as shown by the numbered steps
in figure 10. Cover the entire shaft with weld metal for
the desired length. If the place to be welded is not at the
end of the shaft, weld around it and turn the shaft slowly
to keep the weld puddle in the flat position (fig_ 11). Clean
off the slag after each bead, then machine the shaft to
proper size.
F_gure 10
1-7
Loading ...
Loading ...
Loading ...