Loading ...
Loading ...
Loading ...
RECORDING
o
659
I
I 8 7,1023
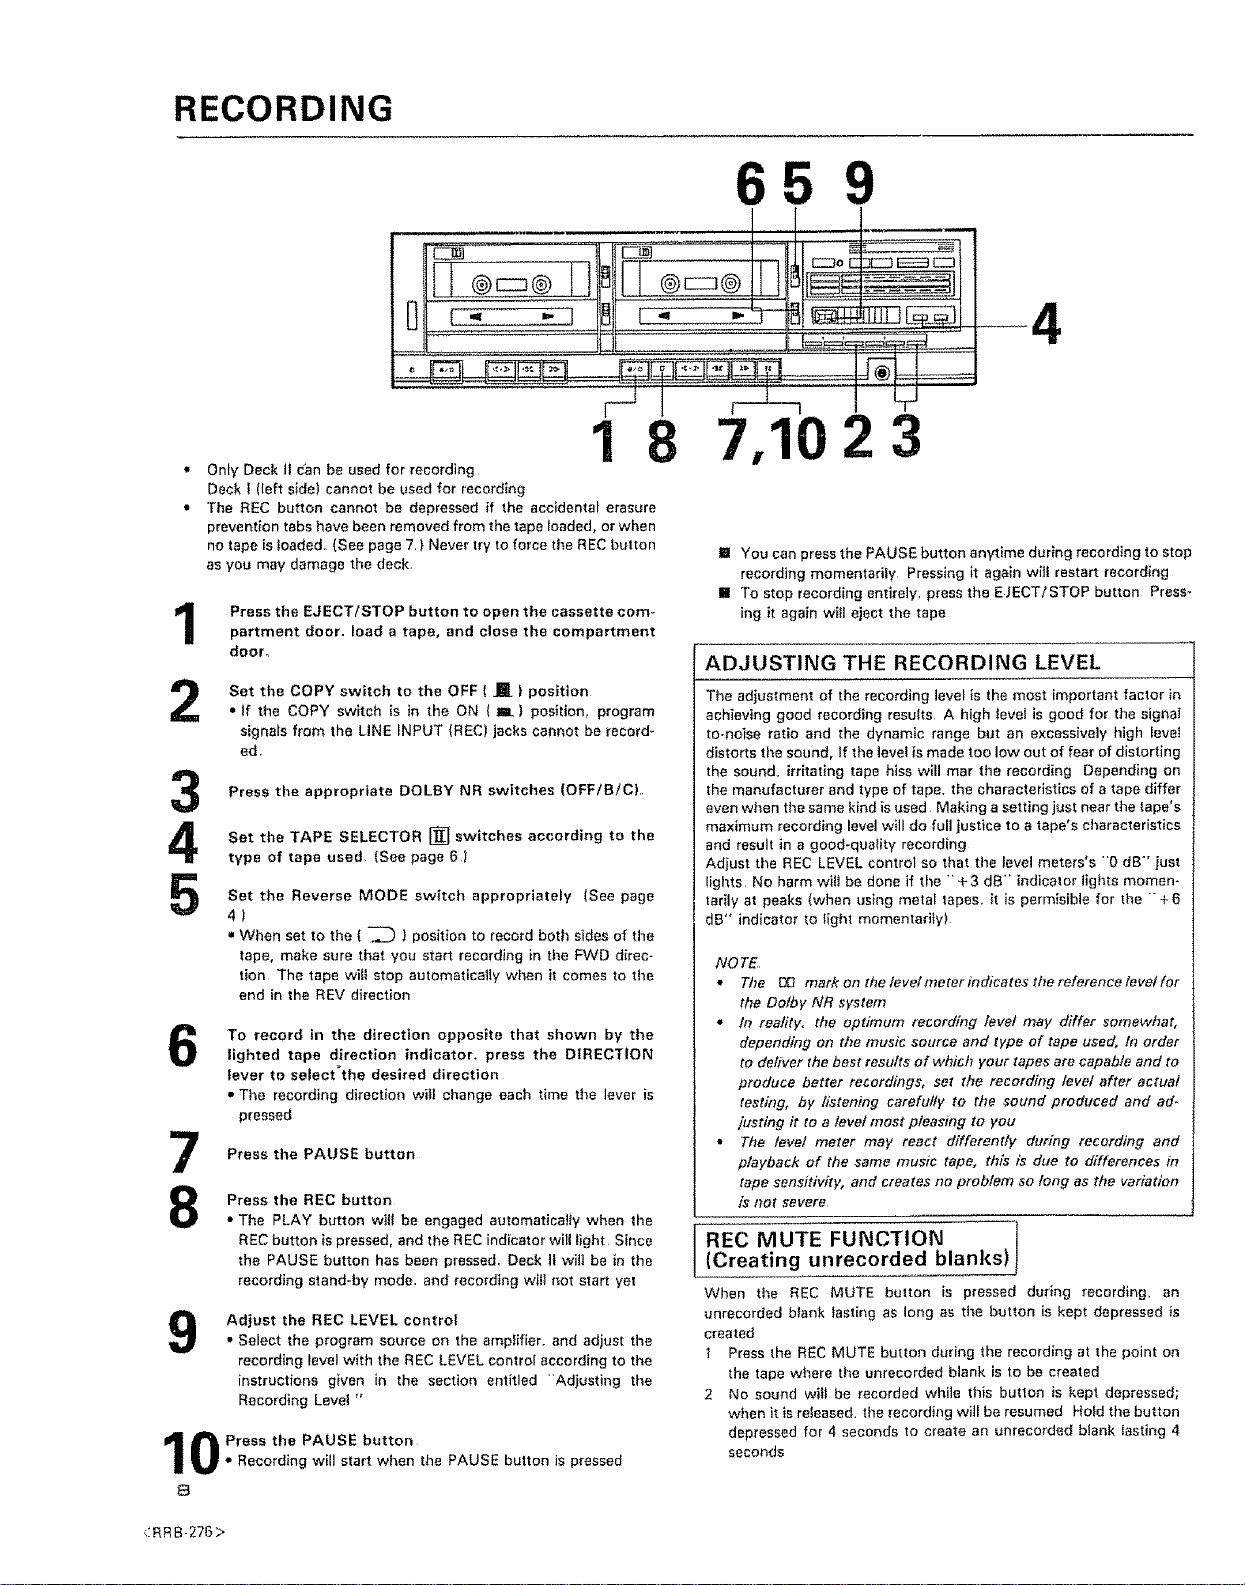
Only Deck tl can be used for recording
Deck 1 (left side) cannot be used for recording
The REC button cannot be depressed if the accidental erasure
prevention tabs have been removed from the tape loaded, or when
no tape is !oaded_ (See page 7 } Never try to force the REC button
as you may damage the deck
Press the EJ ECT/STOP button to open the cassette com-
partment door. load a tape, and close the compartment
door_
2
3
4
Set the COPY switch to the OFF ( ._ t position
= If the COPY switch is in the ON ( m ) position, program
signals from the LiNE INPUT (REC) jacks cannot be record-
ed
Press the appropriate DOLBY NR switches (OFF/B/C},.
Set the TAPE SELECTOR [] switches according to the
type of tape used (See page 6)
Set the Reverse MODE switch appropriately (See page
41
• When set to the ( _ i position to record both sides of the
tape, make sure that you start recording in the FWD direc-
tion The tape will stop automatically when it comes to the
end in the REV direction
7
8
To record in the direction opposite that shown by the
lighted tape direction indicator, press the DIRECTION
lever to select'the desired direction
" The recording direction will change each time the lever is
pressed
Press the PAUSE button
Press the REC button
* The PLAY button wilt be engaged automatica!_y when the
REC button is pressed, and the REC indicator will light Since
the PAUSE button has been pressed, Deck It wilt be in the
recording stand-by mode. and recording will not start yet
9
Adjust the REC LEVEL control
• Select the program source on the amplifier, and adjust the
recording level with the REC LEVEL control according to the
instructions given in the section entitled 'Adiusgng the
Recording Level "
0 Press the PAUSE button
_' Record ng w start when the PAUSE button is pressed
B
! You can press the PAUSE button anytime during recording to stop
recording momentarily Pressing it again wi]! restart recording
llll To stop recording entirely, press the EJECT/STOP button Press-
ing it again will eiect the tape
ADJUSTING THE RECORDING LEVEL
The adjustment of the recording level is the most important factor in
achieving good recording results A high level is good for the signal
to-noise ratio and the dynamic range but an excessively high level
distorts the sound, If the level is made too low out of fear of distorting
the sound, irritating tape hiss will mar the recording Depending on
the manufacturer and type of tape, the characteristics of a tape differ
even when the same kind is used Making a setting just near the tape's
maximum recording level will do full justice to a tape's characteristics
and result in a good-quality recording
Adjust the REC LEVEL control so that the level meters's "'0 dB" just
lights No harm wit! be done if the ""+3 de- indicator lights momen-
tarily at peaks (when using metal tapes, it is permisible for the " +6
dB" indicator to light momentarily)
NOTE¸
* The D_ markontheleve/meterindicatesthereference/evelfor
the Do/by NR system
tn reality, the optimum re_ordiog level may differ somewhat,
depending on the music source and type of tape used, fo order
to deriver the best results of which your tapes are capable and to
produce better recordings, set the recording level after actual
testing, by listening carefully to the sound produced and ad-
lusting it to a level most pleasing to you
, The level meter may react differently during recording and
playback of the same music tape, dT/s is due to differences in
tape sensitivity, and creates no problem so long as the variation
is not severe
REC MUTE FUNCTION j
(Creating unrecorded blanks)
1
When the REC MUTE button is pressed during recording, an
unrecorded blank lasting as long as the button is kept depressed is
created
1 Press the REC MUTE button during the recording at the point on
the tape where the unrecorded blank is to be created
2 No sound will be recorded while this button is kept depressed;
when it is released, the recording will be resumed Hold the button
depressed for 4 seconds to create an unrecorded blank lasting 4
seconds
,:RRB-276>
Loading ...
Loading ...
Loading ...