Loading ...
Loading ...
Loading ...
RECORDING AND PLAYBACK USING AUDIO TIMER
• This procedure may differ according to the timer used, Refer to
the timer operating instructions for information on its use
tUNATTENDED RECORDING]
9
1,10 8,13 7,11 2 3
4
1
2
4
5
6
14
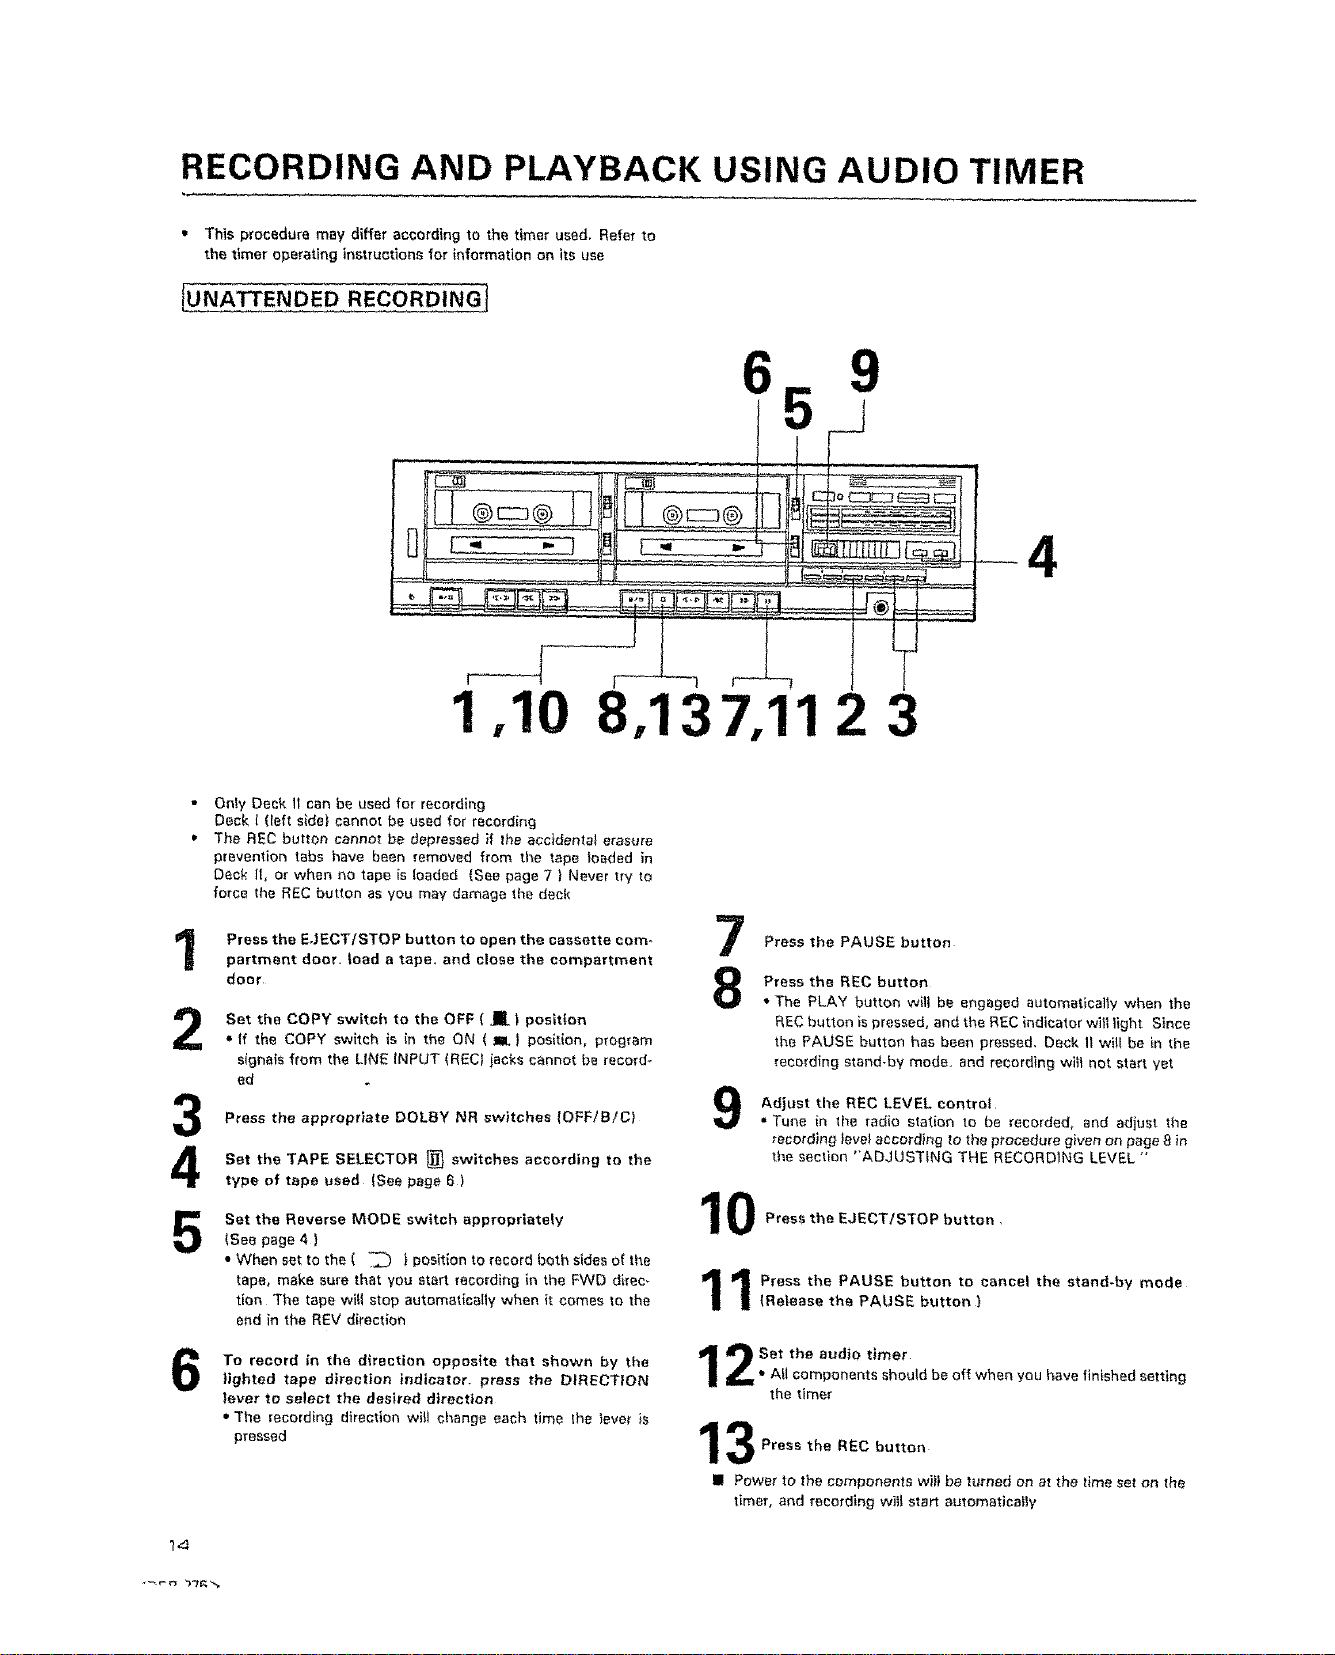
Only Deck 11can be used for recording
Deck { (left s_de} cannot be used for recording
The REC button cannot be depressed if the accidental erasure
prevention tabs have been removed from the tape _oaded in
Deck II, or when no tape is loaded (See page 7 } Never try to
force the REC button as you may damage the deck
Press the EJECT/STOP button to open the cassette com-
partment door. toad a tape. and close the compartment
door
Set the COPY switch to the OFF ( m | position
* If the COPY switch is in the ON ( _ } position, program
signals from the LINE iNPUT (RECt iacks cannot be record-
ed
Press the appropriate DOLBY NR switches IOFF/B/C)
Set the TAPE SELECTOR _ switches according to the
type of tape used {See page 6)
Set the Reverse MODE switch appropriately
(See page 4 )
• When set to the ( _'_ } position to record both sides e{ the
tape, make sure that you start recording in the FWD direc_
tion The tape will stop automatically when it comes to the
end in the REV direction
To record in the direction oppos{te that shown by the
lighted tape direction indicator, press the DIRECTION
|ever to select the desired direction
* ]'he recording direction wilt change each time lhe |ever is
pressed
7
Press the PAUSE button
Press the REC button
• The PLAY button will be engaged automatlcalty when the
REC button is pressed, and the REC indicator wi_I fight Since
the PAUSE button has been pressed, Deck It wilt be in the
recording stand.by mode. and recording wit| not start yet
Adjust the REC LEVEL control
• Tune in d_e radio station to be recorded, and adjust tile
recording level according to the procedure given on page 8 in
the section "ADJUSTING THE RECORDING LEVEL "
0 Press the EJECT/STOP button.
1 Press the PAUSE button to cancel the stand-by mode
(Release the PAUSE button }
l tt_ Set the audio timer
I_" All components should be off when you have finished setting
the timer
3 Press the REC button
II Power to the components will be turned on at the time set on the
timer, and recording will start automatic_IIy
Loading ...
Loading ...
Loading ...