Loading ...
Loading ...
Loading ...
ASSEMBLY
TOOLS REQUIRED FOR ASSEMBLY
1 - Knife(to cut carton and plastic ties)
2 - 112inch wrenches (or adjustable wrenches)
2 - 9/16 inchwrenches (or adjustable wrenches)
2 - 3/4 inchwrenches (or adjustable wrenches)
1 - Pliers (to spread cotter pin)
1- Screwdriver
1 - Measuring Tape or Ruler
FIG. 1 shows the snowthrowerin theshippingposition.
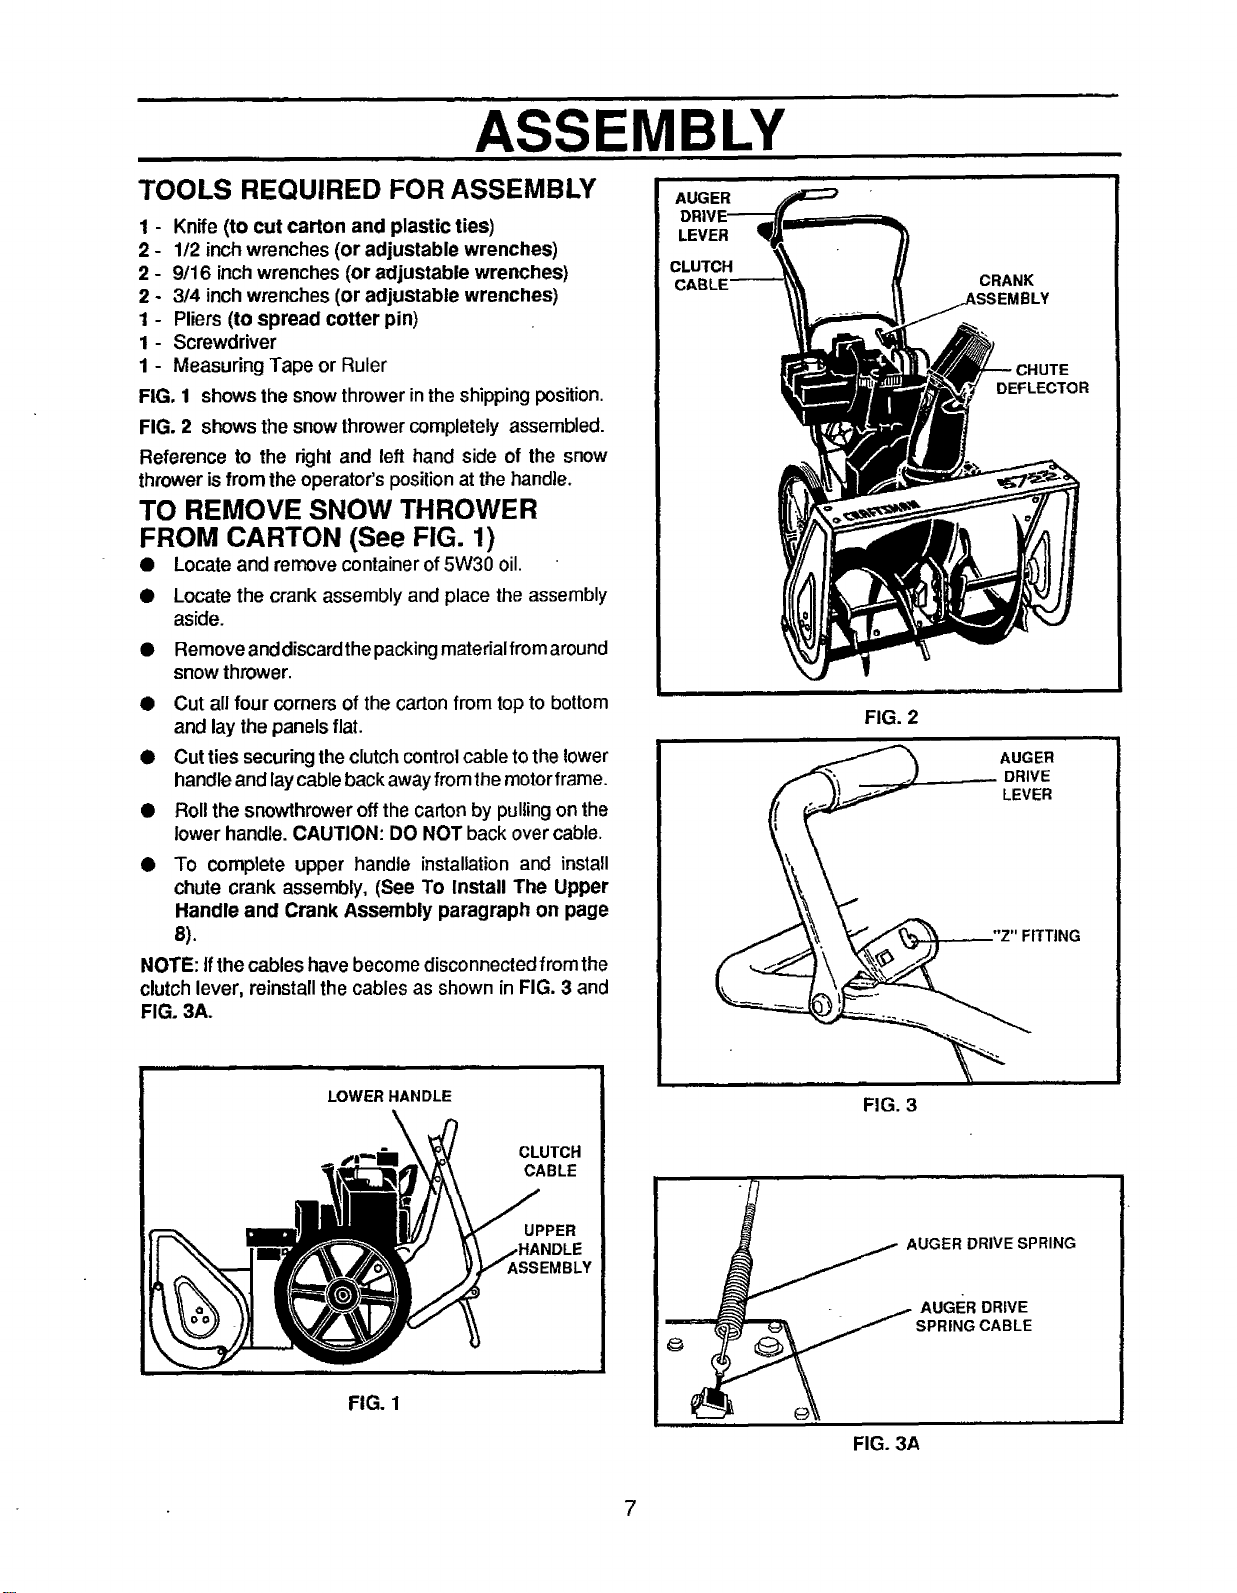
FIG. 2 shows the snowthrowercompletely assembled.
Reference to the right and left hand side of the snow
throwerisfrom the operator'spositionat the handle.
TO REMOVE SNOW THROWER
FROM CARTON (See FIG. 1)
• Locate and remove container of 5W30 oil.
• Locate the crank assembly and place the assembly
aside.
• Remove anddiscardthepacking materialfromaround
snow thrower.
• Cut all four comers ofthe carton from top to bottom
and lay the panelsflat.
• Cut ties securing the clutch control cable to the lower
handle and laycable back away from the motor frame.
• Roll the snowthrower off the carton by pulling on the
lower handle. CAUTION: DO NOT back over cable.
• To complete upper handle installation and install
chute crank assembly, (See To Install The Upper
Handle and Crank Assembly paragraph on page
8).
NOTE: if the cables havebecomedisconnectedfrom the
clutchlever, reinstallthe cables as shown in FIG. 3 and
FIG. 3A.
AUGER
LEVER
CLUTCH
FIG. 2
CRANK
}LY
DEFLECTOR
AUGER
DRIVE
LEVER
FITTING
LOWER HANDLE
FIG. 1
CLUTCH
CABLE
UPPER
SSEMBLY
FIG. 3
AUGER DRIVE SPRING
FIG. 3A
7
Loading ...
Loading ...
Loading ...