Loading ...
Loading ...
Loading ...
SERVICE AND ADJUSTMENTS
CAUTION: ALWAYS DISCONNECT THE
SPARK PLUG WIRE AND TIE BACK
AWAY FROM THE PLUG BEFORE MAK-
ING ANY ADJUSTMENTS OR REPAIRS.
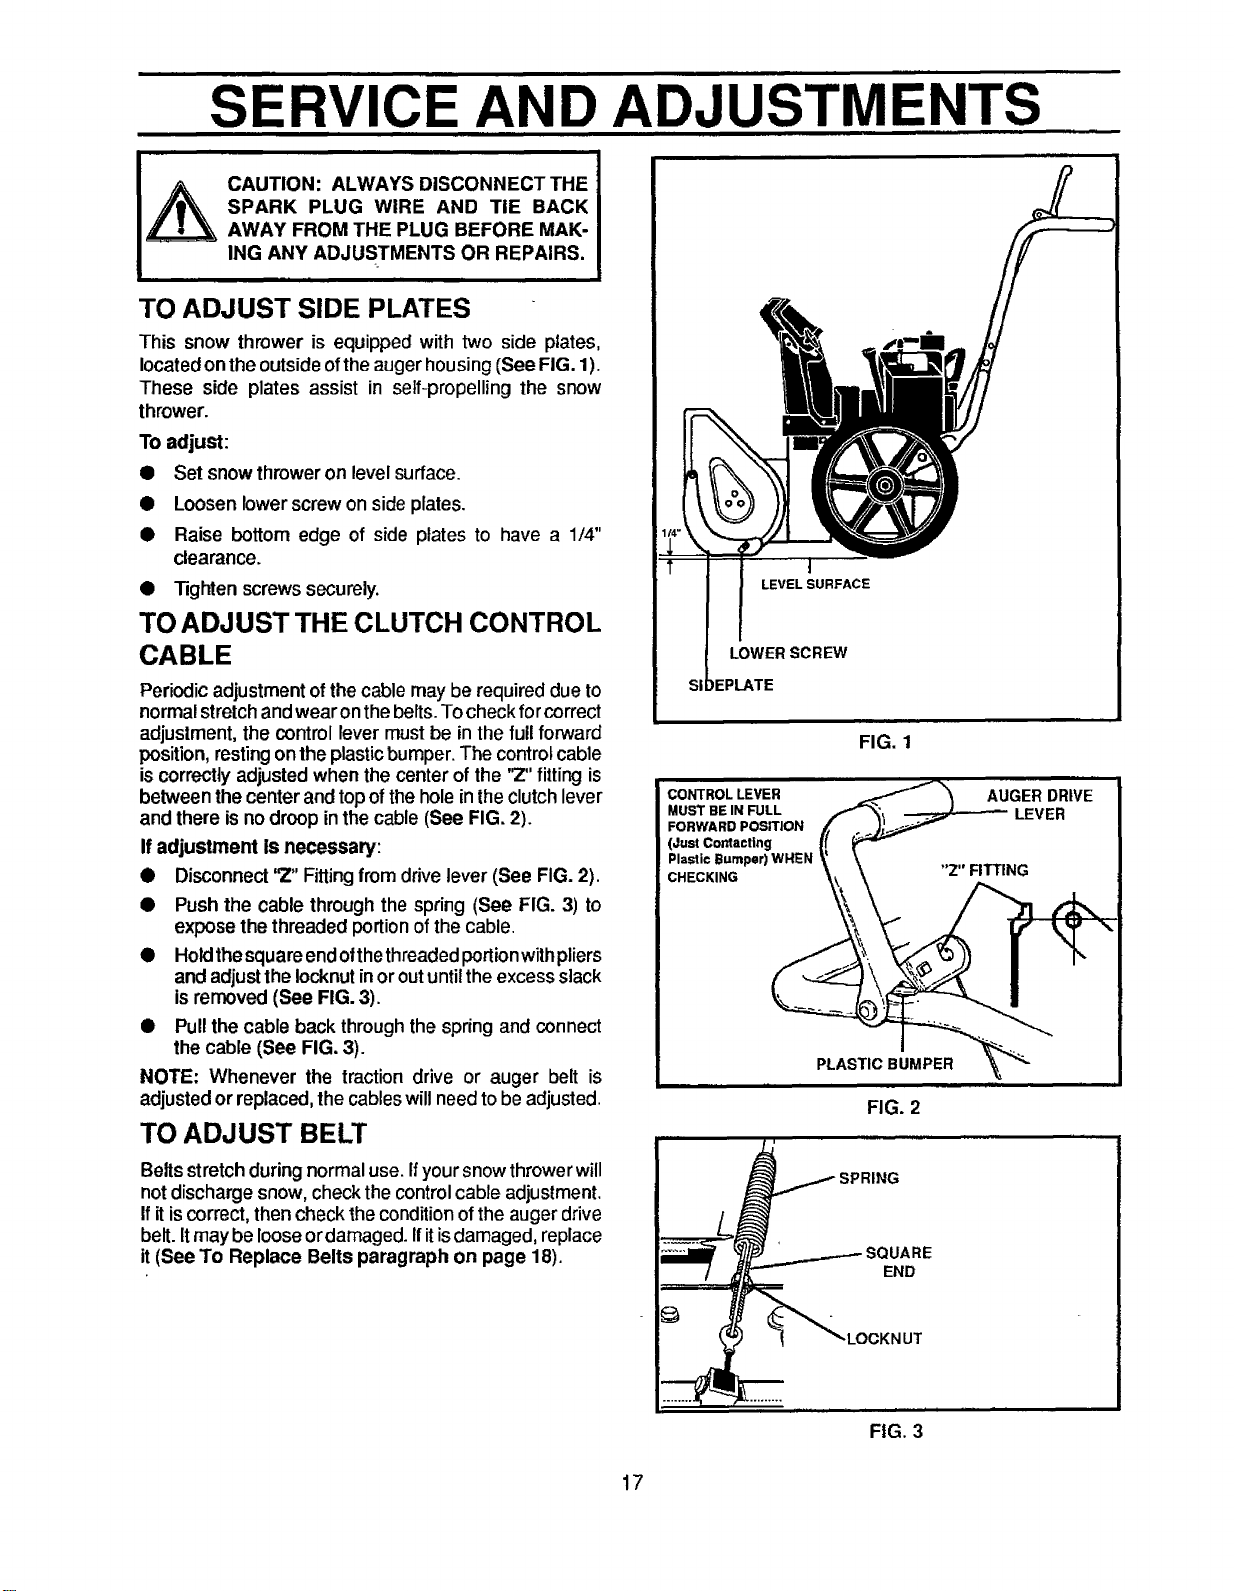
TO ADJUST SIDE PLATES
This snow thrower is equipped with two side plates,
located on the outside ofthe auger housing (See FIG. 1).
These side plates assist in self-propelling the snow
thrower.
Toadjust:
• Setsnowthroweronlevelsurface.
• Loosen lowerscrew on side plates.
• Raise bottom edge of side plates to have a 1/4"
clearance.
• Tighten screwssecurely.
TO ADJUST THE CLUTCH CONTROL
CABLE
Periodic adjustment of the cable may be required due to
normalstretch andwearon thebelts. Tocheck forcorrect
adjustment, the control lever must be in the full forward
position, resting on the plastic bumper. The control cable
is correctly adjusted when the center of the '_" fitting is
between the center and top of the hole in the clutch lever
and there is no droop inthe cable (See FIG. 2).
If adjustment is necessary:
• Disconnect'2" Fittingfrom drivelever (See FIG. 2).
• Push the cable through the spring (See FIG. 3) to
expose thethreaded portion ofthe cable.
• Holdthesquareendofthethreadedportionwithpliers
and adjusttheIocknutinoroutuntilthe excessslack
isremoved (See FIG. 3).
• Pullthe cable back through the spring and connect
the cable (See FIG. 3).
NOTE: Whenever the traction drive or auger belt is
adjusted or replaced,the cableswillneedtobe adjusted.
TO ADJUST BELT
I
LEVEL SURFACE
LOWER SCREW
IEPLATE
FIG. 1
CONTROL LEVER
MUST BE IN FULL
FORWARD POSITION
(Just Cordact|ng
Plastic Bumper) WHEN
CHECKING
PLASTIC BUMPER
FIG. 2
Beltsstretch during normal use. Ifyoursnow throwerwill
not discharge snow, check the control cable adjustment.
If itis correct, then check the condition of the auger drive
belt. Itmay be loose ordamaged. Ifitisdamaged, replace
it (See To Replace Belts paragraph on page 18).
IARE
END
FIG. 3
17
Loading ...
Loading ...
Loading ...