Loading ...
Loading ...
Loading ...
26 27
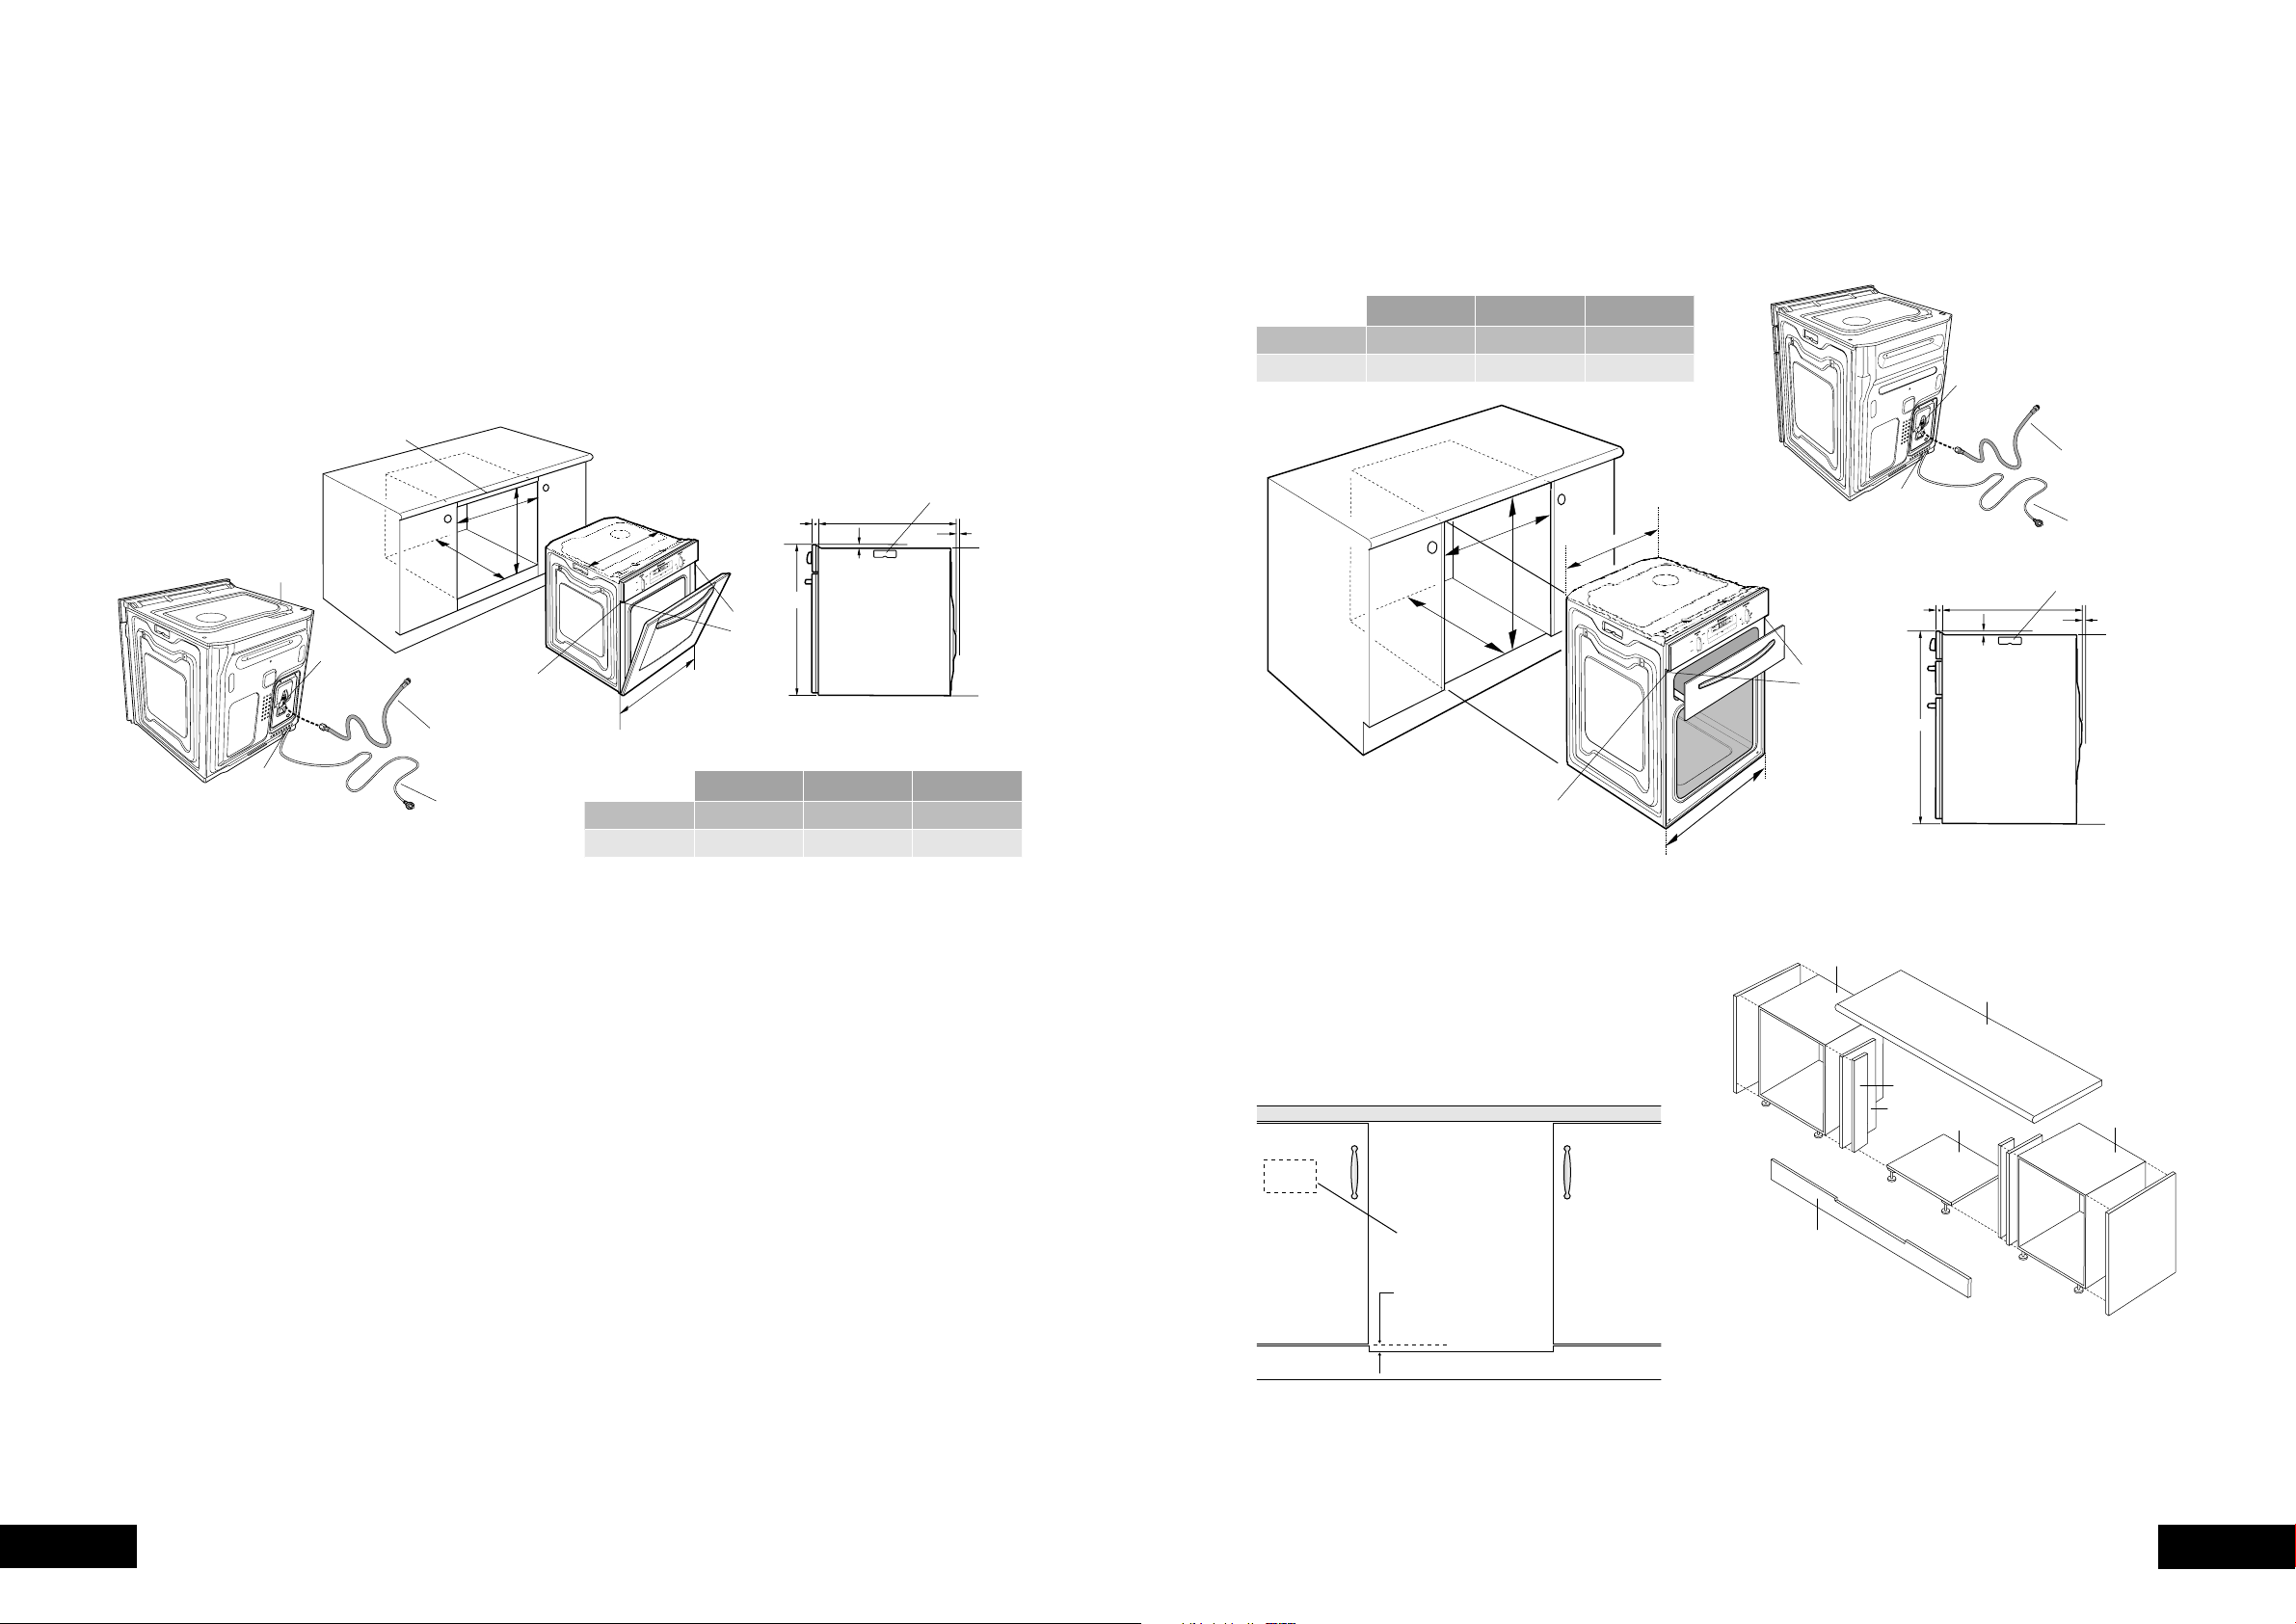
INSTALLATIONINSTALLATION
A
B
C
561
mounting
holes
596
Use 25mm long black
installation screws
supplied
1.7m flexible gas hose
(supplied unfitted)
1.5m electrical
service cord
D: Gas connection – 150mm from right hand side
– 220mm from bottom
E: Electrical connection – 50mm from right hand side
– at bottom
D
E
carry handle
8mm min
clearance
725
*20
553
15
Separate grill underbench ovens
GAS TYPE A B C
600 731 581min
565 723 560min
Recommended cabinet design
NOTE TO INSTALLER:
appliance, a minimum clearance distance of 10mm must
be allowed for between the bottom of the cooktop & the
Underbench Ovens
Your underbench oven looks best when the control panel
is directly under the benchtop. An upper infill panel
may have to be added if the cooktop placed above the
benchtop is too deep.
clearance between cooktop and oven.
GAS INSTALLATION INFORMATIONGAS INSTALLATION INFORMATION
upper infill if required
mounting
holes
carry handle
8mm min
clearance
Use long black
installation screws
supplied
1.7m flexible gas hose
(supplied unfitted)
1.5m electrical
service cord
D: Gas connection – 150mm from right hand side
– 220mm from bottom
E: Electrical connection – 50mm from right hand side
– at bottom
596
595
*20
553
15
558
A
D
E
B
C
GAS TYPE A B C
600 600 581min
565 590 560min
NOTE: Power point connection must be accessible with the
appliance installed.
720mm Module(s)
Bench Top
Kick Panel
Cleat (2)
Infill Panel (2)
Cooker Platform
720mm Module(s)
Area for mounting
of power point.
Supporting shelf 8mm
below door line to give
perfect alignment of
cooker & cupboard
(kick panel notched
to suit).
Front View
Loading ...
Loading ...
Loading ...