Loading ...
Loading ...
Loading ...
22 23
INSTALLATIONTROUBLESHOOTING
Faults
yourself and so continue cooking.
NOTE:
period if your problem is due to the causes listed below.
Data Plate
parts please:
Number shown on the data plate. The data plate is
visible when the oven or grill door is open.
8.00am 5.00pm M
F).
call the number listed on the back page.
PROBLEM POSSIBLE CAUSE
not working
- Time of day not set.
- Power not turned on.
empty.
- Household fuse has blown or power
supply is off.
NOTE:
not working
- Household fuse has blown.
NOTE:
enough
- Foil or trays on bottom of oven.
operating instructions)
- Household fuse has blown.
NOTE:
blow, call the
empty.
- The oven safety shutdown has enacted.
Reset the controls, wait 90 seconds and
then re-start the oven.
NOTE:
Timer flashing
on display
- Power failure or interruption.
NOTE: Reset time of day and any
cooking functions you were using.
Unit smoking
when first used
- Protective oils being removed.
be replaced
after removal
or condensation on
control panel
or knobs
for air movement at top of oven door.
NOTE:
SOLVING PROBLEMS
WARNING
Use an authorised person.
As stated in the local municipal building codes and other
relevant statutory regulations.
Refer to data plate for rating information and circuit
diagram. The data plate is positioned behind the bottom
of the oven door. The circuit diagram is positioned on
the top panel of the appliance.
WARNING
This appliance must be properly earthed
Prepare the cupboard opening to match your appliance
supply cable (where fitted) does not kink.
To prevent tipping, use the screws supplied to secure
your oven into the cupboard. Use just 2 screws for
underbench and separate grill underbench ovens, and
4 screws for separate grill wallovens. Remove the bottom
door in separate grill wallovens to provide access to the
bottom 2 screwing points (see illustrations on page 21).
if the cord is damaged, it must be replaced by the
accessible after installation.
(e.g. vinyl coated) may result in deterioration of the low
temperature coating by discolouring or bubbling.
surfaces, use an installation kit available from the vinyl-
wrap supplier.
for damage caused by installation into low temperature
tolerant cabinets.
operates correctly before handing it over to the customer.
unvented living space, particularly if that space incorporates
CAUTION
To avoid any potential hazard, you must follow our instructions below
when you install your appliance. Failure to install the appliance correctly
could invalidate any warranty or liability claims and lead to prosecution.
This appliance is only suitable for connection to fixed
consumer piping where the maximum over-pressure is
limited to 14kPa
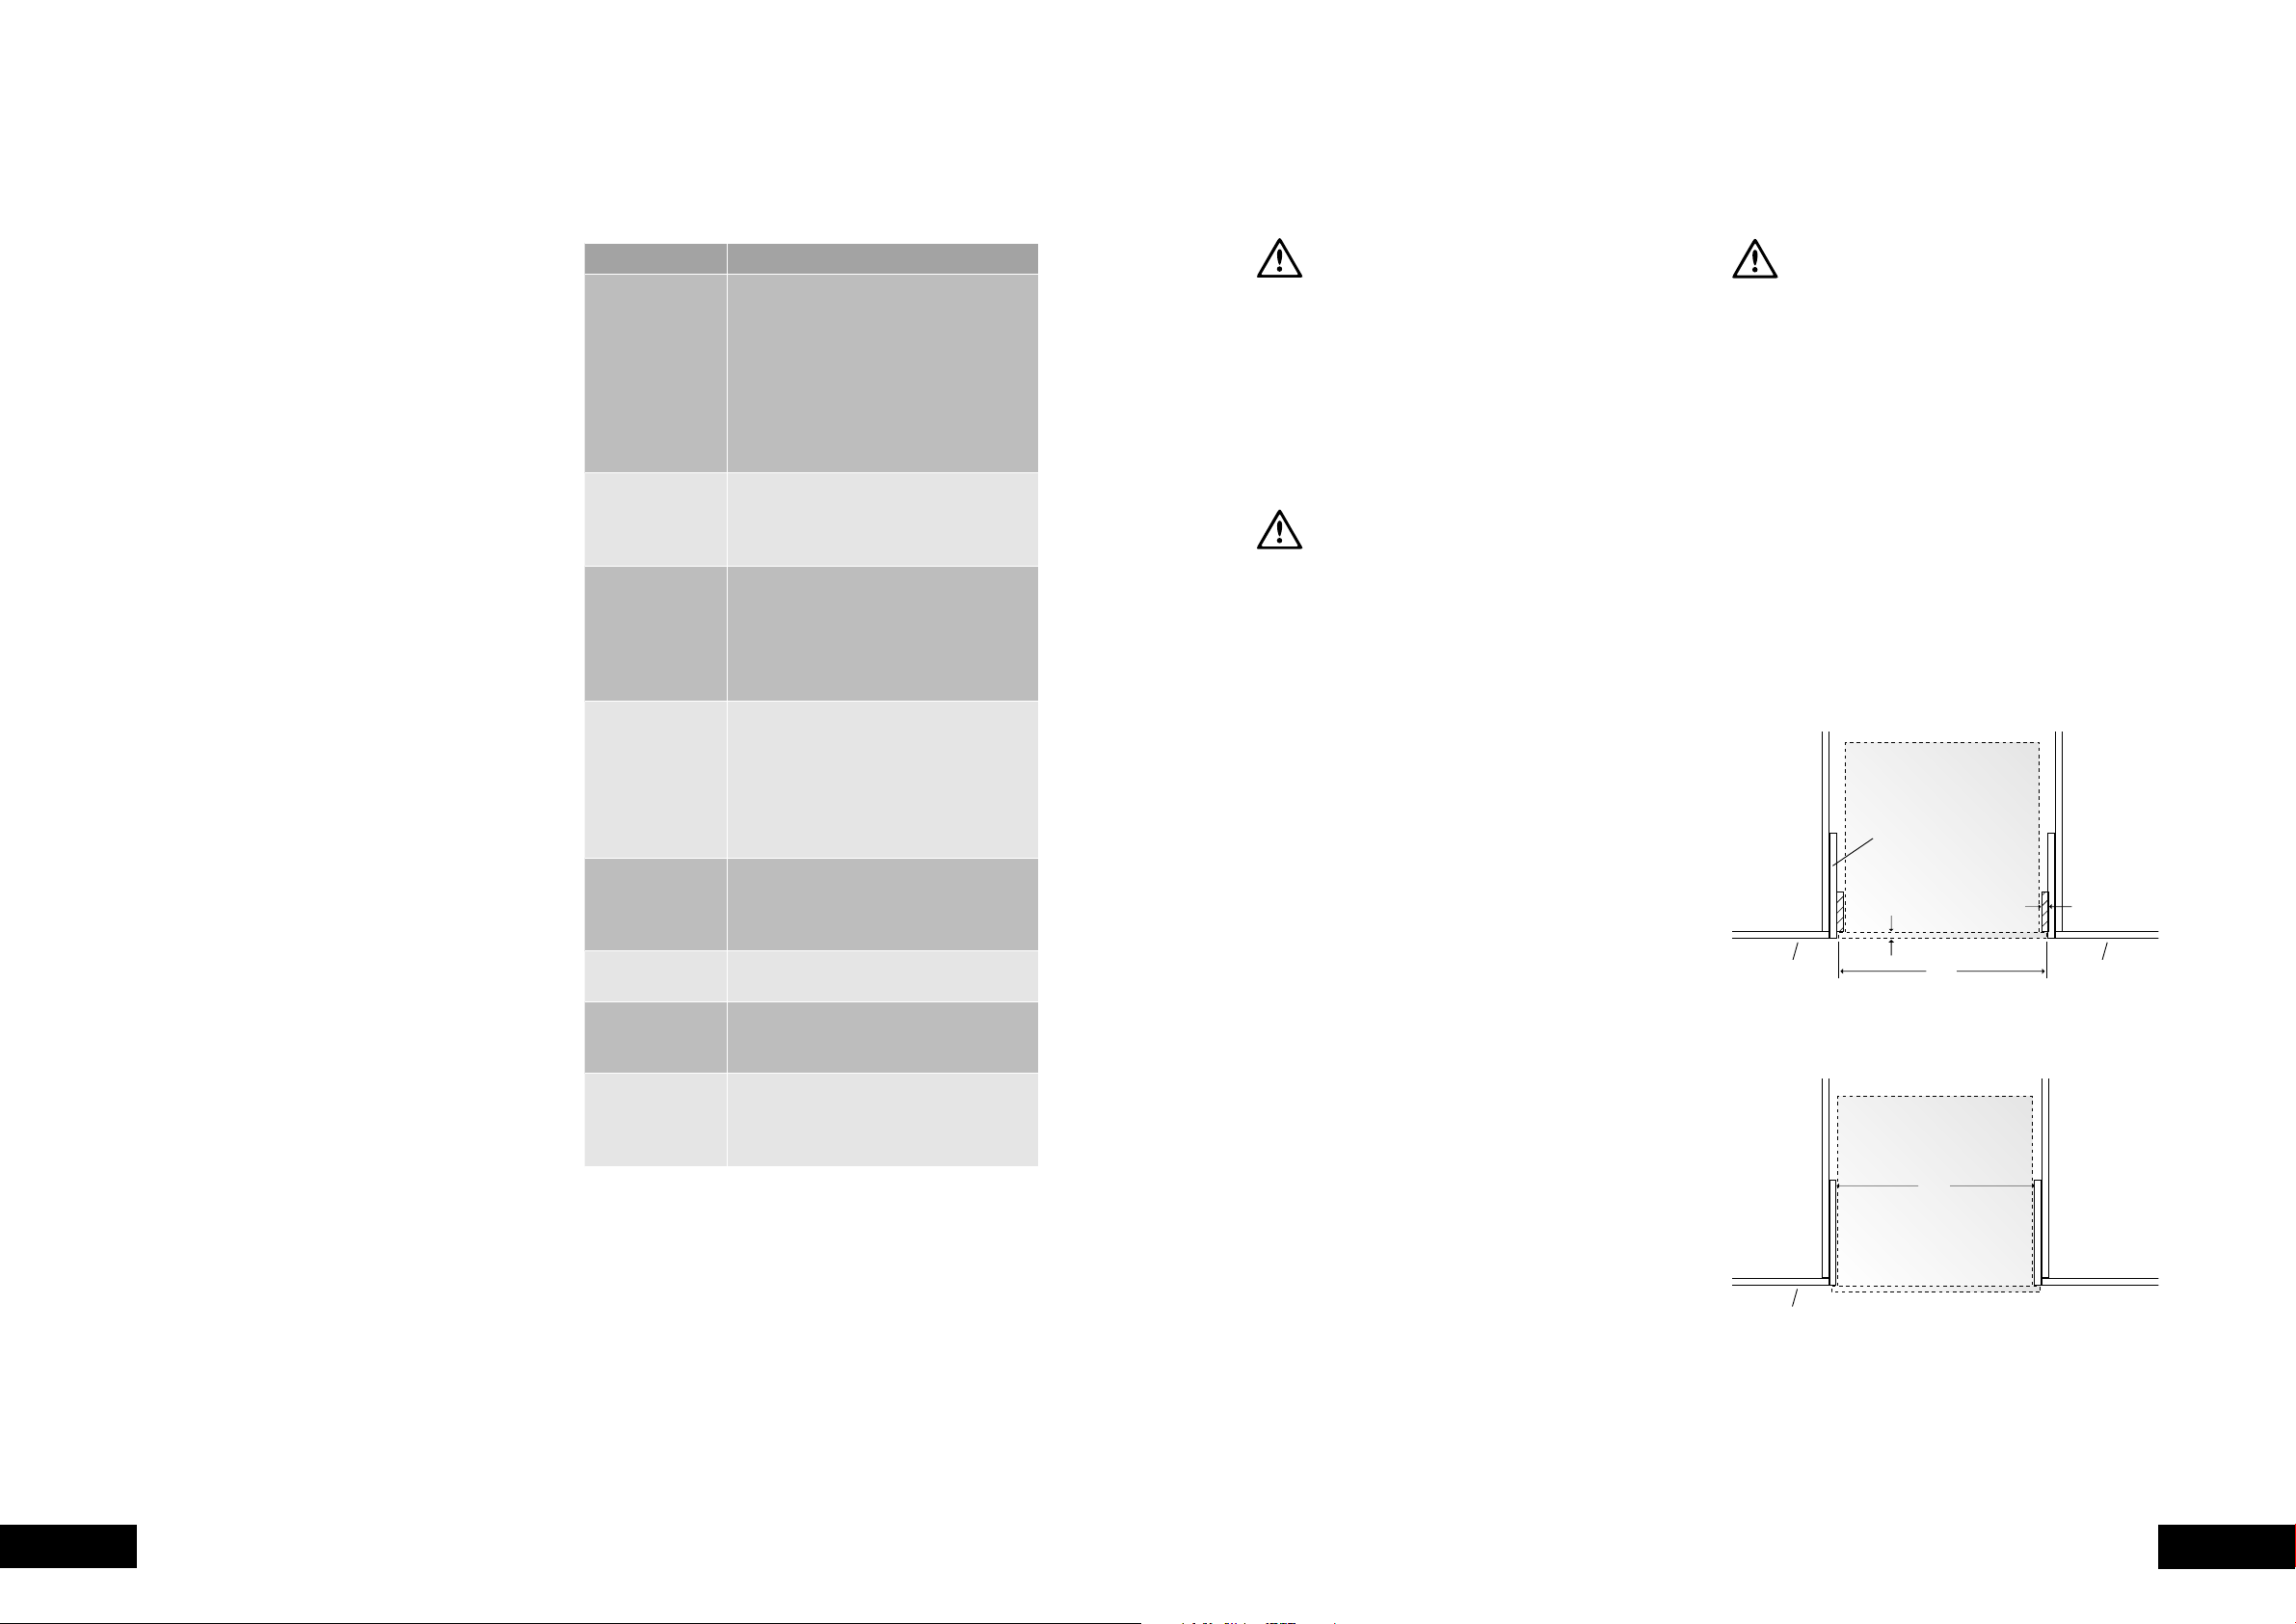
Cabinet Construction for your appliance
For the best integration within a kitchen, install this
appliance in a standard 600mm wide cupboard that gives
a flush fit with the surrounding cupboard fronts (Figure A).
a proud fit with the surrounding cupboard (F
NOTE: Your appliance must be mounted on a flat surface
for the full width and depth of the product.
16mm Cleat
Figure B – Proud fit (top view)
Cupboard front
20mm
Infill panel
565
Figure A – Flush fit (top view)
Cupboard door Cupboard door
600
16mm Cleat
Figure B – Proud fit (top view)
Cupboard front
20mm
Infill panel
565
Figure A – Flush fit (top view)
Cupboard door Cupboard door
600
INSTALLING YOUR APPLIANCE
Loading ...
Loading ...
Loading ...