Loading ...
Loading ...
Loading ...
The Problem Solver
Stainless Steel Outdoor Cooking" Center
Questions ?
Use this
problem
solver!
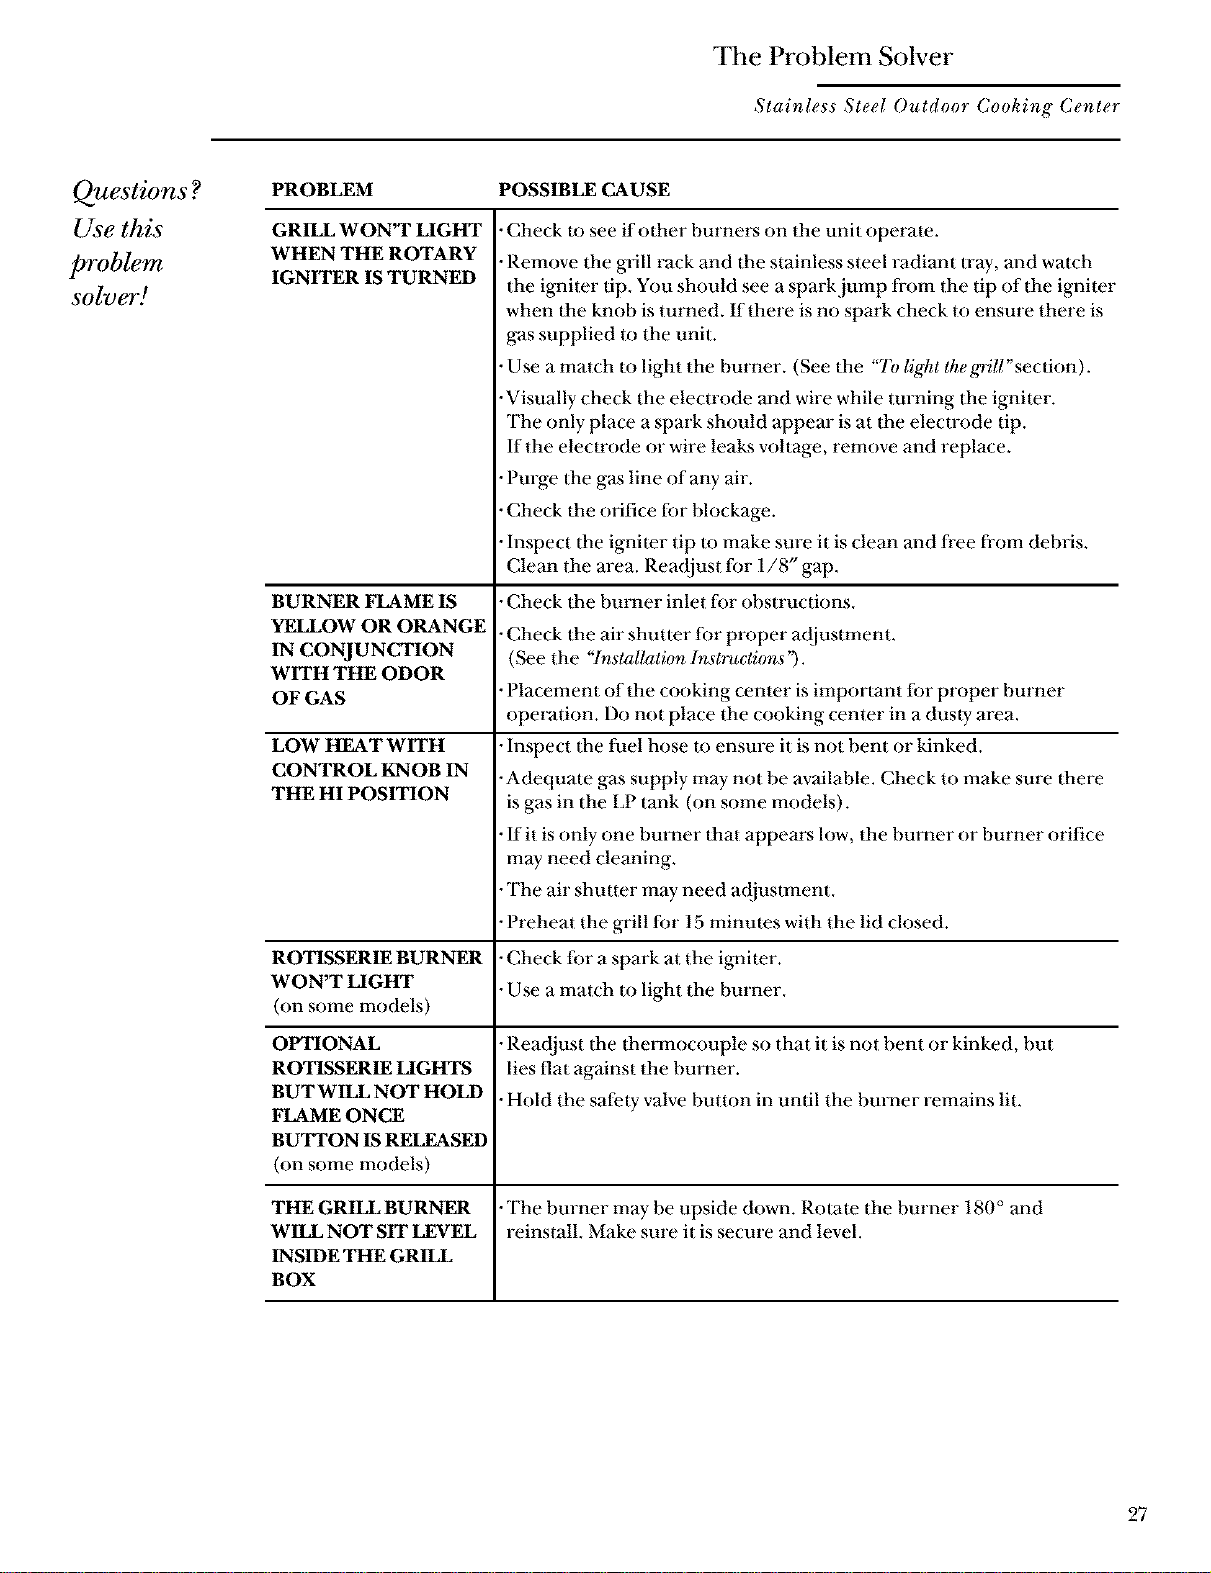
PROBLEM POSSIBLE CAUSE
GRILL WON'T LIGHT
WHEN THE ROTARY
IGNITER IS TURNED
BURNER FLAME IS
YFJ_OW OR ORANGE
IN CONJUNCTION
WITH THE ODOR
OF GAS
LOW HFAT WITH
CONTROL KNOB IN
THE HI POSITION
ROTISSERIE BURNER
WON'T LIGHT
(on some models)
OPTIONAL
ROTISSERIE LIGHTS
BUT WILL NOT HOLD
FLAME ONCE
BUTTON IS RELEASED
(on some models)
THE GRILL BURNER
WILL NOT SIT LEVEL
INSIDE THE GRILL
BOX
•Check to see if other burners on the unit operate.
•Remove the grill rack and dae stainless steel radiant tray, and watch
the igniter tip. You should see a spark jump from the tip of the igniter
when the knob is turned. If there is no spark check to ensure there is
gas supplied to the unit.
•Use a match to light the burner. (See the "To ligt_,tthe grill" section).
•Visually check the electrode and wire while turning the igniter.
The only place a spark should appem" is at dae electrode tip.
If the electrode or wire leaks voltage, remove and replace.
•Purge dae gas line of any air.
•Check 1he orifice for blockage.
•Inspect dae igniter tip 1o make sure it is clean and fi'ee from debris.
Clean the area. Readjust for 1/8" gap.
•Check dae burner inlet for obstructions.
•Check dae air shutter for proper adjustment.
(See the "Installation I_a_tructious') .
•Placement of the cooking center is important for proper burner
operation. Do not place the cooking center in a dusly area.
•Inspect the fuel hose to ensure it is not bent or kinked.
•Adequate gas supply may- not be available. Check to make sure there
is gas in the LP tank (on some models).
•If it is only one burner that appears low, the burner or burner orifice
may need cleaning.
•The air shutter may need adjustment.
•Preheat the grill for 15 minutes with the lid dosed.
•Check for a spark at the igniler.
•Use a match to light the burner.
•Readjust the thermocouple so that it is not bent or kinked, but
lies flat against the burner.
•Hold the safety- valve button in until the burner remains lit.
•The burner may be upside down. Rotate the burner 180 oand
reinstall. Make sure it is secure and level.
27
Loading ...
Loading ...
Loading ...