Loading ...
Loading ...
Loading ...
GETTING TO KNOW YOUR VEHICLE 113
Adaptive Cruise Control (ACC)/Forward
Collision Warning (FCW) Sensor Protective
Cover — If Equipped
Your vehicle may be equipped with a protective
cover that is to be used whenever the windshield is
folded down in order to protect the Adaptive Cruise
Control (ACC)/Forward Collision Warning (FCW)
sensor. To install the cover, follow these
instructions:
1. Secure the top part of the cover so that it
hinges to the header.
2. Swing the cover down and push on it so that it
covers the opening.
3. Check to make sure the cover is secured
properly.
NOTE:
Be sure to remove the cover before returning the
windshield to the normal position. Store the cover
in the cargo area.
Cleaning Instructions
During windshield down applications, dust/dirt can
accumulate in the cover and block the camera
lens. Use a microfiber cloth to clean the camera
lens, module, and inside cover, being careful not to
damage or scratch the module.
RAISING THE WINDSHIELD
1. Release the strap that secured the windshield
in the lowered position.
2. Raise the windshield.
3. Using the provided #40 Torx head driver,
reinstall the four Torx screws located along the
interior of the windshield. Secure them until
they are snug, being careful not to
cross-thread the screws or overtighten.
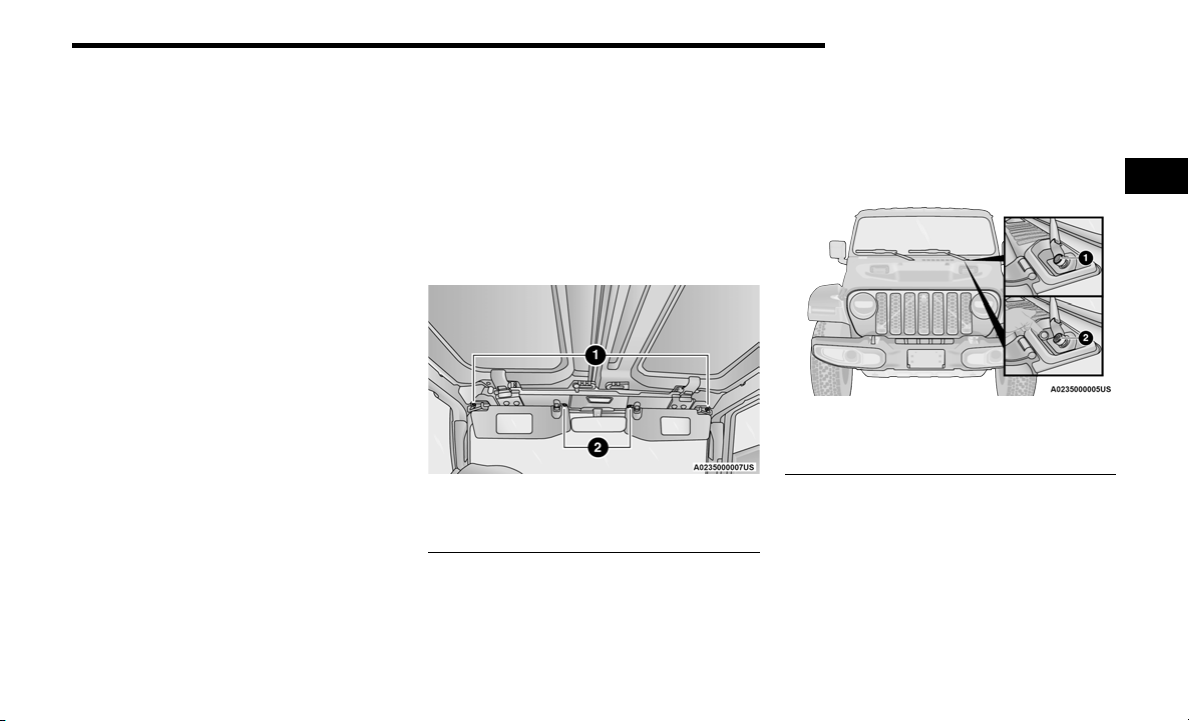
Interior Torx Screw Locations
4. Reinstall the windshield wiper arms using the
provided 15 mm socket. First, align the tips of
the blade to the “T” mark in the glass. Then,
while holding the arm in that position,
reinstall the hex nut and tighten until snug. Be
careful not to overtighten. Repeat for the
other arm.
5. Reinstall the protective caps over the wiper
arm hex bolts and push gently until they snap
into place.
Step Five
6. After completing the steps above:
If your vehicle is equipped with a Soft Top,
reinstall the Door Rails and raise the top.
If your vehicle is equipped with a Hard Top,
reinstall the Freedom Panels.
1 — Outside Torx Screws
2 — Inside Torx Screws
1 — Hex Bolt Cover Installed
2 — Hex Bolt Cover Removed
2
22_JL_OM_EN_USC_t.book Page 113
Loading ...
Loading ...
Loading ...