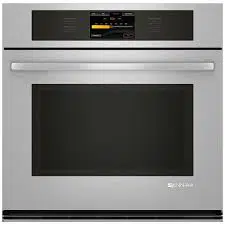
Loading ...
Loading ...
Loading ...

Convect Pastry is best for 1,2, or 3 rack baking of items such as
cream puffs, turnovers, and croissants.
_,_0 _,V@C/__{0Ct_
Convect roast can be used for roasting meats, poultry and
vegetables. During convect roast, the broil, convect, and bake
elements will cycle on and off in intervals to maintain oven
temperature, while the fan constantly circulates the hot air.
A. Broil element
B. Convection elements
C. Convection fans
D. Bake element
• Reduce recipe temperature by 25°F (14°C) for this mode.
Before Using Convect Pastry:
Before using Convect Pastry, see the "Positioning Racks and
Bakeware" section and the following tips for rack positions.
1-rack baking: 3f
2-rack baking: 20 and 4f
3-rack baking: lo, 3f, and 5r
NOTE: An "o" after the rack position number indicates that the
offset rack should be used. An "f" indicates that the flat rack
should be used, and an "r" indicates that the roll-out rack should
be used.
To Use Convect Pastry:
1. Touch MODES tab to move to the Modes menu.
2. From the Modes menu, touch CONVECT PASTRY.
3. Touch the Temperature tab to move to the Temperature
screen.
Use the slider to enter a desired cooking temperature or
touch the -5°F (-1 °C) or +5°F (+1 °C) buttons. The temperature
must be between 170°F (77°C) and 550°F (288°C).
4. Touch START to begin preheating oven.
OR
5. If you want to set a cook time or access the Keep Warm and
Delay Start functions, touch the TIMER NOT SET tab to enter
the Cook Time screen.
Enter a cooking length using the on-screen number keyboard
to set a timer to alert you when cooking ends. The time length
may not exceed 12:00:00.
6. (Optional) To keep food warm after cooking ends, turn Keep
Warm ON. See the "Keep Warm" section for additional
information.
7. (Optional) To set a delayed start, touch DELAY START and set
desired time. See "Delay Start" section for additional
information.
8. Touch START to begin preheating oven.
9. Place food in oven when preheat signal sounds. The screen
will also prompt you when to insert food.
10. When the cook timer ends, you can start the Keep Warm
cycle if not preset, Add More time or Cancel the timer.
11. Touch CANCEL (Cancel Upper or Cancel Lower on double
models) to turn off the oven.
C
A. Broil element
B. Convection elements
C. Convection fans
D. Bake element
If the oven door is opened during convection roasting, the fans
turn off immediately and turn on immediately when the door is
closed. Bake, broil, and convect elements will turn off
approximately 30 seconds after the door is opened. They will turn
on again approximately 30 seconds after the door is closed.
• The cook time should be reduced 15-30%.
For best results, use a broiler pan, grid and roasting rack,
designed to drain juices and help avoid spatter and smoke.
If you would like to purchase a Broiler Pan Kit, it may be
ordered. See "Assistance or Service" section to order. Ask for
Part Number W10123240.
To Use Convect Roast:
Before using convect roast, see the "Positioning Racks and
Bakeware" section. It is not necessary to wait for the oven to
preheat before putting food in, unless recommended in the
recipe.
Use the roasting rack on top of the broiler pan and grid. This
holds the food above the grid and allows air to circulate
completely around all surfaces.
1. Place food in oven if no preheat is recommended.
2. Touch MODES to move to the Modes menu.
3. From the Modes menu, touch CONVECT ROAST.
4. Touch the Temperature tab to move to the Temperature
screen.
Use the slider to enter a desired cooking temperature or
press the -5°F (-1°C) or +5°F (+1°C) buttons. The temperature
must be between 170°F (77°C) and 550°F (288°C).
5. Touch START to begin cooking or preheating.
OR
6. If a Cook Time, Keep Warm or Delay Start function is desired,
press the TIMER NOT SET tab and enter the Cook Time
screen.
Enter a cooking length using the on-screen number keyboard
to set a timer to be alerted when cooking ends. The time
length may not exceed 12:00:00.
7. (Optional) To keep food warm after cooking ends, turn Keep
Warm ON. See the "Keep Warm" section for additional
information.
18
Loading ...
Loading ...
Loading ...