Loading ...
Loading ...
Loading ...
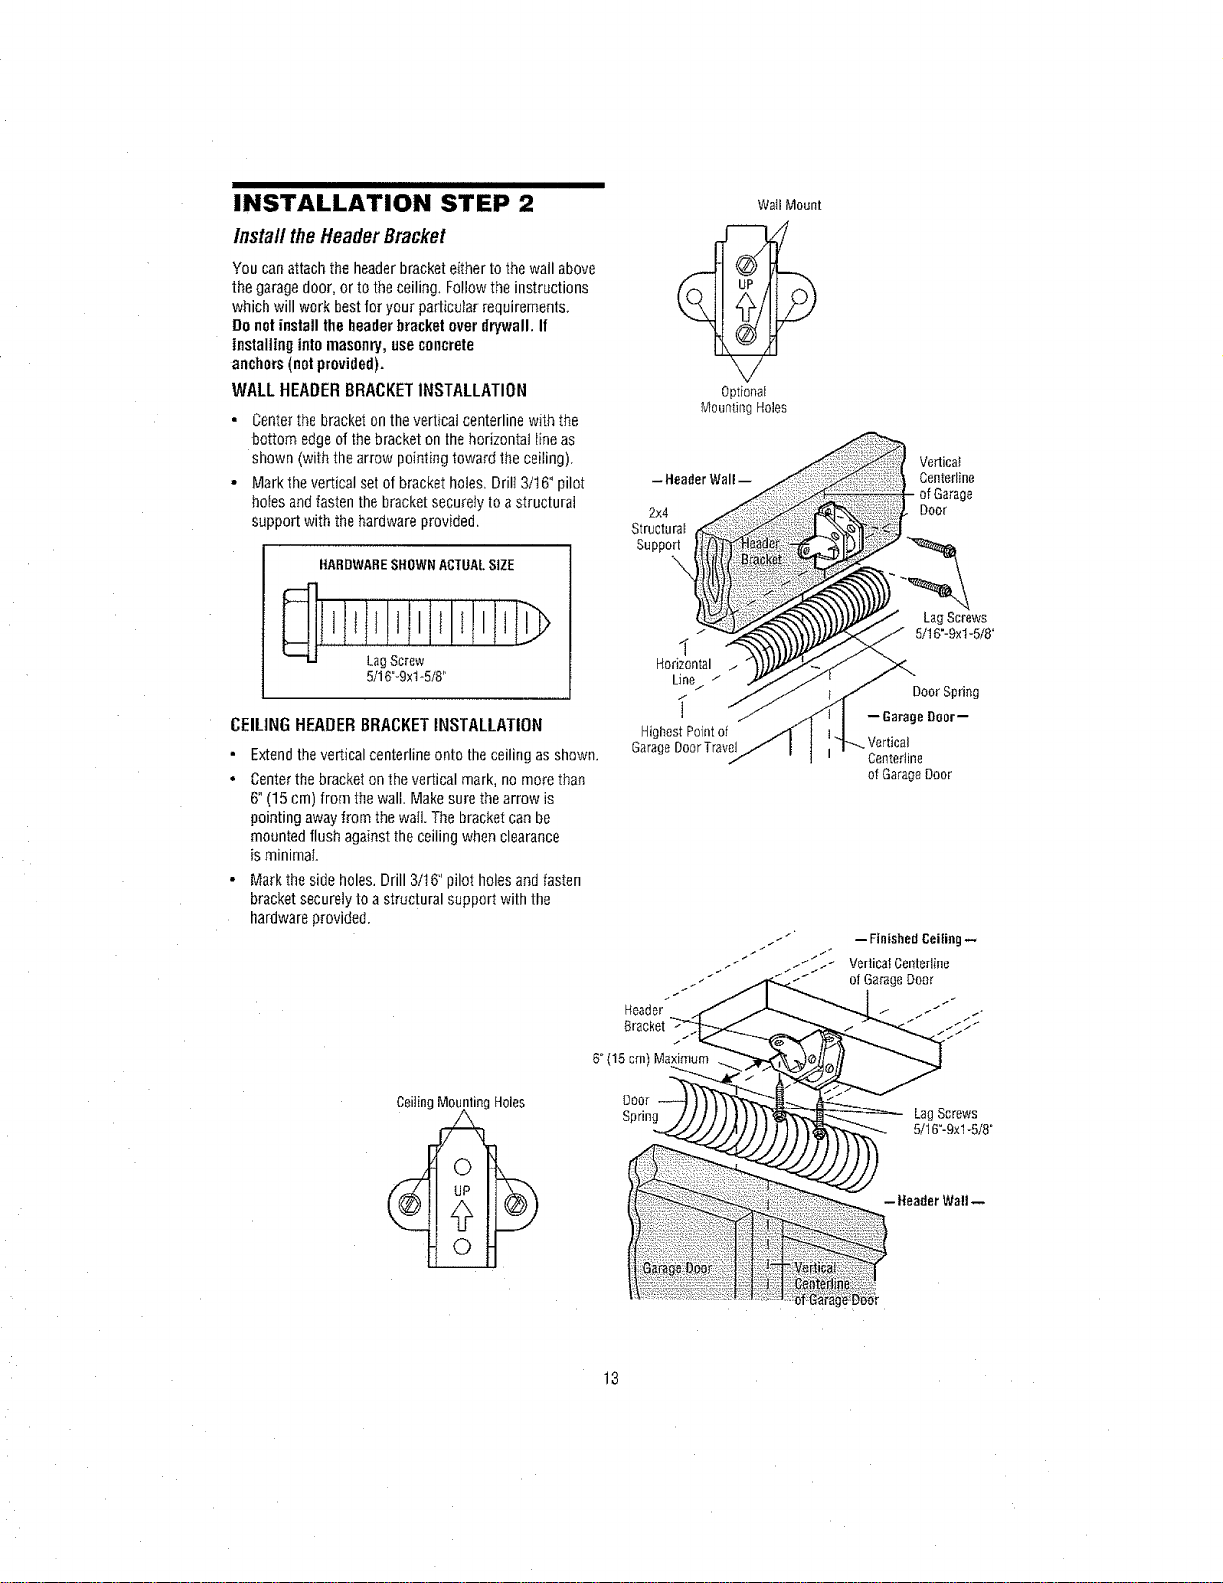
INSTALLATION 2
lnsta// the HeaderBracket
Youcanattachthe headerbracketeithertothewailabove
the garagedoor,ortotheceiling.Followtheinstructions
whichwill workbestforyourparticularrequirements,
Donotinstall theheaderbracketoverdrywall. If
installing intomasonry,useconcrete
anchors(notprovided).
WALLHEADERBRACKETINSTALLATION
• Centerthe bracket on thevertical centerline with the
bottom edgeof the bracket on the horizontal Iine as
shown (with the arrow pointing toward the ceiling).
• Markthe vertical set of bracket holes. Drill 3/t6 °pilot
holesandfasten the bracket securely to astructural
support with the hardware provided.
HARDWARESHOWNACTUALSIZE
Lag Screw
5/16°-9xt-5/8"
CEILINGHEADERBRACKETINSTALLATION
• Extendthe vertical centerline onto the ceiIing as shown.
• Centerthe bracket on thevertical mark, no more than
6°(15 cm) from thewalt. Make sure the arrow is
pointing away from the waft.The bracket can be
mounted flush against theceiIing when clearance
is minimal
- Markthe side holes, Drill 3/16" pilot holesand fasten
bracket securelyto astructural support with the
hardware provided,
Wall Mount
Optional
Mounting Holes
2x4
Structura_
Support
I
Horizontal /
Line/ ./
i
HighestPointof
GarageDoorTravel
Header
Bracket
6° (15 cm) M_
DoOr
Spring
Vertica}
Centerline
of Garage
Door
LagScrews
5/16"-9xl-5/8"
Door Spring
-- 6arago Door--
Vertical
Centertine
of GarageDoor
-- FinishedCeiling--
VerticalCenteriine
of GarageDoer
LagScrews
5/16"-9xl -5/8"
- Header Wall --
13
Loading ...
Loading ...
Loading ...