Loading ...
Loading ...
Loading ...
36
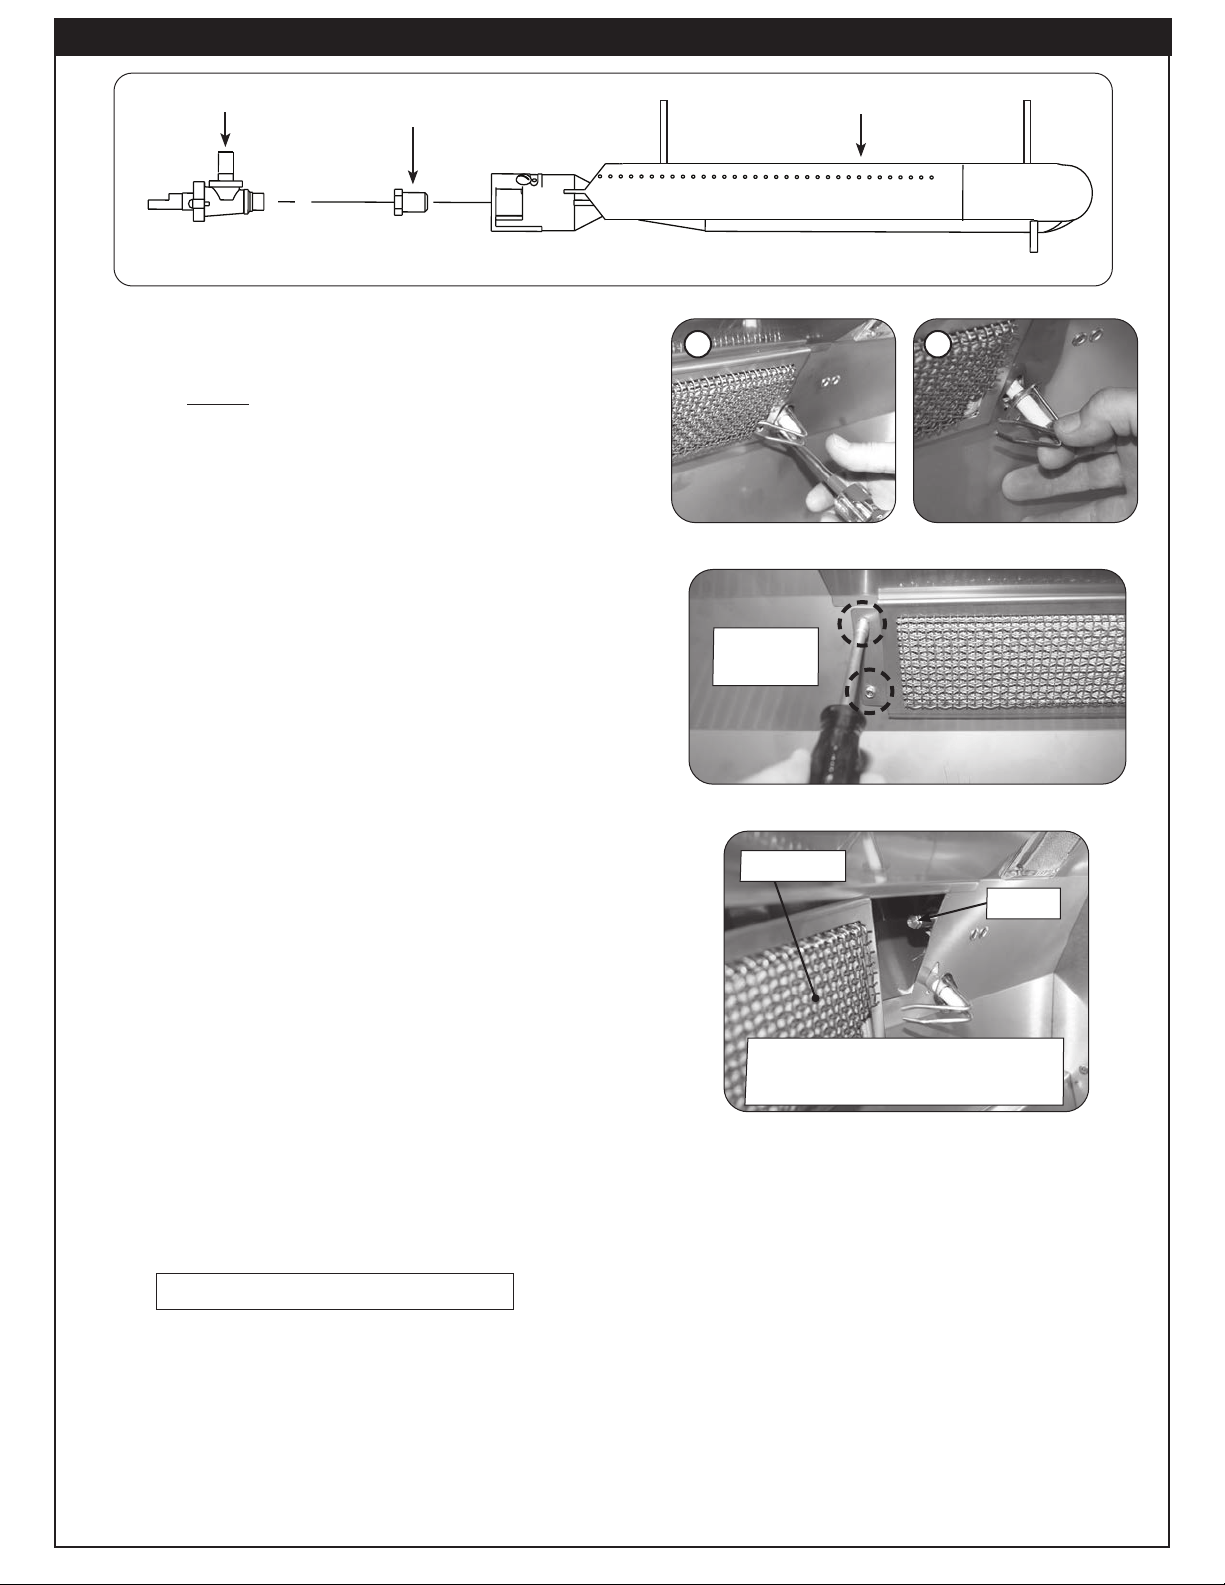
Fig. 36-3 Remove backburner mounting screws
Remove
backburner
screws
Fig. 36-2 Remove electrode
Fig. 36-1 - Main burner orifice diagram
Orifice
Burner
Valve
4. Replace burners (See BURNER REMOVAL
section).
Note: It is critical to the continued safe functioning
of the burners that the orifices are centered
and completely inside the burner gas inlets.
5. Replace the vaporizer panels and the cooking
grids.
6. If applicable, reinstall the control panel.
Convert/Check Backburner Orifice (if
equipped)
Note: It may be necessary to remove the rotisserie
rod before beginning this procedure.
1. Remove the backburner electrode mounting
screw (1/4" hex) (see Fig. 36-2, A) and loosen the
electrode. Carefully pull the electrode assembly
slightly from the grill wall to give enough clearance
for the backburner to be removed (see Fig. 36-2,
B).
2. Remove the backburner mounting screws (
1
/
4
" hex)
located at the left end of the backburner assembly
(see Fig. 36-3).
3. Carefully pull the left end of the backburner
forward until the burner can be moved to the left
pulling it free from the orifice located on the right
side (see Fig. 36-4).
4. Use a
3
/
8
" hex nut driver to remove the exposed
orifice. Check orifice. If needed, replace it with the
correct orifice for the new gas.
5. Replace the backburner assembly and the
electrode by reversing the procedure in steps 1.
through 3.
Fig. 36-4 Remove backburner
The backburner orifice can be
seen on the right side after
removing the backburner.
backburner
orifice
Procedure continued on next page
A
B
SERVICING AND CLEANING (Cont.)
Loading ...
Loading ...
Loading ...