Loading ...
Loading ...
Loading ...
34
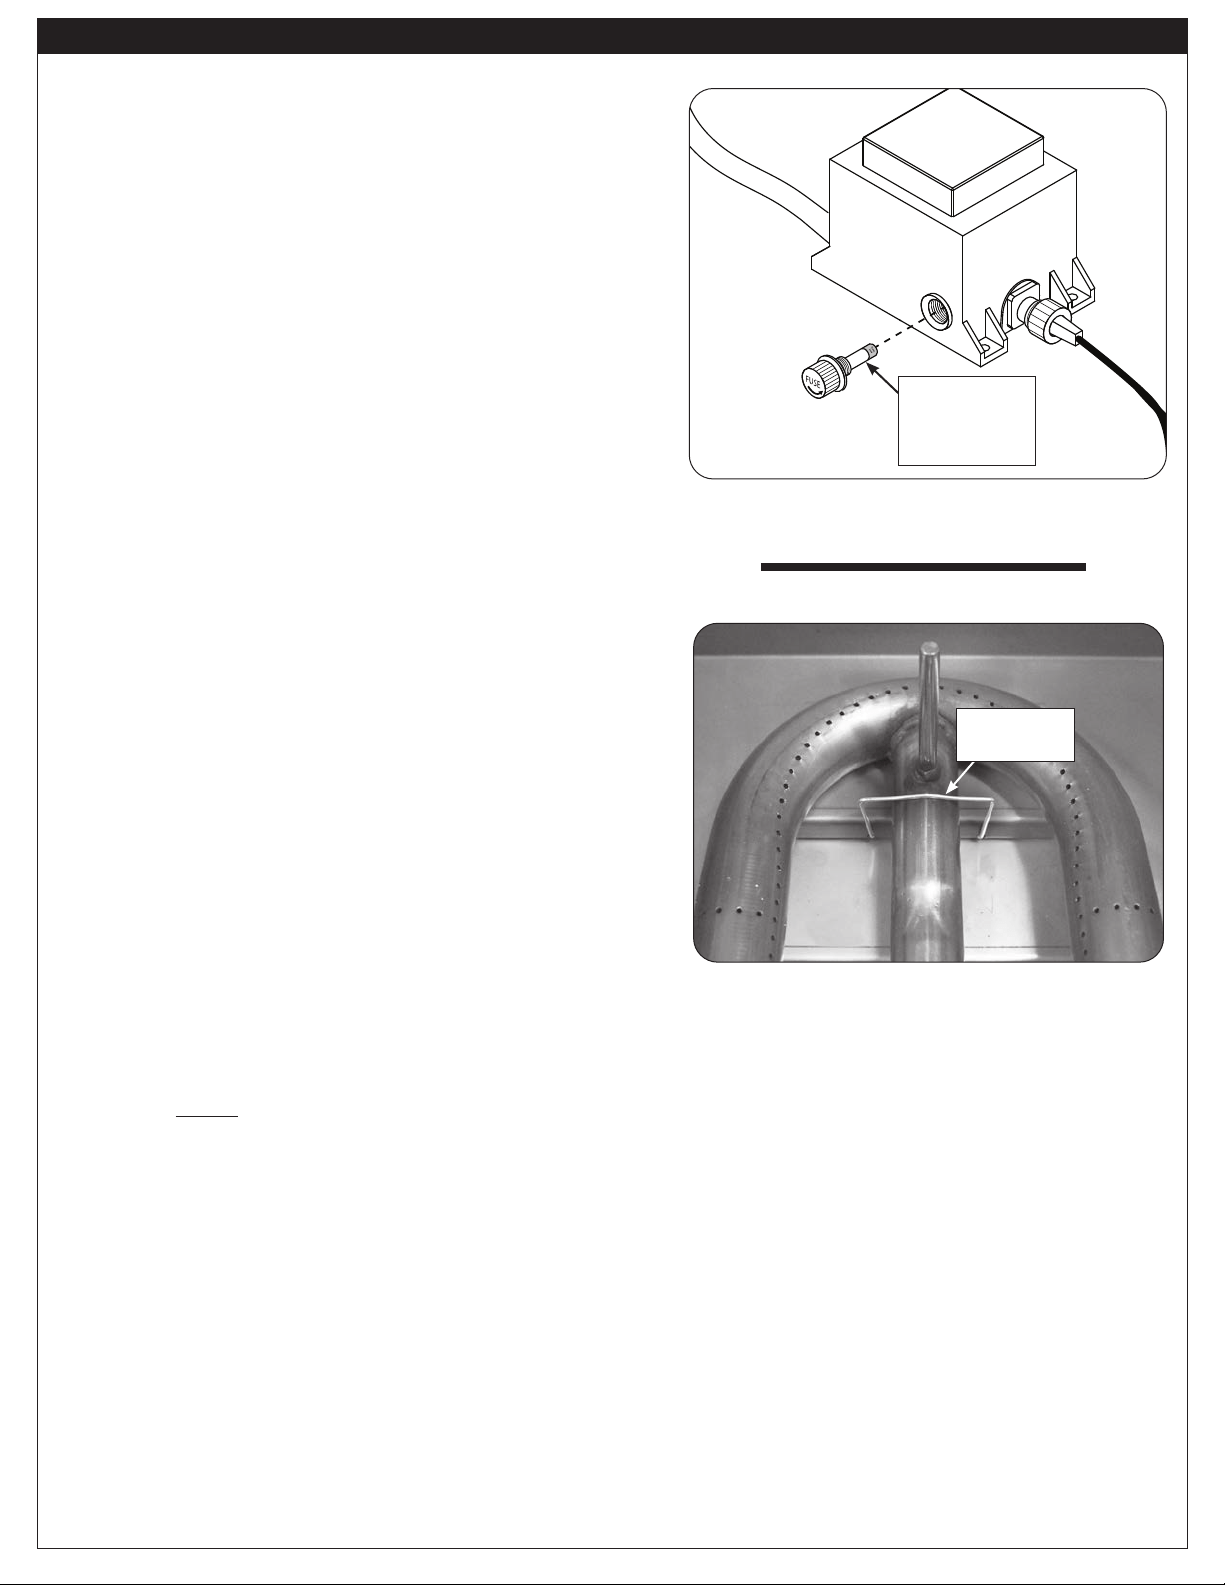
FUSE REPLACEMENT
If the unit is connected to the power supply but the ignition
system and interior oven lights are not functioning, fuse
replacement may be required.
1. Ensure the knobs are in the OFF position, the gas
supply is turned off, and the light switch is off.
2. Disconnect the power supply cord from line power.
3. Locate the fuse holder on the power supply box (see
Fig. 34-1).
4. Turn the fuse cap counterclockwise to remove the cap and
access the fuse.
5. Replace with a new fuse (model # 24-B-57).
6. Re-secure the fuse cap.
7. Reset the GFCI receptacle if needed, then test the unit.
Note: If the unit powers up but some or all components are not
responding, reference the TROUBLESHOOTING
section.
BURNER REMOVAL
1. Remove the cooking grid and vaporizer panel from above
the burner that is to be removed and set them aside.
2. Locate the burner clip (located over the rear center tube of
the burner) and slightly pinch and remove the clip from
the burner support. See Fig. 34-2.
3. Carefully lift the burner from the burner support anchor peg
holes and out from the hole in the forward fire wall.
4. To replace the burner, slide the open cylindrical end of the
burner around the orifice, enveloping it and centering on
it. Then lower the back end anchor pegs into the burner
support anchor peg holes.
Note: It is critical to the continued safe functioning of the burners
that the orifices are centered and completely inside
the burner gas inlets.
5. Re-install the burner clip around the burner and into the
holes in the burner support.
6. Replace the cooking grid and vaporizer panel.
Fig. 34-1 Replace fuse
Model #:
24-B-57
Fuse type:
T6.3AL (250V)
Fig. 34-2 Main burner removal
Remove
burner clip
SERVICING AND CLEANING (Cont.)
Loading ...
Loading ...
Loading ...