Loading ...
Loading ...
Loading ...
W415-1517 / A / 09.02.16
47
EN
9.5 CHIMNEY CLEANING
86.1
Both the chimney and the appliance must be inspected and cleaned if necessary at least once a year.
For serious wood burners, chimney cleaning must be done as needed to avoid chimney fi res; the venting
systems for controlled combustion appliances may need cleaning as often as once a month. These rates,
however, depend on the burning habits of the individual operating the appliance. For example, it is possible to
clog a solid fuel appliance chimney in a few days if slow, smoldering fi res are burned and the chimney is cold.
NOTE: Appliances burned consistently without hot fi res may result in signifi cant creosote
accumulations in the chimney.
Certain items and considerations are important in chimney cleaning:
• Proper tools should be used, including a brush specifi cally designed for chimney cleaning.
• The chimney connector and dampers as well as the chimney should be cleaned.
• The appliance’s fi rebox and baffl e system should be cleaned if needed.
• The chimney should be inspected and repairs made if needed, preferably by a qualifi ed chimney
sweep or mason.
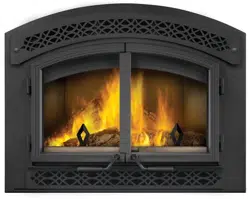
9.6 CAST IRON DOOR GLASS AND GASKET REPLACEMENT
A. Remove the damaged gasket.
B. Apply a thin bead of adhesive (red high
temperature silicone (RTV) or wood stove gasket
cement) in the top, side and bottom gasket
grooves. The adhesive should follow the same
path as the gasket, as shown.
C. Wrap a piece of tape around one end of the 1/2"
(13mm) gasket and cut through the center. This
will stop the gasket from fraying.
D. Place the taped end of the gasket into the
groove, ensure it remains fl ush with the side of
the door (recessed point). Without stretching or
compressing the gasket, place it naturally along
the top, side and bottom gasket groove and into
the adhesive, as shown.
E. When you reach the end point, wrap a piece
of tape around the gasket and cut through
the center, ensuring the gasket is fl ush with
recessed point, as shown above.
INSTALLATION INSTRUCTIONS FOR THE RIGHT DOOR:
1/2”(12.7mm)
GASKET
TAPE
TAPE
RECESSED POINTS
Remove the doors from the appliance (If necessary, refer to your Door Installation Instructions). Place them
facedown on a protected surface to avoid any damages.
Continued on next page
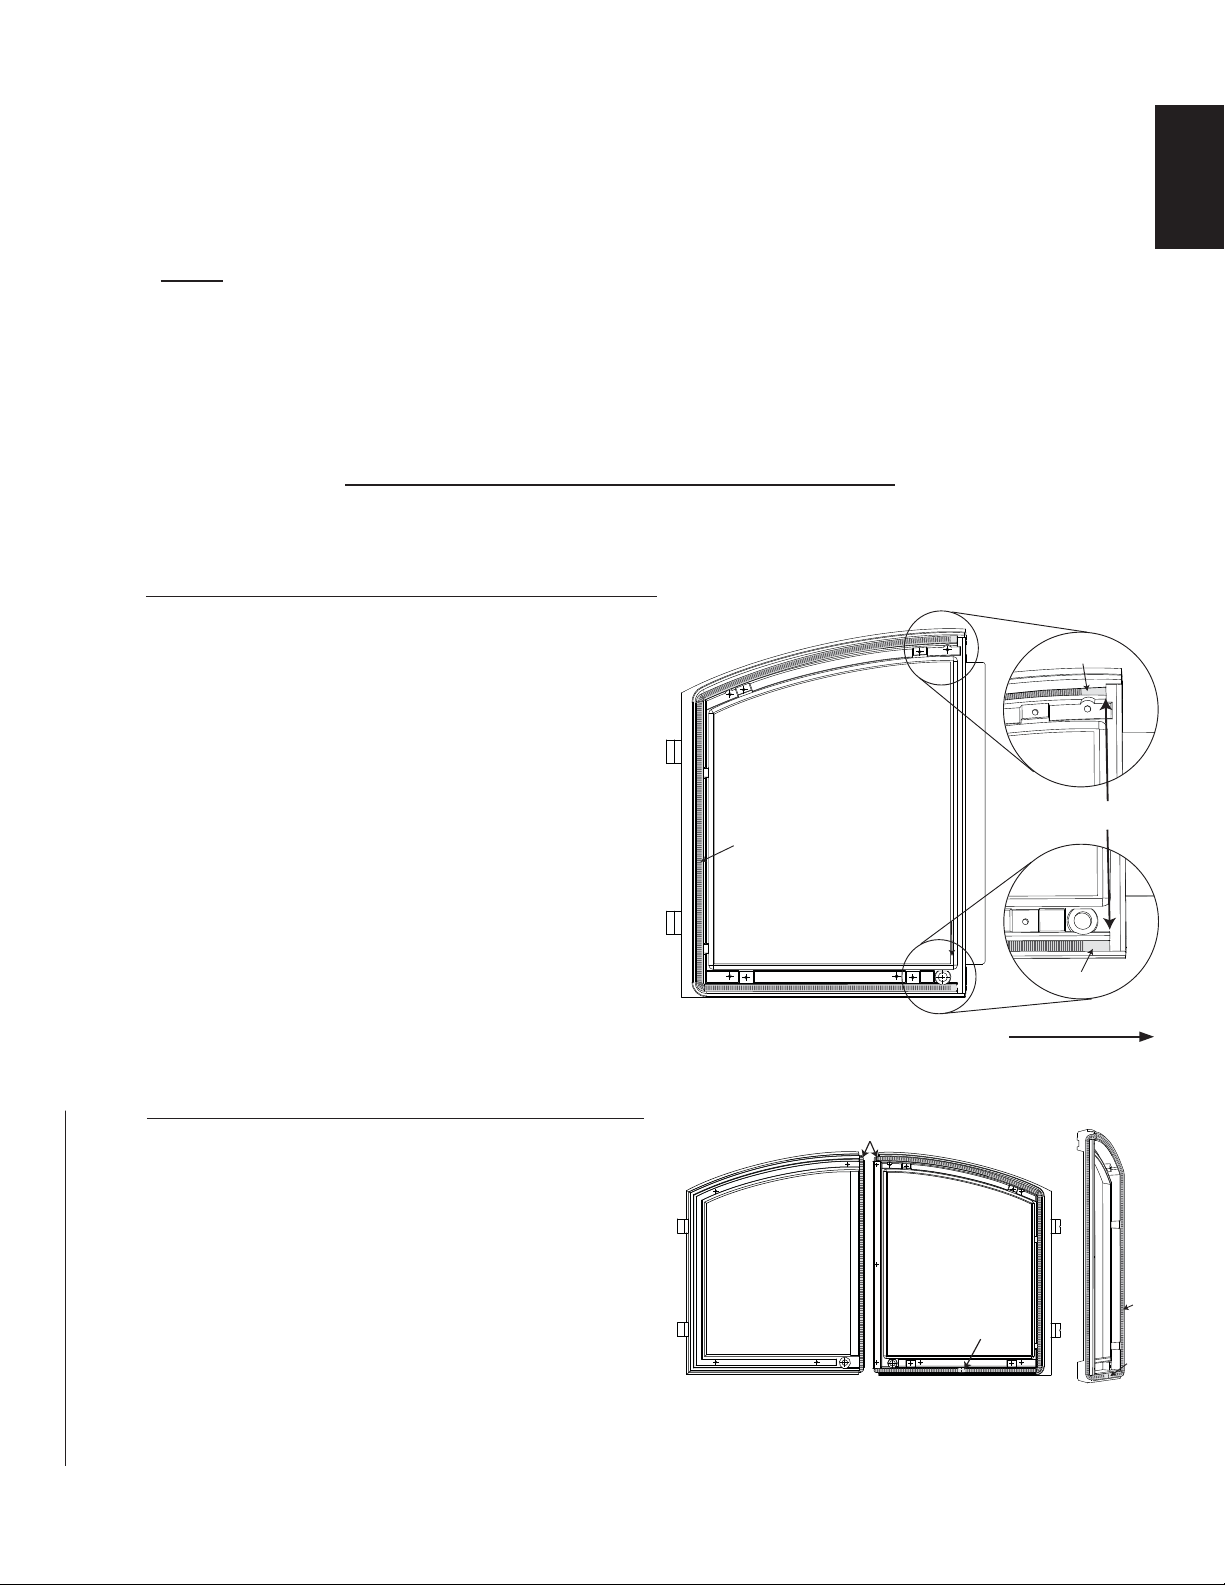
INSTALLATION INSTRUCTIONS FOR THE LEFT DOOR:
A. Remove the damaged gasket.
B. Apply a thin bead of adhesive (red high
temperature silicone (RTV) or wood stove gasket
cement) in the top, sides and bottom gasket
grooves. The adhesive should follow the same
path as the gasket illustrated in Figures 1 and 2.
C. Wrap a piece of tape around one end of the 1/2"
(13mm) gasket and cut through the center. This
will stop the gasket from fraying.
D. Place the taped end of the gasket centered in
the groove at the bottom of the door. Without
stretching or compressing the gasket, lay it
naturally into the groove, on top of the adhesive as
a continuous loop, as shown in Figures 1 and 2.
TAPE
REAR SIDE
1/2”(12.7mm) GASKET
FRONT SIDE
FIG. 1
TAPE
1/2”
(12.7mm)
GASKET
FIG. 2
E. When you return to the other end of the gasket,
wrap a piece of tape around the other end of
the gasket and cut through the center, refer to
Figures 1 and 2.
Loading ...
Loading ...
Loading ...